OpenVINO™ Explainable AI Toolkit (1/3): Basic#
This Jupyter notebook can be launched on-line, opening an interactive environment in a browser window. You can also make a local installation. Choose one of the following options:


Warning
Important note: This notebook requires python >= 3.10. Please make sure that your environment fulfill to this requirement before running it
This is the first notebook in series of exploring OpenVINO™ Explainable AI (XAI):
It covers the basic introduction to XAI toolkit and shows how to explain predictions of an image classification model.
OpenVINO™ Explainable AI (XAI) provides a suite of XAI algorithms for the analysis of OpenVINO IR model predictions. Generated saliency maps can be used to evaluate model reasoning when making predictions.
A saliency map is a visualization technique that highlights regions of the interest in an image from the model perspective. For example, it can be used to explain classification model predictions for a particular label. Here is an example of a saliency map that you will get in this notebook:
A pre-trained MobileNetV3 model from Open Model Zoo is used in this tutorial.
Table of contents:
This is a self-contained example that relies solely on its own code.
We recommend running the notebook in a virtual environment. You only need a Jupyter server to start. For details, please refer to Installation Guide.
# Install openvino package
%pip install -q "openvino>=2024.2.0" opencv-python tqdm

# Install openvino xai package
%pip install -q --no-deps "openvino-xai>=1.1.0"
%pip install -q -U "numpy==1.*"
%pip install -q scipy

%pip install -q "matplotlib>=3.4"
Imports#
from pathlib import Path

import cv2
import matplotlib.pyplot as plt
import numpy as np
import openvino as ov
import openvino_xai as xai

# Fetch `notebook_utils` module
import requests

r = requests.get(
    url="https://raw.githubusercontent.com/openvinotoolkit/openvino_notebooks/latest/utils/notebook_utils.py",
)

open("notebook_utils.py", "w").write(r.text)

from notebook_utils import download_file, device_widget
Download the Model and data samples#
base_artifacts_dir = Path("./artifacts").expanduser()

model_name = "v3-small_224_1.0_float"
model_xml_name = f"{model_name}.xml"
model_bin_name = f"{model_name}.bin"

model_xml_path = base_artifacts_dir / model_xml_name

base_url = "https://storage.openvinotoolkit.org/repositories/openvino_notebooks/models/mobelinet-v3-tf/FP32/"

if not model_xml_path.exists():
    download_file(base_url + model_xml_name, model_xml_name, base_artifacts_dir)
    download_file(base_url + model_bin_name, model_bin_name, base_artifacts_dir)
else:
    print(f"{model_name} already downloaded to {base_artifacts_dir}")
Select inference device#
select device from dropdown list for running inference using OpenVINO
device = device_widget()
device
Load the Model#
core = ov.Core()
model = core.read_model(model=model_xml_path)
compiled_model = core.compile_model(model=model, device_name=device.value)
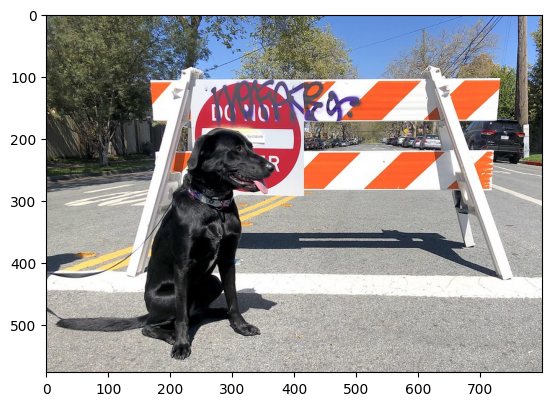
Load an Image#
# Download the image from the openvino_notebooks storage
image_filename = download_file(
    "https://storage.openvinotoolkit.org/repositories/openvino_notebooks/data/data/image/coco.jpg",
    directory="data",
)

# The MobileNet model expects images in RGB format.
image = cv2.cvtColor(cv2.imread(filename=str(image_filename)), code=cv2.COLOR_BGR2RGB)

# Resize to MobileNet image shape.
input_image = cv2.resize(src=image, dsize=(224, 224))

# Reshape to model input shape.
input_image = np.expand_dims(input_image, 0)
plt.imshow(image)
'data/coco.jpg' already exists.
<matplotlib.image.AxesImage at 0x7f4c102acfd0>
Do Inference#
result_infer = compiled_model([input_image])[0]
result_index = np.argmax(result_infer)
imagenet_filename = download_file(
    "https://storage.openvinotoolkit.org/repositories/openvino_notebooks/data/data/datasets/imagenet/imagenet_2012.txt",
    directory="data",
)

imagenet_classes = imagenet_filename.read_text().splitlines()
# The model description states that for this model, class 0 is a background.
# Therefore, a background must be added at the beginning of imagenet_classes.
imagenet_classes = ["background"] + imagenet_classes

print(f"class index: {result_index}")
print(f"class name: {imagenet_classes[result_index]}")
print(f"class score: {result_infer[0][result_index]:.2f}")
class index: 206
class name: n02099267 flat-coated retriever
class score: 0.76
Create Explainer#
explainer = xai.Explainer(
    model=model,
    task=xai.Task.CLASSIFICATION,
)
INFO:openvino_xai:Assigning preprocess_fn to identity function assumes that input images were already preprocessed by user before passing it to the model. Please define preprocessing function OR preprocess images beforehand.
INFO:openvino_xai:Target insertion layer is not provided - trying to find it in auto mode.
INFO:openvino_xai:Using ReciproCAM method (for CNNs).
INFO:openvino_xai:Explaining the model in white-box mode.
Do Explanation#
Explainer generates explanation which contains saliency maps ({target: saliency_map}). For classification, targets are indices of the classes.
explanation = explainer(
    data=input_image,
    targets=result_index,  # can be a single target or a container of targets
    label_names=imagenet_classes,  # optional, list of label names
    overlay=True,  # saliency map overlays over the input image, defaults to False
)
explanation.plot()
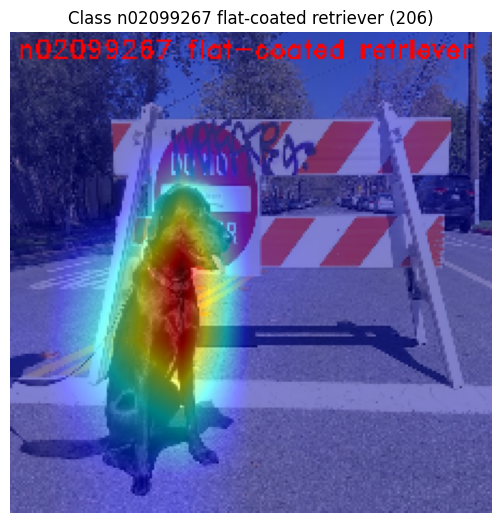
Note: by default, overlay is applied over the image in the data
argument. In this case, data was preprocessed (e.g. resized to
224x224), but still recognizable by human. In order for the overlay to
applied over the original image, provide original image with
original_image argument (please refer to OpenVINO™ Explainable AI
Toolkit (2/3): Deep Dive).
Above saliency map can help to answer the question: “Which part of the image mostly contributes to the model predicted class: (206, ‘n02099267 flat-coated retriever’)?”
Observing saliency map overlay, it might be concluded that the model is using the right features (pixels) to make a prediction.
Save saliency maps for the further visual analysis:
explanation.save(base_artifacts_dir)