Object masks from prompts with SAM2 and OpenVINO for Images#
This Jupyter notebook can be launched after a local installation only.
Warning
Important note: This notebook requires python >= 3.10. Please make sure that your environment fulfill to this requirement before running it
Installation Instructions#
This is a self-contained example that relies solely on its own code.
We recommend running the notebook in a virtual environment. You only need a Jupyter server to start. For details, please refer to Installation Guide.
Table of contents:
Segmentation - identifying which image pixels belong to an object - is a core task in computer vision and is used in a broad array of applications, from analyzing scientific imagery to editing photos. But creating an accurate segmentation model for specific tasks typically requires highly specialized work by technical experts with access to AI training infrastructure and large volumes of carefully annotated in-domain data. Reducing the need for task-specific modeling expertise, training compute, and custom data annotation for image segmentation is the main goal of the Segment Anything project.
Segment Anything Model 2 (SAM 2) is a foundation model towards solving promptable visual segmentation in images and videos. It extend SAM to video by considering images as a video with a single frame. When SAM 2 is applied to images the model behaves like SAM. SAM 2 has all the capabilities of SAM on static images. The model first converts the image into an image embedding that allows high quality masks to be efficiently produced from a prompt. A promptable and light-weight mask decoder accepts a image embedding and prompts (if any) on the current image and outputs a segmentation mask. SAM 2 supports point, box, and mask prompts.
This notebook shows an example of how to convert and use Segment Anything Model 2 in OpenVINO format, allowing it to run on a variety of platforms that support an OpenVINO.
The diagram below demonstrates the SAM 2 architecture. For a given frame, the segmentation prediction is conditioned on the current prompt and/or on previously observed memories. Videos are processed in a streaming fashion with frames being consumed one at a time by the image encoder, and cross-attended to memories of the target object from previous frames. The mask decoder, which optionally also takes input prompts, predicts the segmentation mask for that frame. Finally, a memory encoder transforms the prediction and image encoder embeddings (not shown in the figure) for use in future frames

model_diagram#
More details about approach can be found in the paper, original repo and Meta AI blog post
Prerequisites#
%pip install -q "gradio>=4.13,<4.41.0" "fastapi==0.112.4" "openvino>=2024.4.0" "nncf>=2.13" "torch>=2.3.1" "torchvision>=0.18.1" opencv-python tqdm numpy  --extra-index-url https://download.pytorch.org/whl/cpu
%pip install "iopath>=0.1.10" "pillow>=9.4.0"  "hydra-core>=1.3.2"

%pip install -q "matplotlib>=3.4"
Note: you may need to restart the kernel to use updated packages.
Collecting iopath>=0.1.10
  Using cached iopath-0.1.10-py3-none-any.whl
Requirement already satisfied: pillow>=9.4.0 in /opt/home/k8sworker/ci-ai/cibuilds/jobs/ov-notebook/jobs/OVNotebookOps/builds/835/archive/.workspace/scm/ov-notebook/.venv/lib/python3.8/site-packages (10.4.0)
Requirement already satisfied: hydra-core>=1.3.2 in /opt/home/k8sworker/ci-ai/cibuilds/jobs/ov-notebook/jobs/OVNotebookOps/builds/835/archive/.workspace/scm/ov-notebook/.venv/lib/python3.8/site-packages (1.3.2)
Requirement already satisfied: tqdm in /opt/home/k8sworker/ci-ai/cibuilds/jobs/ov-notebook/jobs/OVNotebookOps/builds/835/archive/.workspace/scm/ov-notebook/.venv/lib/python3.8/site-packages (from iopath>=0.1.10) (4.67.1)
Requirement already satisfied: typing-extensions in /opt/home/k8sworker/ci-ai/cibuilds/jobs/ov-notebook/jobs/OVNotebookOps/builds/835/archive/.workspace/scm/ov-notebook/.venv/lib/python3.8/site-packages (from iopath>=0.1.10) (4.12.2)
Requirement already satisfied: portalocker in /opt/home/k8sworker/ci-ai/cibuilds/jobs/ov-notebook/jobs/OVNotebookOps/builds/835/archive/.workspace/scm/ov-notebook/.venv/lib/python3.8/site-packages (from iopath>=0.1.10) (3.0.0)
Requirement already satisfied: omegaconf<2.4,>=2.2 in /opt/home/k8sworker/ci-ai/cibuilds/jobs/ov-notebook/jobs/OVNotebookOps/builds/835/archive/.workspace/scm/ov-notebook/.venv/lib/python3.8/site-packages (from hydra-core>=1.3.2) (2.3.0)
Requirement already satisfied: antlr4-python3-runtime==4.9.* in /opt/home/k8sworker/ci-ai/cibuilds/jobs/ov-notebook/jobs/OVNotebookOps/builds/835/archive/.workspace/scm/ov-notebook/.venv/lib/python3.8/site-packages (from hydra-core>=1.3.2) (4.9.3)
Requirement already satisfied: packaging in /opt/home/k8sworker/ci-ai/cibuilds/jobs/ov-notebook/jobs/OVNotebookOps/builds/835/archive/.workspace/scm/ov-notebook/.venv/lib/python3.8/site-packages (from hydra-core>=1.3.2) (24.2)
Requirement already satisfied: importlib-resources in /opt/home/k8sworker/ci-ai/cibuilds/jobs/ov-notebook/jobs/OVNotebookOps/builds/835/archive/.workspace/scm/ov-notebook/.venv/lib/python3.8/site-packages (from hydra-core>=1.3.2) (6.4.5)
Requirement already satisfied: PyYAML>=5.1.0 in /opt/home/k8sworker/ci-ai/cibuilds/jobs/ov-notebook/jobs/OVNotebookOps/builds/835/archive/.workspace/scm/ov-notebook/.venv/lib/python3.8/site-packages (from omegaconf<2.4,>=2.2->hydra-core>=1.3.2) (6.0.2)
Requirement already satisfied: zipp>=3.1.0 in /opt/home/k8sworker/ci-ai/cibuilds/jobs/ov-notebook/jobs/OVNotebookOps/builds/835/archive/.workspace/scm/ov-notebook/.venv/lib/python3.8/site-packages (from importlib-resources->hydra-core>=1.3.2) (3.20.2)
Installing collected packages: iopath
  Attempting uninstall: iopath
    Found existing installation: iopath 0.1.9
    Uninstalling iopath-0.1.9:
      Successfully uninstalled iopath-0.1.9
ERROR: pip's dependency resolver does not currently take into account all the packages that are installed. This behaviour is the source of the following dependency conflicts.
detectron2 0.6 requires iopath<0.1.10,>=0.1.7, but you have iopath 0.1.10 which is incompatible.
Successfully installed iopath-0.1.10
Note: you may need to restart the kernel to use updated packages.
Note: you may need to restart the kernel to use updated packages.
import requests
from pathlib import Path


if not Path("notebook_utils.py").exists():
    r = requests.get(
        url="https://raw.githubusercontent.com/openvinotoolkit/openvino_notebooks/latest/utils/notebook_utils.py",
    )
    open("notebook_utils.py", "w").write(r.text)

r = requests.get(
    url="https://raw.githubusercontent.com/openvinotoolkit/openvino_notebooks/latest/utils/cmd_helper.py",
)
open("cmd_helper.py", "w").write(r.text)


from notebook_utils import download_file
Clone and install segment-anything-2
from cmd_helper import clone_repo


repo_dir = clone_repo("https://github.com/facebookresearch/sam2.git")
%env SAM2_BUILD_CUDA=0
%cd sam2
%pip install -q -e .
%cd ..
env: SAM2_BUILD_CUDA=0
/opt/home/k8sworker/ci-ai/cibuilds/jobs/ov-notebook/jobs/OVNotebookOps/builds/835/archive/.workspace/scm/ov-notebook/notebooks/sam2-image-segmentation/sam2
ERROR: Package 'sam-2' requires a different Python: 3.8.10 not in '>=3.10.0'
Note: you may need to restart the kernel to use updated packages.
/opt/home/k8sworker/ci-ai/cibuilds/jobs/ov-notebook/jobs/OVNotebookOps/builds/835/archive/.workspace/scm/ov-notebook/notebooks/sam2-image-segmentation
ov_sam2_helper_file_name = "ov_sam2_helper.py"

if not Path(ov_sam2_helper_file_name).exists():
    r = requests.get(
        url=f"https://raw.githubusercontent.com/openvinotoolkit/openvino_notebooks/latest/notebooks/sam2-image-segmentation/{ov_sam2_helper_file_name}",
    )
    open(ov_sam2_helper_file_name, "w").write(r.text)
Image prediction#
Prepare image#
import numpy as np
import matplotlib.pyplot as plt
from PIL import Image

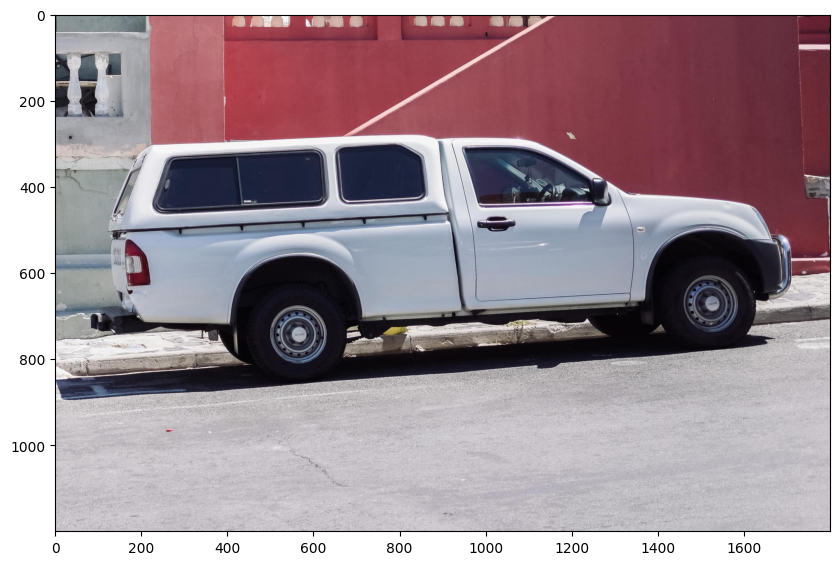
download_file("https://raw.githubusercontent.com/facebookresearch/segment-anything/main/notebooks/images/truck.jpg")

image = Image.open("truck.jpg")
image = np.array(image.convert("RGB"))
truck.jpg: 0%| | 0.00/265k [00:00<?, ?B/s]
plt.figure(figsize=(10, 10))
plt.imshow(image)
plt.axis("on")
plt.show()
Download and inference PyTorch model#
There are several Segment Anything V2
Models
available for downloading. In this tutorial we will use model based on
sam2-hiera-large, but the demonstrated approach is very general and
applicable to other SAM models.
SAM2 provide image prediction APIs that closely resemble SAM for image
use cases. The SAM2ImagePredictor class has an easy interface for
image prompting. Also the model could be loaded by
SAM2ImagePredictor from
HuggingFace. List
of other SAM2 models could be found
here.
from sam2.sam2_image_predictor import SAM2ImagePredictor

predictor = SAM2ImagePredictor.from_pretrained("facebook/sam2-hiera-large", device="cpu")
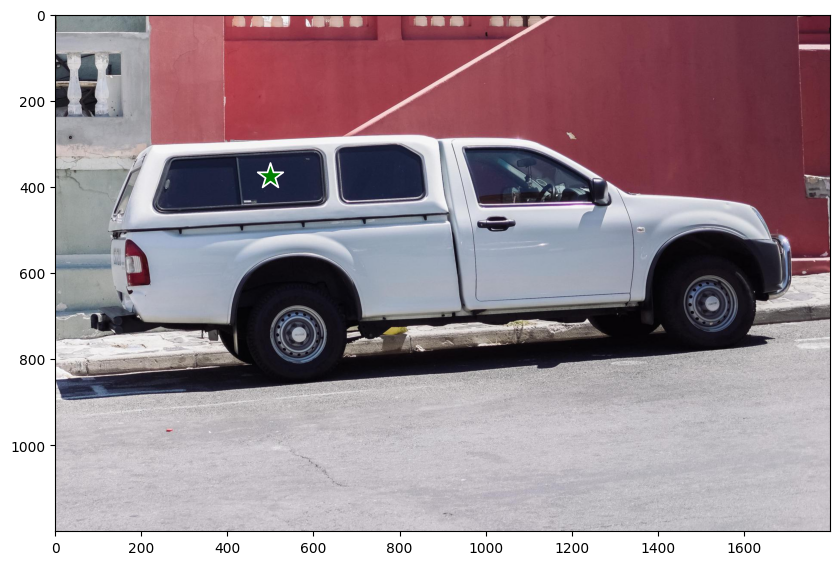
input_point = np.array([[500, 375]])
input_label = np.array([1])
from ov_sam2_helper import show_points

plt.figure(figsize=(10, 10))
plt.imshow(image)
show_points(input_point, input_label, plt.gca())
plt.axis("on")
plt.show()
predictor.set_image(image)

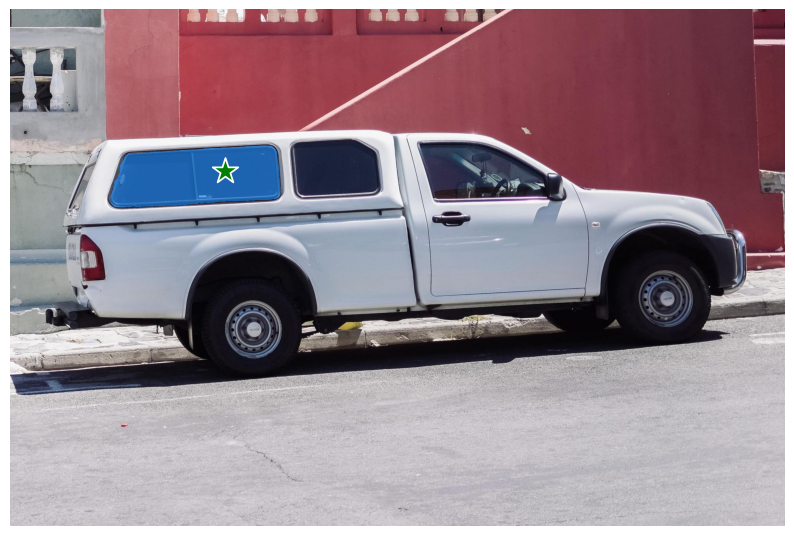
masks, scores, logits = predictor.predict(point_coords=input_point, point_labels=input_label, multimask_output=False)
from ov_sam2_helper import show_masks

show_masks(image, masks, point_coords=input_point, input_labels=input_label)
predictor.reset_predictor()
Convert model to OpenVINO Intermediate Representation#
We split model on 2 independent parts: image_encoder and mask_predictor, where mask_predictor is combination of Prompt Encoder and Mask Decoder.
import openvino as ov

core = ov.Core()
from notebook_utils import device_widget

device = device_widget()

device
Dropdown(description='Device:', index=1, options=('CPU', 'AUTO'), value='AUTO')
Image Encoder#
The image encoder is only run once for the entire interaction and its role is to provide unconditioned tokens (feature embeddings) representing each frame. Then changing prompt, prompt encoder and mask decoder can be run multiple times to retrieve different objects from the same image.
Image Encoder input is tensor with shape 1x3x1024x1024 in NCHW
format, contains image for segmentation. Image Encoder output is image
embeddings, tensor with shape 1x256x64x64 and two tensors of high
resolution features with shapes 1x32x256x256 and 1x64x128x128.
To learn more about conversion of Image Encoder, please, see
SamImageEncoderModel from ov_sam2_helper.py.
import warnings
import torch
from ov_sam2_helper import SamImageEncoderModel

ov_encoder_path = Path("ov_image_encoder.xml")
if not ov_encoder_path.exists():
    with warnings.catch_warnings():
        warnings.filterwarnings("ignore", category=torch.jit.TracerWarning)
        warnings.filterwarnings("ignore", category=UserWarning)

        image_encoder = SamImageEncoderModel(predictor)
        ov_encoder_model = ov.convert_model(
            image_encoder,
            example_input=torch.zeros(1, 3, 1024, 1024),
            input=([1, 3, 1024, 1024],),
        )
    ov.save_model(ov_encoder_model, ov_encoder_path)
else:
    ov_encoder_model = core.read_model(ov_encoder_path)
ov_encoder = core.compile_model(ov_encoder_model, device.value)
Mask predictor#
Mask prediction will be includes two models:
Prompt Encoder - Encoder for segmentation condition. As a condition can be used points, boxes or segmentation mask.
Mask Decoder - The mask decoder efficiently maps the image embedding, prompt embeddings, and an output token to a mask.
Combined prompt encoder and mask decoder model has following list of inputs:
image_embeddings: The image embedding fromimage_encoder. Has a batch index of length 1.high_res_feats_256: The high resolution features fromimage_encoder. Has a batch index of length 1.high_res_feats_128: The high resolution features fromimage_encoder. Has a batch index of length 1.point_coords: Coordinates of sparse input prompts, corresponding to both point inputs and box inputs. Boxes are encoded using two points, one for the top-left corner and one for the bottom-right corner. Coordinates must already be transformed to long-side 1024. Has a batch index of length 1.point_labels: Labels for the sparse input prompts. 0 is a negative input point, 1 is a positive input point, 2 is a top-left box corner, 3 is a bottom-right box corner, and -1 is a padding point. *If there is no box input, a single padding point with label -1 and coordinates (0.0, 0.0) should be concatenated.
Model outputs:
masks- predicted masks resized to original image size, to obtain a binary mask, should be compared withthreshold(usually equal 0.0).iou_predictions- intersection over union predictionslow_res_masks- predicted masks before postprocessing, can be used as mask input for model.
Note that we use the multimask_output=False option when converting.
This way, the SAM2 model returns a single mask that it define as the
best variant. You can also avoid using use_high_res_features by passing
use_high_res_features=False in SamImageMaskPredictionModel. You
can find more details about conversion of Mask Predictor in
SamImageMaskPredictionModel from ov_sam2_helper.py.
from ov_sam2_helper import SamImageMaskPredictionModel


ov_mask_predictor_path = Path("ov_mask_predictor.xml")
if not ov_mask_predictor_path.exists():
    exportable_model = SamImageMaskPredictionModel(predictor.model, multimask_output=False)
    embed_dim = predictor.model.sam_prompt_encoder.embed_dim
    embed_size = predictor.model.sam_prompt_encoder.image_embedding_size

    hf_sizes = predictor._bb_feat_sizes

    dummy_inputs = {
        "image_embeddings": torch.randn(1, embed_dim, *embed_size, dtype=torch.float),
        "high_res_feats_256": torch.randn(1, 32, *hf_sizes[0], dtype=torch.float),
        "high_res_feats_128": torch.randn(1, 64, *hf_sizes[1], dtype=torch.float),
        "point_coords": torch.randint(low=0, high=1024, size=(1, 5, 2), dtype=torch.float),
        "point_labels": torch.randint(low=0, high=4, size=(1, 5), dtype=torch.float),
    }
    with warnings.catch_warnings():
        warnings.filterwarnings("ignore", category=torch.jit.TracerWarning)
        warnings.filterwarnings("ignore", category=UserWarning)
        ov_mask_predictor_model = ov.convert_model(exportable_model, example_input=dummy_inputs)
    ov.save_model(ov_mask_predictor_model, ov_mask_predictor_path)
else:
    ov_mask_predictor_model = core.read_model(ov_mask_predictor_path)
ov_predictor = core.compile_model(ov_mask_predictor_model, device.value)
Run OpenVINO model in interactive segmentation mode#
Example Image#
import numpy as np
import cv2
import matplotlib.pyplot as plt

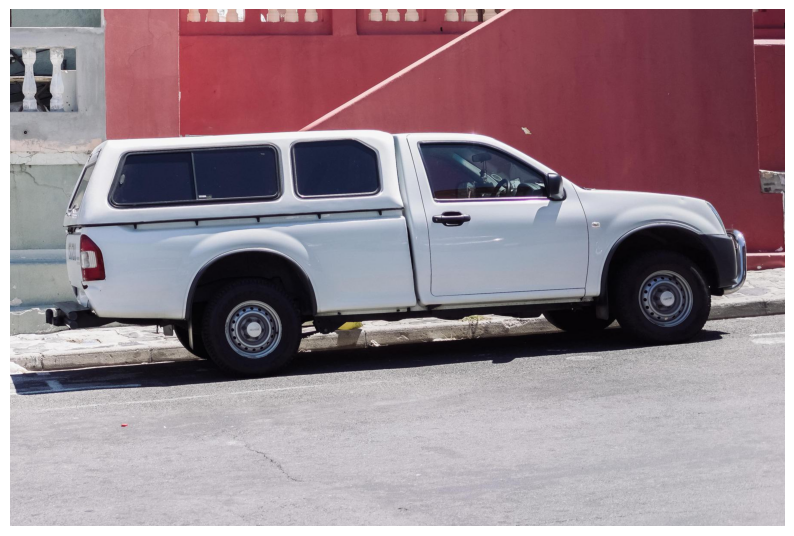
download_file("https://raw.githubusercontent.com/facebookresearch/segment-anything/main/notebooks/images/truck.jpg")
image = cv2.imread("truck.jpg")
image = cv2.cvtColor(image, cv2.COLOR_BGR2RGB)
plt.figure(figsize=(10, 10))
plt.imshow(image)
plt.axis("off")
plt.show()
Preprocessing and visualization utilities#
To prepare input for Image Encoder we should:
Convert BGR image to RGB
Resize image saving aspect ratio where longest size equal to Image Encoder input size - 1024.
Normalize image subtract mean values (123.675, 116.28, 103.53) and divide by std (58.395, 57.12, 57.375)
Transpose HWC data layout to CHW and add batch dimension.
Add zero padding to input tensor by height or width (depends on aspect ratio) according Image Encoder expected input shape.
These steps are applicable to all available models
from ov_sam2_helper import ResizeLongestSide, preprocess_image, postprocess_masks

resizer = ResizeLongestSide(1024)
Image encoding#
To start work with image, we should preprocess it and obtain image
embeddings using ov_encoder. We will use the same image for all
experiments, so it is possible to generate image embedding once and then
reuse them.
preprocessed_image = preprocess_image(image, resizer)
encoding_results = ov_encoder(preprocessed_image)
Now, we can try to provide different prompts for mask generation
Example point input#
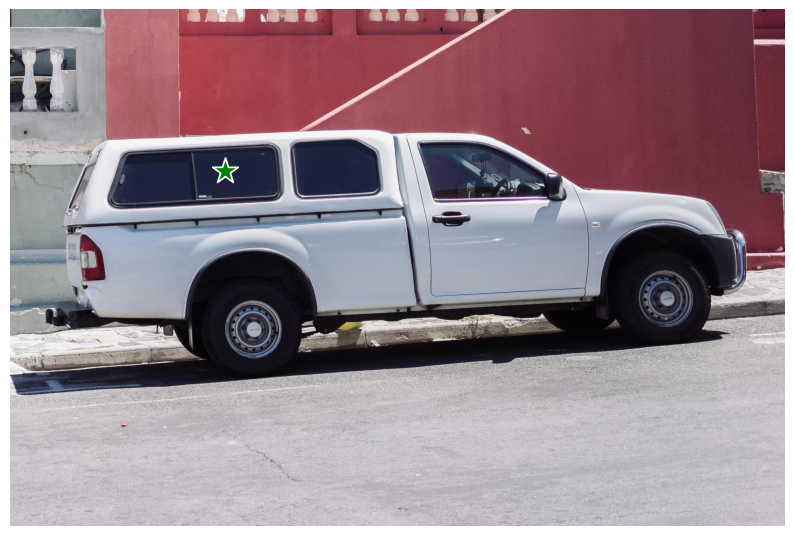
In this example we select one point. The green star symbol show its location on the image below.
input_point = np.array([[500, 375]])
input_label = np.array([1])

plt.figure(figsize=(10, 10))
plt.imshow(image)
show_points(input_point, input_label, plt.gca())
plt.axis("off")
plt.show()
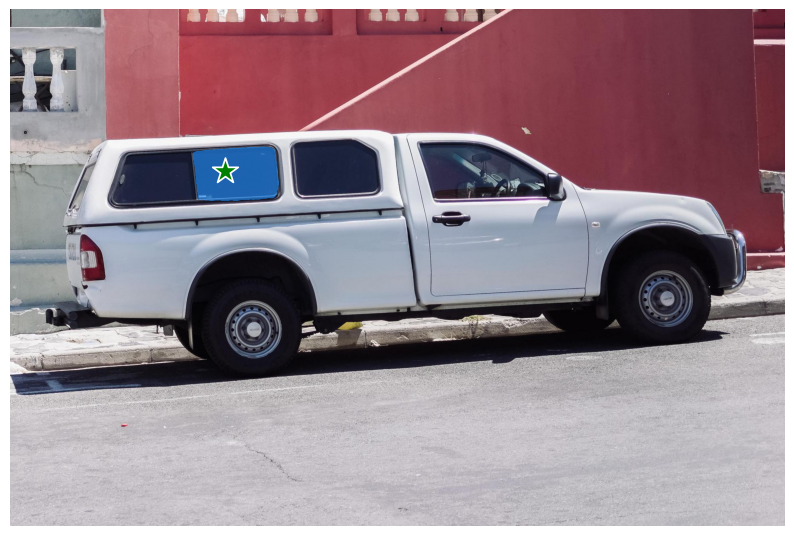
Add a batch index, concatenate a padding point, and transform it to input tensor coordinate system.
coord = np.concatenate([input_point, np.array([[0.0, 0.0]])], axis=0)[None, :, :]
label = np.concatenate([input_label, np.array([-1])], axis=0)[None, :].astype(np.float32)
coord = resizer.apply_coords(coord, image.shape[:2]).astype(np.float32)
Package the inputs to run in the mask predictor.
inputs = {
    "image_embeddings": torch.from_numpy(encoding_results[ov_encoder.output(0)]),
    "high_res_feats_256": torch.from_numpy(encoding_results[ov_encoder.output(1)]),
    "high_res_feats_128": torch.from_numpy(encoding_results[ov_encoder.output(2)]),
    "point_coords": coord,
    "point_labels": label,
}
Predict a mask and threshold it to get binary mask (0 - no object, 1 - object).
results = ov_predictor(inputs)

masks = results[ov_predictor.output(0)]
masks = postprocess_masks(masks, image.shape[:-1], resizer)

masks = masks > 0.0
mask = masks[0]
mask = np.transpose(mask, (1, 2, 0))
from ov_sam2_helper import show_mask

plt.figure(figsize=(10, 10))
plt.imshow(image)
show_mask(masks, plt.gca())
show_points(input_point, input_label, plt.gca())
plt.axis("off")
plt.show()
Example with multiple points#
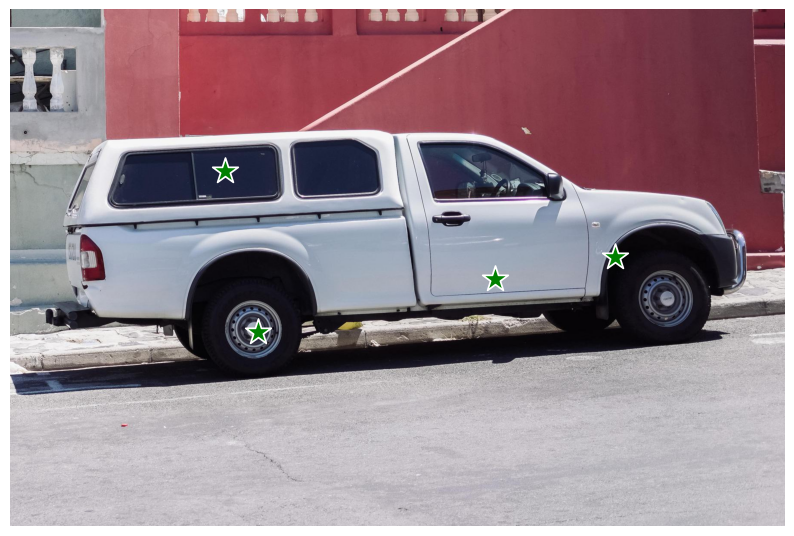
in this example, we provide additional point for cover larger object area.
input_point = np.array([[500, 375], [1125, 625], [575, 750], [1405, 575]])
input_label = np.array([1, 1, 1, 1])
Now, prompt for model looks like represented on this image:
plt.figure(figsize=(10, 10))
plt.imshow(image)
show_points(input_point, input_label, plt.gca())
plt.axis("off")
plt.show()
Transform the points as in the previous example.
coord = np.concatenate([input_point, np.array([[0.0, 0.0]])], axis=0)[None, :, :]
label = np.concatenate([input_label, np.array([-1])], axis=0)[None, :].astype(np.float32)

coord = resizer.apply_coords(coord, image.shape[:2]).astype(np.float32)
Package inputs, then predict and threshold the mask.
inputs = {
    "image_embeddings": encoding_results[ov_encoder.output(0)],
    "high_res_feats_256": encoding_results[ov_encoder.output(1)],
    "high_res_feats_128": encoding_results[ov_encoder.output(2)],
    "point_coords": coord,
    "point_labels": label,
}

results = ov_predictor(inputs)

masks = results[ov_predictor.output(0)]
masks = postprocess_masks(masks, image.shape[:-1], resizer)
masks = masks > 0.0
plt.figure(figsize=(10, 10))
plt.imshow(image)
show_mask(masks, plt.gca())
show_points(input_point, input_label, plt.gca())
plt.axis("off")
plt.show()
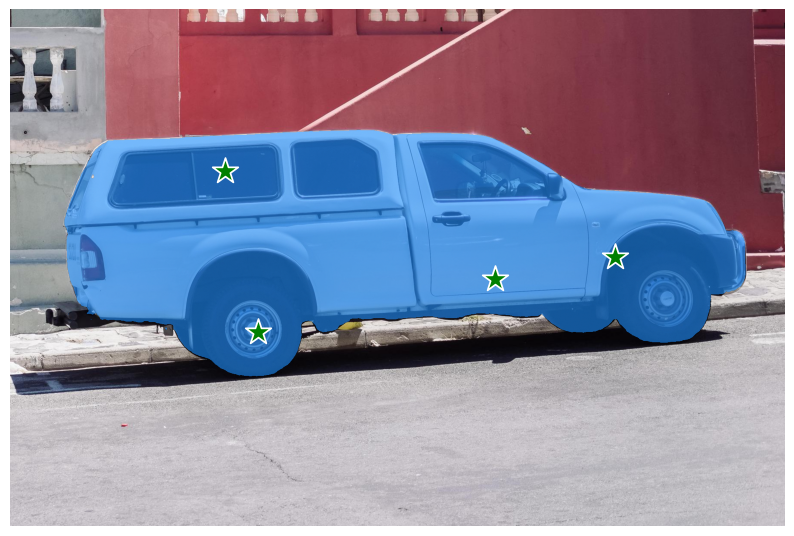
Great! Looks like now, predicted mask cover whole truck.
Example box and point input with negative label#
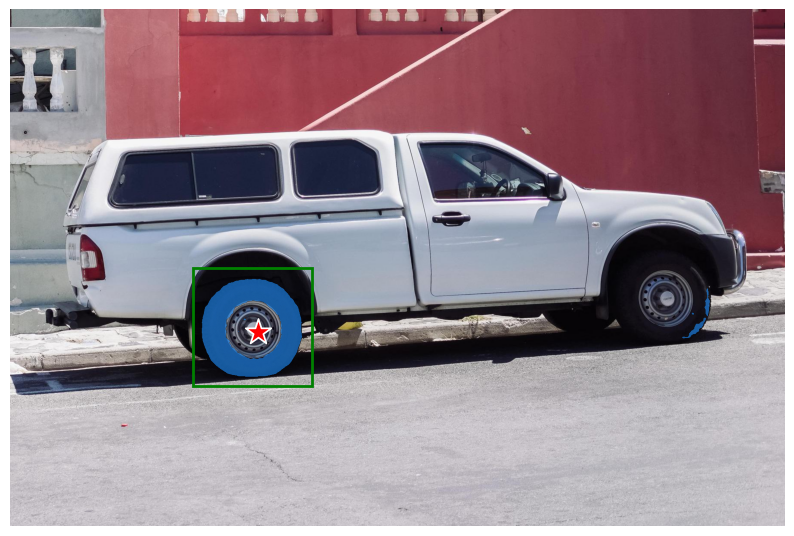
In this example we define input prompt using bounding box and point inside it.The bounding box represented as set of points of its left upper corner and right lower corner. Label 0 for point speak that this point should be excluded from mask.
input_box = np.array([425, 600, 700, 875])
input_point = np.array([[575, 750]])
input_label = np.array([0])
from ov_sam2_helper import show_box

plt.figure(figsize=(10, 10))
plt.imshow(image)
show_box(input_box, plt.gca())
show_points(input_point, input_label, plt.gca())
plt.axis("off")
plt.show()
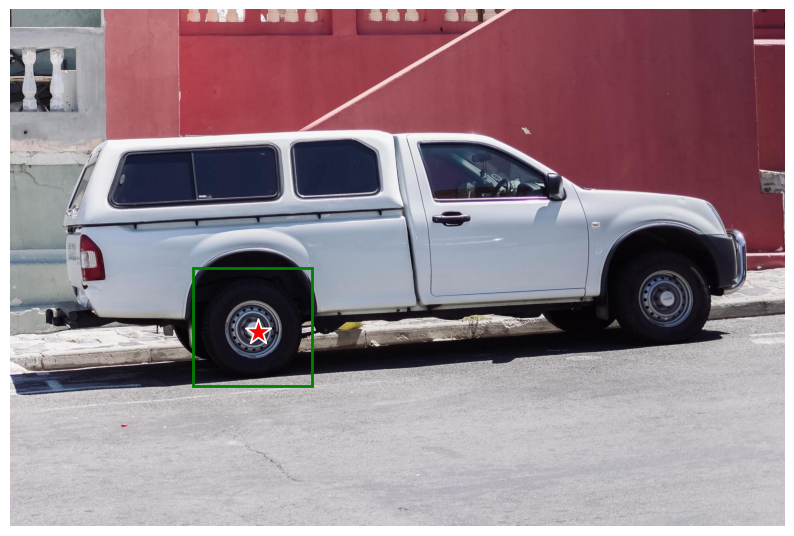
Add a batch index, concatenate a box and point inputs, add the appropriate labels for the box corners, and transform. There is no padding point since the input includes a box input.
box_coords = input_box.reshape(2, 2)
box_labels = np.array([2, 3])

coord = np.concatenate([input_point, box_coords], axis=0)[None, :, :]
label = np.concatenate([input_label, box_labels], axis=0)[None, :].astype(np.float32)

coord = resizer.apply_coords(coord, image.shape[:2]).astype(np.float32)
Package inputs, then predict and threshold the mask.
inputs = {
    "image_embeddings": encoding_results[ov_encoder.output(0)],
    "high_res_feats_256": encoding_results[ov_encoder.output(1)],
    "high_res_feats_128": encoding_results[ov_encoder.output(2)],
    "point_coords": coord,
    "point_labels": label,
}

results = ov_predictor(inputs)

masks = results[ov_predictor.output(0)]
masks = postprocess_masks(masks, image.shape[:-1], resizer)
masks = masks > 0.0
plt.figure(figsize=(10, 10))
plt.imshow(image)
show_mask(masks[0], plt.gca())
show_box(input_box, plt.gca())
show_points(input_point, input_label, plt.gca())
plt.axis("off")
plt.show()
Interactive segmentation with Gradio#
Now, you can try SAM on own image. Upload image to input window and click on desired point, model predict segment based on your image and point.
class Segmenter:
    def __init__(self, ov_encoder, ov_predictor):
        self.encoder = ov_encoder
        self.predictor = ov_predictor
        self._img_embeddings = None
        self._high_res_features_256 = None
        self._high_res_features_128 = None

    def set_image(self, img: np.ndarray):
        if self._img_embeddings is not None:
            del self._img_embeddings
        preprocessed_image = preprocess_image(img, resizer)
        encoding_results = self.encoder(preprocessed_image)
        image_embeddings = encoding_results[ov_encoder.output(0)]
        self._img_embeddings = image_embeddings
        self._high_res_features_256 = encoding_results[ov_encoder.output(1)]
        self._high_res_features_128 = encoding_results[ov_encoder.output(2)]
        return img

    def get_mask(self, points, img):
        coord = np.array(points)
        coord = np.concatenate([coord, np.array([[0, 0]])], axis=0)
        coord = coord[None, :, :]
        label = np.concatenate([np.ones(len(points)), np.array([-1])], axis=0)[None, :].astype(np.float32)
        coord = resizer.apply_coords(coord, img.shape[:2]).astype(np.float32)
        if self._img_embeddings is None:
            self.set_image(img)
        inputs = {
            "image_embeddings": self._img_embeddings,
            "high_res_feats_256": self._high_res_features_256,
            "high_res_feats_128": self._high_res_features_128,
            "point_coords": coord,
            "point_labels": label,
        }

        results = self.predictor(inputs)
        masks = results[ov_predictor.output(0)]
        masks = postprocess_masks(masks, img.shape[:-1], resizer)

        masks = masks > 0.0
        mask = masks[0]
        mask = np.transpose(mask, (1, 2, 0))
        return mask


segmenter = Segmenter(ov_encoder, ov_predictor)
if not Path("gradio_helper.py").exists():
    r = requests.get(url="https://raw.githubusercontent.com/openvinotoolkit/openvino_notebooks/latest/notebooks/segment-anything/gradio_helper.py")
    open("gradio_helper.py", "w").write(r.text)

from gradio_helper import make_demo

demo = make_demo(segmenter)

try:
    demo.launch()
except Exception:
    demo.launch(share=True)
# If you are launching remotely, specify server_name and server_port
# EXAMPLE: `demo.launch(server_name="your server name", server_port="server port in int")`
# To learn more please refer to the Gradio docs: https://gradio.app/docs/
Running on local URL:  http://127.0.0.1:7860

To create a public link, set share=True in launch().
# please uncomment and run this cell for stopping gradio interface
# demo.close()
Run OpenVINO model in automatic mask generation mode#
Since SAM2 can efficiently process prompts, masks for the entire image
can be generated by sampling a large number of prompts over an image.
automatic_mask_generation function implements this capability. It
works by sampling single-point input prompts in a grid over the image,
from each of which SAM can predict multiple masks. Then, masks are
filtered for quality and deduplicated using non-maximal suppression.
Additional options allow for further improvement of mask quality and
quantity, such as running prediction on multiple crops of the image or
postprocessing masks to remove small disconnected regions and holes.
mask_generation_helper_file_name = "automatic_mask_generation_helper.py"

if not Path(mask_generation_helper_file_name).exists():
    r = requests.get(
        url=f"https://raw.githubusercontent.com/openvinotoolkit/openvino_notebooks/latest/notebooks/segment-anything/{mask_generation_helper_file_name}",
    )
    open(mask_generation_helper_file_name, "w").write(r.text)
from automatic_mask_generation_helper import AutomaticMaskGenerationHelper

mask_generator_helper = AutomaticMaskGenerationHelper(resizer, ov_predictor, ov_encoder)
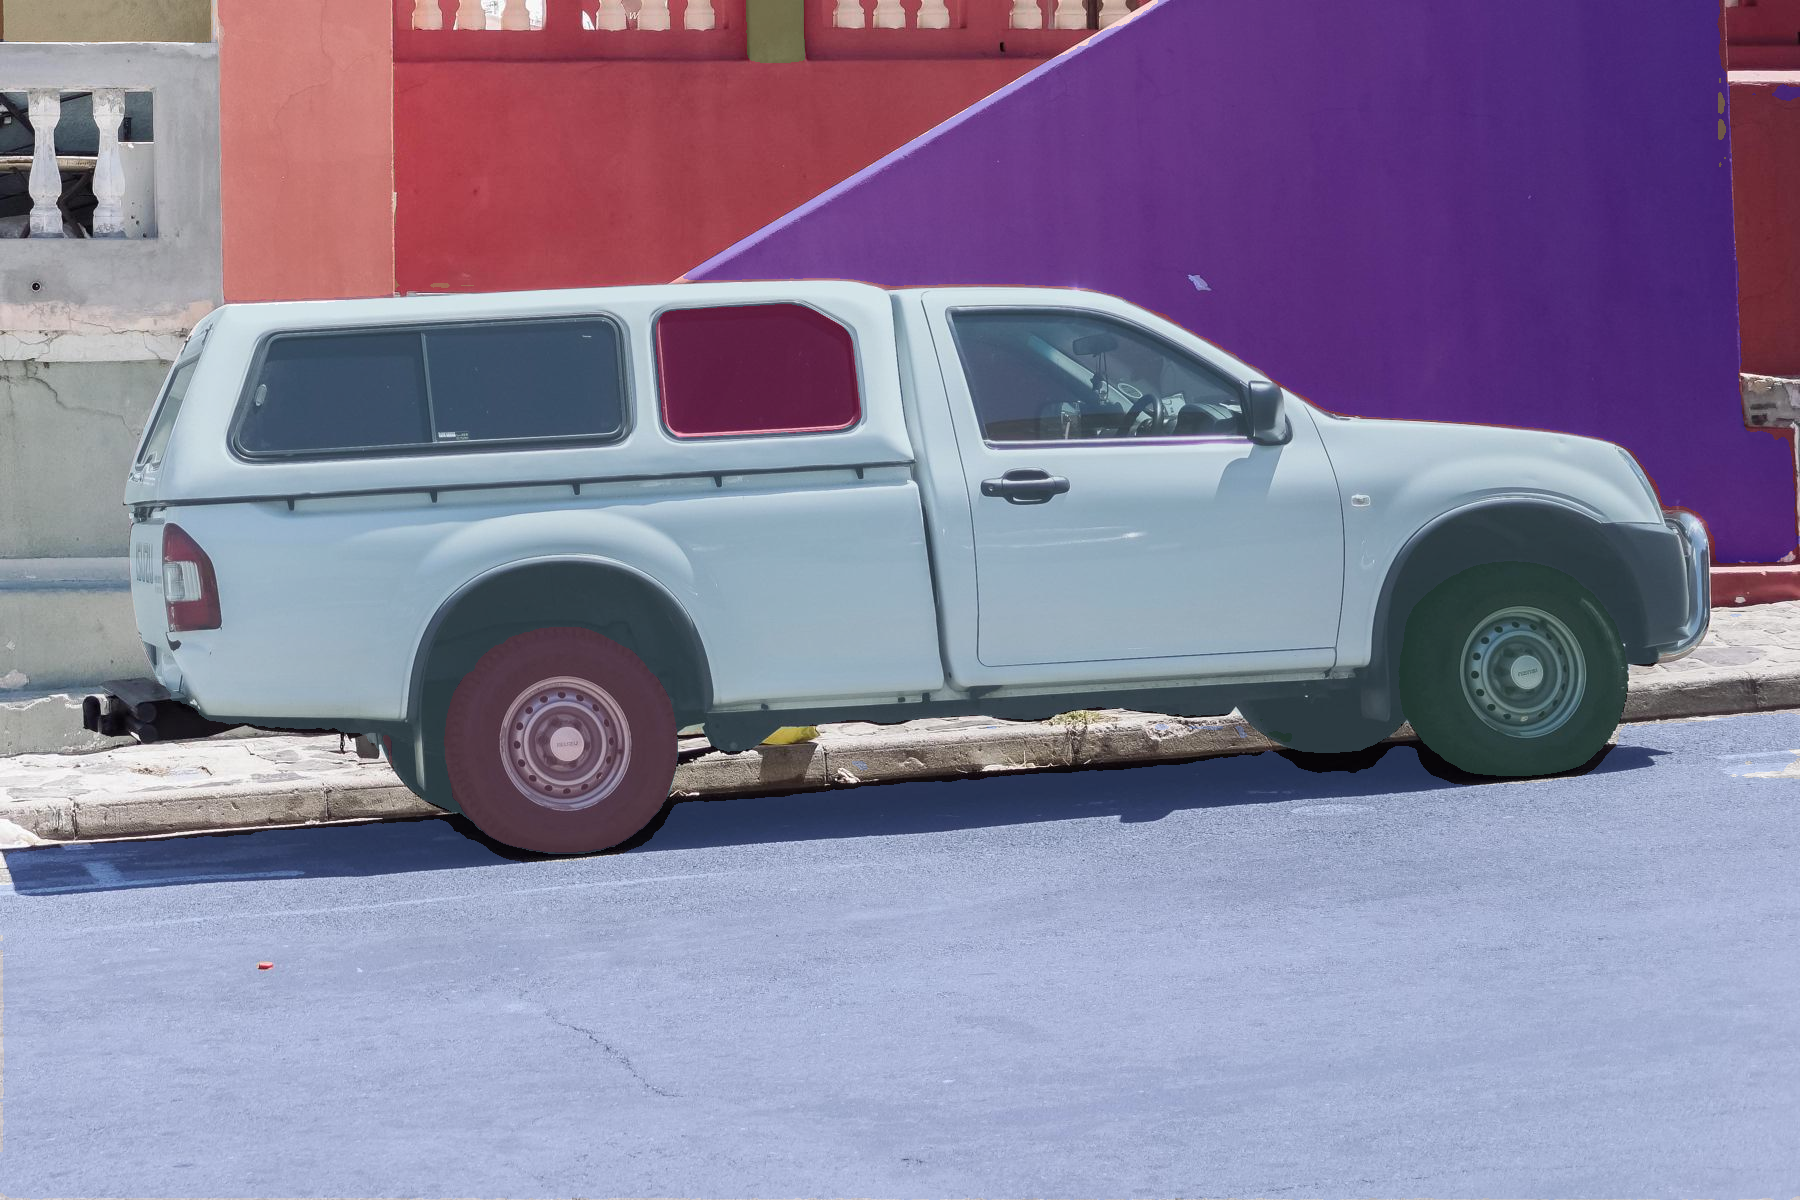
There are several tunable parameters in automatic mask generation that control how densely points are sampled and what the thresholds are for removing low quality or duplicate masks. Additionally, generation can be automatically run on crops of the image to get improved performance on smaller objects, and post-processing can remove stray pixels and holes
prediction = mask_generator_helper.automatic_mask_generation(image)
automatic_mask_generation returns a list over masks, where each mask
is a dictionary containing various data about the mask. These keys are:
segmentation: the maskarea: the area of the mask in pixelsbbox: the boundary box of the mask in XYWH formatpredicted_iou: the model’s own prediction for the quality of the maskpoint_coords: the sampled input point that generated this maskstability_score: an additional measure of mask qualitycrop_box: the crop of the image used to generate this mask in XYWH format
print(f"Number of detected masks: {len(prediction)}")
print(f"Annotation keys: {prediction[0].keys()}")
Number of detected masks: 11
Annotation keys: dict_keys(['segmentation', 'area', 'bbox', 'predicted_iou', 'point_coords', 'stability_score', 'crop_box'])
import PIL
from automatic_mask_generation_helper import draw_anns

out = draw_anns(image, prediction)
cv2.imwrite("result.png", out[:, :, ::-1])

PIL.Image.open("result.png")
0%| | 0/11 [00:00<?, ?it/s]
Optimize encoder using NNCF Post-training Quantization API#
NNCF provides a suite of advanced algorithms for Neural Networks inference optimization in OpenVINO with minimal accuracy drop.
Since encoder costing much more time than other parts in SAM2 inference pipeline, we will use 8-bit quantization in post-training mode (without the fine-tuning pipeline) to optimize encoder of SAM2.
The optimization process contains the following steps:
Create a Dataset for quantization.
Run
nncf.quantizefor getting an optimized model.Serialize OpenVINO IR model, using the
openvino.save_modelfunction.
from notebook_utils import quantization_widget

to_quantize = quantization_widget(False)
to_quantize
Checkbox(value=False, description='Quantization')
# Fetch `skip_kernel_extension` module
skip_kernel_extension_file_name = "skip_kernel_extension.py"

if not Path(skip_kernel_extension_file_name).exists():
    r = requests.get(
        url=f"https://raw.githubusercontent.com/openvinotoolkit/openvino_notebooks/latest/utils/{skip_kernel_extension_file_name}",
    )
    open(skip_kernel_extension_file_name, "w").write(r.text)

%load_ext skip_kernel_extension
Prepare a calibration dataset#
Download COCO dataset. Since the dataset is used to calibrate the model’s parameter instead of fine-tuning it, we don’t need to download the label files.
%%skip not $to_quantize.value

from zipfile import ZipFile

DATA_URL = "https://ultralytics.com/assets/coco128.zip"
OUT_DIR = Path(".")

download_file(DATA_URL, directory=OUT_DIR, show_progress=True)

if not (OUT_DIR / "coco128/images/train2017").exists():
    with ZipFile("coco128.zip", "r") as zip_ref:
        zip_ref.extractall(OUT_DIR)
Create an instance of the nncf.Dataset class that represents the
calibration dataset. For PyTorch, we can pass an instance of the
torch.utils.data.DataLoader object.
%%skip not $to_quantize.value

import torch.utils.data as data


class COCOLoader(data.Dataset):
    def __init__(self, images_path):
        self.images = list(Path(images_path).iterdir())

    def __getitem__(self, index):
        image_path = self.images[index]
        image = cv2.imread(str(image_path))
        image = cv2.cvtColor(image, cv2.COLOR_BGR2RGB)
        return image

    def __len__(self):
        return len(self.images)


coco_dataset = COCOLoader(OUT_DIR / "coco128/images/train2017")
calibration_loader = torch.utils.data.DataLoader(coco_dataset)
The transformation function is a function that takes a sample from the dataset and returns data that can be passed to the model for inference.
%%skip not $to_quantize.value


import nncf


def transform_fn(image_data):
    """
    Quantization transform function. Extracts and preprocess input data from dataloader item for quantization.
    Parameters:
        image_data: image data produced by DataLoader during iteration
    Returns:
        input_tensor: input data in Dict format for model quantization
    """
    image = image_data.numpy()
    processed_image = preprocess_image(np.squeeze(image), resizer)
    return processed_image


calibration_dataset = nncf.Dataset(calibration_loader, transform_fn)
Run quantization and serialize OpenVINO IR model#
The nncf.quantize function provides an interface for model
quantization. It requires an instance of the OpenVINO Model and
quantization dataset. It is available for models in the following
frameworks: PyTorch, TensorFlow 2.x, ONNX, and
OpenVINO IR.
Optionally, some additional parameters for the configuration
quantization process (number of samples for quantization, preset, model
type, etc.) can be provided. model_type can be used to specify
quantization scheme required for specific type of the model. For
example, Transformer models such as SAM require a special quantization
scheme to preserve accuracy after quantization. To achieve a better
result, we will use a mixed quantization preset. It provides
symmetric quantization of weights and asymmetric quantization of
activations.
Note: Model post-training quantization is time-consuming process. Be patient, it can take several minutes depending on your hardware.
%%skip not $to_quantize.value

model = core.read_model(ov_encoder_path)
quantized_model = nncf.quantize(
    model,
    calibration_dataset,
    model_type=nncf.parameters.ModelType.TRANSFORMER,
    subset_size=128,
)
print("model quantization finished")
ov_encoder_path_int8 = "ov_image_encoder_int8.xml"
%%skip not $to_quantize.value

ov.save_model(quantized_model, ov_encoder_path_int8)
Validate Quantized Model Inference#
We can reuse the previous code to validate the output of INT8 model.
%%skip not $to_quantize.value


# Load INT8 model and run pipeline again
ov_encoder_model_int8 = core.read_model(ov_encoder_path_int8)
ov_encoder_int8 = core.compile_model(ov_encoder_model_int8, device.value)
encoding_results = ov_encoder_int8(preprocessed_image)
image_embeddings = encoding_results[ov_encoder_int8.output(0)]
high_res_256 = encoding_results[ov_encoder_int8.output(1)]
high_res_128 = encoding_results[ov_encoder_int8.output(2)]

input_point = np.array([[500, 375]])
input_label = np.array([1])
coord = np.concatenate([input_point, np.array([[0.0, 0.0]])], axis=0)[None, :, :]
label = np.concatenate([input_label, np.array([-1])], axis=0)[None, :].astype(np.float32)

coord = resizer.apply_coords(coord, image.shape[:2]).astype(np.float32)
inputs = {
    "image_embeddings": image_embeddings,
    "high_res_feats_256": high_res_256,
    "high_res_feats_128": high_res_128,
    "point_coords": coord,
    "point_labels": label,
}
results = ov_predictor(inputs)

masks = results[ov_predictor.output(0)]
masks = postprocess_masks(masks, image.shape[:-1], resizer)
masks = masks > 0.0
plt.figure(figsize=(10, 10))
plt.imshow(image)
show_mask(masks, plt.gca())
show_points(input_point, input_label, plt.gca())
plt.axis("off")
plt.show()
Run INT8 model in automatic mask generation mode
%%skip not $to_quantize.value


mask_generator_helper_int8 = AutomaticMaskGenerationHelper(resizer, ov_predictor, ov_encoder_int8)

prediction = mask_generator_helper_int8.automatic_mask_generation(image)
out = draw_anns(image, prediction)
cv2.imwrite("result_int8.png", out[:, :, ::-1])
PIL.Image.open("result_int8.png")
Compare Performance of the Original and Quantized Models#
Finally, use the OpenVINO Benchmark
Tool
to measure the inference performance of the FP32 and INT8
models.
if Path(ov_encoder_path).exists() and Path(ov_encoder_path_int8).exists():
    # Inference FP32 model (OpenVINO IR)
    !benchmark_app -m $ov_encoder_path -d $device.value
if Path(ov_encoder_path).exists() and Path(ov_encoder_path_int8).exists():
    # Inference INT8 model (OpenVINO IR)
    !benchmark_app -m $ov_encoder_path_int8 -d $device.value