Face Blur Pipeline Demo with OVMS
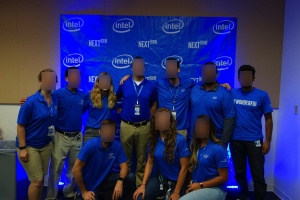
This document demonstrates how to create pipelines using object detection models from OpenVINO Model Zoo in order to blur the image. As an example, we will use face-detection-retail-0004 to detect multiple faces on the image. Then, for each detected face we will blur it using face_blur example custom node.
Pipeline Configuration Graph
Below is depicted graph implementing face blur pipeline execution.
It include the following Nodes:
Model
face-detection-retail-0004- deep learning model which takes user image as input. Its output contain information about faces coordinates and confidence levels.Custom node
face_blur- it includes C++ implementation of image blurring. By analysing the output it produces image blurred in spots detected by object detection model based on the configurable score level threshold. Custom node also resizes it to the target resolution. All operations on the images employ OpenCV libraries which are preinstalled in the OVMS. Learn more about the face_blur custom node.Response - image blurred in spots detected by object detection model.
Prepare workspace to run the demo
To successfully deploy face blur pipeline you need to have a workspace that contains:
Custom node for image blurring
Configuration file
Clone the repository and enter face_blur directory
git clone https://github.com/openvinotoolkit/model_server.git
cd model_server/demos/face_blur/python
You can prepare the workspace that contains all the above by just running
make
Final directory structure
Once the make procedure is finished, you should have workspace directory ready with the following content.
workspace
├── config.json
├── face-detection-retail-0004
│   └── 1
│       ├── face-detection-retail-0004.bin
│       └── face-detection-retail-0004.xml
└── lib
    └── libcustom_node_face_blur.so
Deploying OVMS
Deploy OVMS with face blur pipeline using the following command:
docker run -p 9000:9000 -d -v ${PWD}/workspace:/workspace openvino/model_server --config_path /workspace/config.json --port 9000
Requesting the Service
Install python dependencies:
pip3 install -r requirements.txt
Now you can create a directory for blurred image and run the client:
mkdir results
python face_blur.py --grpc_port 9000 --image_input_path ../../common/static/images/people/people1.jpeg --blurred_image_save_path ./results --image_width 600 --image_height 400 --image_layout NHWC
Exemplary result of running the demo:
