Optimize Preprocessing
Introduction
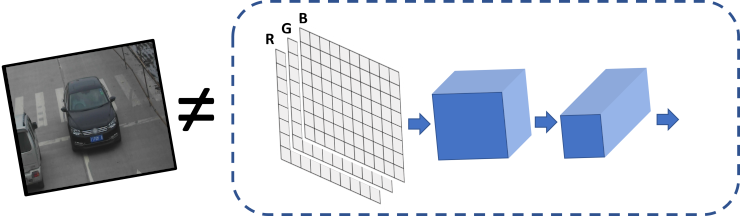
When input data does not fit the model input tensor perfectly, additional operations/steps are needed to transform the data to the format expected by the model. These operations are known as “preprocessing”.
Example
Consider the following standard example: deep learning model expects input with the {1, 3, 224, 224} shape, FP32 precision, RGB color channels order, and it requires data normalization (subtract mean and divide by scale factor). However, there is just a 640x480 BGR image (data is {480, 640, 3}). This means that the following operations must be performed:
Convert
U8buffer toFP32.Transform to
planarformat: from{1, 480, 640, 3}to{1, 3, 480, 640}.Resize image from 640x480 to 224x224.
Make
BGR->RGBconversion as model expectsRGB.For each pixel, subtract mean values and divide by scale factor.
Even though it is relatively easy to implement all these steps in the application code manually, before actual inference, it is also possible with the use of Preprocessing API. Advantages of using the API are:
Preprocessing API is easy to use.
Preprocessing steps will be integrated into execution graph and will be performed on selected device (CPU/GPU/etc.) rather than always being executed on CPU. This will improve selected device utilization which is always good.
Preprocessing API
Intuitively, preprocessing API consists of the following parts:
Tensor - declares user data format, like shape, layout, precision, color format from actual user’s data.
Steps - describes sequence of preprocessing steps which need to be applied to user data.
Model - specifies model data format. Usually, precision and shape are already known for model, only additional information, like layout can be specified.
Note
Graph modifications of a model shall be performed after the model is read from a drive and before it is loaded on the actual device.
PrePostProcessor Object
The ov::preprocess::PrePostProcessor class allows specifying preprocessing and postprocessing steps for a model read from disk.
from openvino.preprocess import PrePostProcessor

ppp = PrePostProcessor(model)
 ov::Core core;
 std::shared_ptr<ov::Model> model = core.read_model(model_path);
 ov::preprocess::PrePostProcessor ppp(model);
Declare User’s Data Format
To address particular input of a model/preprocessor, use the ov::preprocess::PrePostProcessor::input(input_name) method.
from openvino.preprocess import ColorFormat
from openvino import Layout, Type
ppp.input(input_name).tensor() \
        .set_element_type(Type.u8) \
        .set_shape([1, 480, 640, 3]) \
        .set_layout(Layout('NHWC')) \
        .set_color_format(ColorFormat.BGR)
 ov::preprocess::InputInfo& input = ppp.input(input_name);
 input.tensor()
   .set_element_type(ov::element::u8)
   .set_shape({1, 480, 640, 3})
   .set_layout("NHWC")
   .set_color_format(ov::preprocess::ColorFormat::BGR);
Below is all the specified input information:
Precision is
U8(unsigned 8-bit integer).Data represents tensor with the
{1,480,640,3}shape.Layout is “NHWC”. It means:
height=480,width=640,channels=3.Color format is
BGR.
Declaring Model Layout
Model input already has information about precision and shape. Preprocessing API is not intended to modify this. The only thing that may be specified is input data layout
# `model's input` already `knows` it's shape and data type, no need to specify them here
ppp.input(input_name).model().set_layout(Layout('NCHW'))
 // `model's input` already `knows` it's shape and data type, no need to specify them here
 input.model().set_layout("NCHW");
Now, if the model input has {1,3,224,224} shape, preprocessing will be able to identify the height=224, width=224, and channels=3 of that model. The height/ width information is necessary for resize, and channels is needed for mean/scale normalization.
Preprocessing Steps
Now, the sequence of preprocessing steps can be defined:
from openvino.preprocess import ResizeAlgorithm
ppp.input(input_name).preprocess() \
    .convert_element_type(Type.f32) \
    .convert_color(ColorFormat.RGB) \
    .resize(ResizeAlgorithm.RESIZE_LINEAR) \
    .mean([100.5, 101, 101.5]) \
    .scale([50., 51., 52.])
# .convert_layout(Layout('NCHW')) # Not needed, such conversion will be added implicitly
 input.preprocess()
   .convert_element_type(ov::element::f32)
   .convert_color(ov::preprocess::ColorFormat::RGB)
   .resize(ov::preprocess::ResizeAlgorithm::RESIZE_LINEAR)
   .mean({100.5, 101, 101.5})
   .scale({50., 51., 52.});
   // Not needed, such conversion will be added implicitly
   // .convert_layout("NCHW");
Perform the following:
Convert
U8toFP32precision.Convert current color format from
BGRtoRGB.Resize to
height/widthof a model. Be aware that if a model accepts dynamic size e.g.,{?, 3, ?, ?},resizewill not know how to resize the picture. Therefore, in this case, targetheight/widthshould be specified. For more details, see also the ov::preprocess::PreProcessSteps::resize().Subtract mean from each channel. In this step, color format is already
RGB, so100.5will be subtracted from eachRedcomponent, and101.5will be subtracted from eachBlueone.Divide each pixel data to appropriate scale value. In this example, each
Redcomponent will be divided by 50,Greenby 51, andBlueby 52 respectively.Keep in mind that the last
convert_layoutstep is commented out as it is not necessary to specify the last layout conversion. ThePrePostProcessorwill do such conversion automatically.
Integrating Steps into a Model
Once the preprocessing steps have been finished the model can be finally built. It is possible to display PrePostProcessor configuration for debugging purposes:
print(f'Dump preprocessor: {ppp}')
model = ppp.build()
 std::cout << "Dump preprocessor: " << ppp << std::endl;
 model = ppp.build();
The model will accept U8 input with the shape of {1, 480, 640, 3} and the BGR channel order. All conversion steps will be integrated into the execution graph. Now, model can be loaded on the device and the image can be passed to the model without any data manipulation in the application.
Additional Resources
ov::preprocess::PrePostProcessor C++ class documentation