Monodepth Estimation with OpenVINO#
This Jupyter notebook can be launched on-line, opening an interactive environment in a browser window. You can also make a local installation. Choose one of the following options:
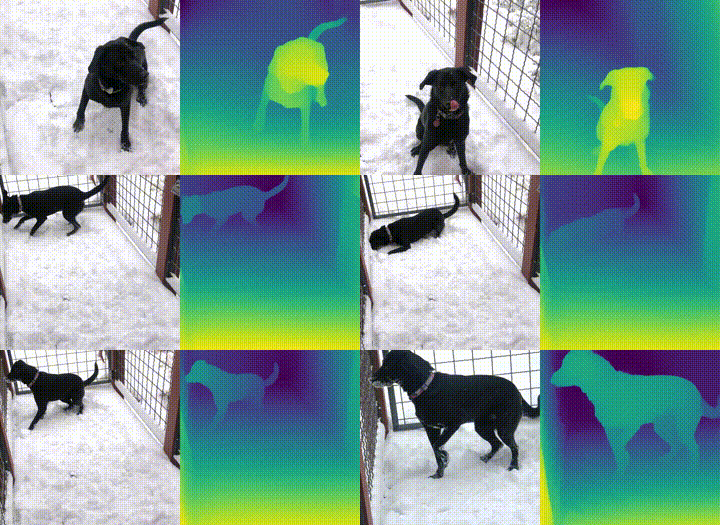
This tutorial demonstrates Monocular Depth Estimation with MidasNet in OpenVINO. Model information can be found here.

monodepth#
What is Monodepth?#
Monocular Depth Estimation is the task of estimating scene depth using a single image. It has many potential applications in robotics, 3D reconstruction, medical imaging and autonomous systems. This tutorial uses a neural network model called MiDaS, which was developed by the Embodied AI Foundation. See the research paper below to learn more.
R. Ranftl, K. Lasinger, D. Hafner, K. Schindler and V. Koltun, “Towards
Robust Monocular Depth Estimation: Mixing Datasets for Zero-shot
Cross-dataset
Transfer,” in IEEE
Transactions on Pattern Analysis and Machine Intelligence, doi:
10.1109/TPAMI.2020.3019967.
Table of contents:
Installation Instructions#
This is a self-contained example that relies solely on its own code.
We recommend running the notebook in a virtual environment. You only need a Jupyter server to start. For details, please refer to Installation Guide.
Preparation#
Install requirements#
%pip install -q "openvino>=2023.1.0"
%pip install -q opencv-python requests tqdm

%pip install -q "matplotlib>=3.4"

# Fetch `notebook_utils` module
import requests
from pathlib import Path


if not Path("notebook_utils.py").exists():
    r = requests.get(
        url="https://raw.githubusercontent.com/openvinotoolkit/openvino_notebooks/latest/utils/notebook_utils.py",
    )

    open("notebook_utils.py", "w").write(r.text)

# Read more about telemetry collection at https://github.com/openvinotoolkit/openvino_notebooks?tab=readme-ov-file#-telemetry
from notebook_utils import collect_telemetry

collect_telemetry("vision-monodepth.ipynb")
Imports#
import time

import cv2
import matplotlib.cm
import matplotlib.pyplot as plt
import numpy as np
from IPython.display import (
    HTML,
    FileLink,
    Pretty,
    ProgressBar,
    Video,
    clear_output,
    display,
)
import openvino as ov

from notebook_utils import download_file, load_image, device_widget
Download the model#
The model is in the OpenVINO Intermediate Representation (IR) format.
model_folder = Path("model")

ir_model_url = "https://storage.openvinotoolkit.org/repositories/openvino_notebooks/models/depth-estimation-midas/FP32/"
ir_model_name_xml = "MiDaS_small.xml"
ir_model_name_bin = "MiDaS_small.bin"

download_file(ir_model_url + ir_model_name_xml, filename=ir_model_name_xml, directory=model_folder)
download_file(ir_model_url + ir_model_name_bin, filename=ir_model_name_bin, directory=model_folder)

model_xml_path = model_folder / ir_model_name_xml
'model/MiDaS_small.xml' already exists.
'model/MiDaS_small.bin' already exists.
Functions#
def normalize_minmax(data):
    """Normalizes the values in `data` between 0 and 1"""
    return (data - data.min()) / (data.max() - data.min())


def convert_result_to_image(result, colormap="viridis"):
    """
    Convert network result of floating point numbers to an RGB image with
    integer values from 0-255 by applying a colormap.

    `result` is expected to be a single network result in 1,H,W shape
    `colormap` is a matplotlib colormap.
    See https://matplotlib.org/stable/tutorials/colors/colormaps.html
    """
    cmap = matplotlib.cm.get_cmap(colormap)
    result = result.squeeze(0)
    result = normalize_minmax(result)
    result = cmap(result)[:, :, :3] * 255
    result = result.astype(np.uint8)
    return result


def to_rgb(image_data) -> np.ndarray:
    """
    Convert image_data from BGR to RGB
    """
    return cv2.cvtColor(image_data, cv2.COLOR_BGR2RGB)
Select inference device#
select device from dropdown list for running inference using OpenVINO
device = device_widget()

device
Dropdown(description='Device:', index=2, options=('CPU', 'GPU', 'AUTO'), value='AUTO')
Load the Model#
Load the model in OpenVINO Runtime with core.read_model and compile
it for the specified device with core.compile_model. Get input and
output keys and the expected input shape for the model.
import openvino.properties as props


# Create cache folder
cache_folder = Path("cache")
cache_folder.mkdir(exist_ok=True)

core = ov.Core()
core.set_property({props.cache_dir(): cache_folder})
model = core.read_model(model_xml_path)
compiled_model = core.compile_model(model=model, device_name=device.value)

input_key = compiled_model.input(0)
output_key = compiled_model.output(0)

network_input_shape = list(input_key.shape)
network_image_height, network_image_width = network_input_shape[2:]
Monodepth on Image#
Load, resize and reshape input image#
The input image is read with OpenCV, resized to network input size, and reshaped to (N,C,H,W) (N=number of images, C=number of channels, H=height, W=width).
IMAGE_URL = "https://storage.openvinotoolkit.org/repositories/openvino_notebooks/data/data/image/coco_bike.jpg"
IMAGE_NAME = "coco_bike.jpg"


image = load_image(IMAGE_NAME, IMAGE_URL)


# Resize to input shape for network.
resized_image = cv2.resize(src=image, dsize=(network_image_height, network_image_width))

# Reshape the image to network input shape NCHW.
input_image = np.expand_dims(np.transpose(resized_image, (2, 0, 1)), 0)
Do inference on the image#
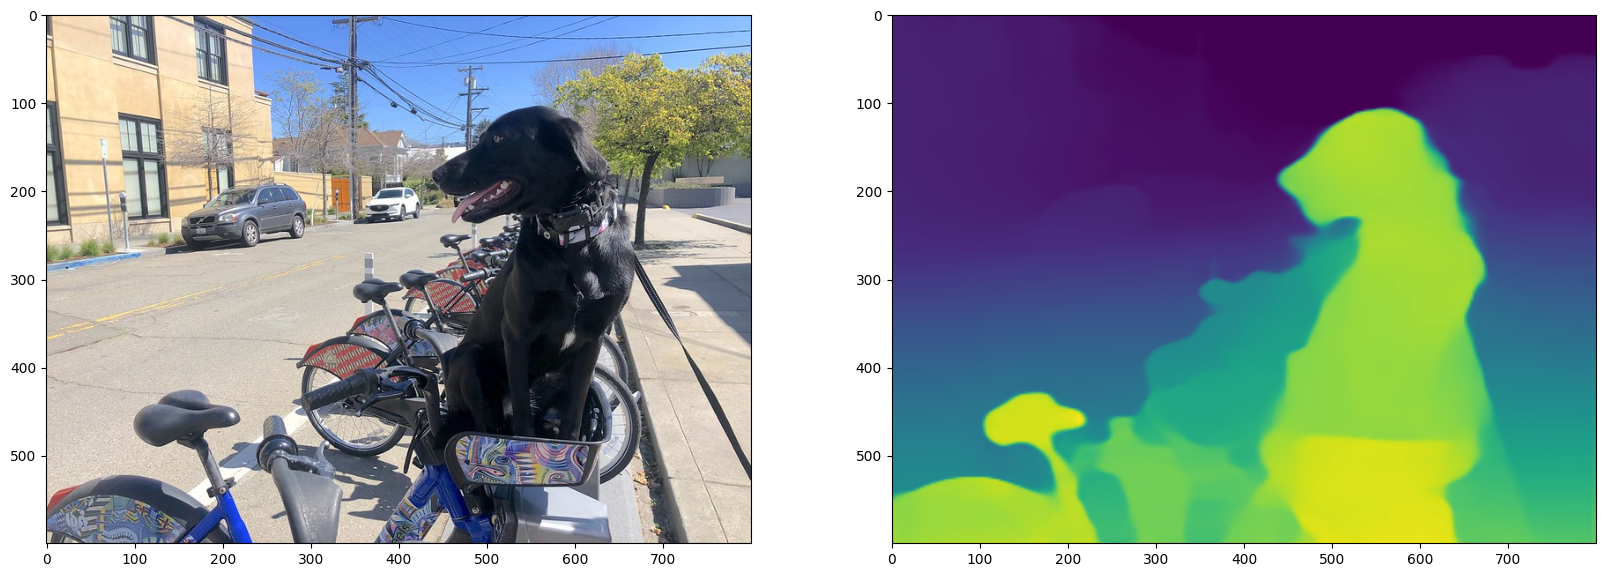
Do inference, convert the result to an image, and resize it to the original image shape.
result = compiled_model([input_image])[output_key]

# Convert the network result of disparity map to an image that shows
# distance as colors.
result_image = convert_result_to_image(result=result)

# Resize back to original image shape. The `cv2.resize` function expects shape
# in (width, height), [::-1] reverses the (height, width) shape to match this.
result_image = cv2.resize(result_image, image.shape[:2][::-1])
Display monodepth image#
fig, ax = plt.subplots(1, 2, figsize=(20, 15))
ax[0].imshow(to_rgb(image))
ax[1].imshow(result_image);

Monodepth on Video#
By default, only the first 4 seconds are processed in order to quickly
check that everything works. Change NUM_SECONDS in the cell below to
modify this. Set NUM_SECONDS to 0 to process the whole video.
Video Settings#
# Video source: https://www.youtube.com/watch?v=fu1xcQdJRws (Public Domain)
VIDEO_FILE = "Coco-Walking-in-Berkeley.mp4"
download_file(
    "https://storage.openvinotoolkit.org/repositories/openvino_notebooks/data/data/video/Coco%20Walking%20in%20Berkeley.mp4",
    VIDEO_FILE,
)

# Number of seconds of input video to process. Set `NUM_SECONDS` to 0 to process
# the full video.
NUM_SECONDS = 4
# Set `ADVANCE_FRAMES` to 1 to process every frame from the input video
# Set `ADVANCE_FRAMES` to 2 to process every second frame. This reduces
# the time it takes to process the video.
ADVANCE_FRAMES = 2
# Set `SCALE_OUTPUT` to reduce the size of the result video
# If `SCALE_OUTPUT` is 0.5, the width and height of the result video
# will be half the width and height of the input video.
SCALE_OUTPUT = 0.5
# The format to use for video encoding. The 'vp09` is slow,
# but it works on most systems.
# Try the `THEO` encoding if you have FFMPEG installed.
# FOURCC = cv2.VideoWriter_fourcc(*"THEO")
FOURCC = cv2.VideoWriter_fourcc(*"vp09")

# Create Path objects for the input video and the result video.
output_directory = Path("output")
output_directory.mkdir(exist_ok=True)
result_video_path = output_directory / f"{Path(VIDEO_FILE).stem}_monodepth.mp4"
Load the Video#
Load the video from a VIDEO_FILE, set in the Video Settings cell
above. Open the video to read the frame width and height and fps, and
compute values for these properties for the monodepth video.
cap = cv2.VideoCapture(str(VIDEO_FILE))
ret, image = cap.read()
if not ret:
    raise ValueError(f"The video at {VIDEO_FILE} cannot be read.")
input_fps = cap.get(cv2.CAP_PROP_FPS)
input_video_frame_height, input_video_frame_width = image.shape[:2]

target_fps = input_fps / ADVANCE_FRAMES
target_frame_height = int(input_video_frame_height * SCALE_OUTPUT)
target_frame_width = int(input_video_frame_width * SCALE_OUTPUT)

cap.release()
print(f"The input video has a frame width of {input_video_frame_width}, " f"frame height of {input_video_frame_height} and runs at {input_fps:.2f} fps")
print(
    "The monodepth video will be scaled with a factor "
    f"{SCALE_OUTPUT}, have width {target_frame_width}, "
    f" height {target_frame_height}, and run at {target_fps:.2f} fps"
)
The input video has a frame width of 640, frame height of 360 and runs at 30.00 fps
The monodepth video will be scaled with a factor 0.5, have width 320,  height 180, and run at 15.00 fps
Do Inference on a Video and Create Monodepth Video#
# Initialize variables.
input_video_frame_nr = 0
start_time = time.perf_counter()
total_inference_duration = 0

# Open the input video
cap = cv2.VideoCapture(str(VIDEO_FILE))

# Create a result video.
out_video = cv2.VideoWriter(
    str(result_video_path),
    FOURCC,
    target_fps,
    (target_frame_width * 2, target_frame_height),
)

num_frames = int(NUM_SECONDS * input_fps)
total_frames = cap.get(cv2.CAP_PROP_FRAME_COUNT) if num_frames == 0 else num_frames
progress_bar = ProgressBar(total=total_frames)
progress_bar.display()

try:
    while cap.isOpened():
        ret, image = cap.read()
        if not ret:
            cap.release()
            break

        if input_video_frame_nr >= total_frames:
            break

        # Only process every second frame.
        # Prepare a frame for inference.
        # Resize to the input shape for network.
        resized_image = cv2.resize(src=image, dsize=(network_image_height, network_image_width))
        # Reshape the image to network input shape NCHW.
        input_image = np.expand_dims(np.transpose(resized_image, (2, 0, 1)), 0)

        # Do inference.
        inference_start_time = time.perf_counter()
        result = compiled_model([input_image])[output_key]
        inference_stop_time = time.perf_counter()
        inference_duration = inference_stop_time - inference_start_time
        total_inference_duration += inference_duration

        if input_video_frame_nr % (10 * ADVANCE_FRAMES) == 0:
            clear_output(wait=True)
            progress_bar.display()
            # input_video_frame_nr // ADVANCE_FRAMES gives the number of
            # Frames that have been processed by the network.
            display(
                Pretty(
                    f"Processed frame {input_video_frame_nr // ADVANCE_FRAMES}"
                    f"/{total_frames // ADVANCE_FRAMES}. "
                    f"Inference time per frame: {inference_duration:.2f} seconds "
                    f"({1/inference_duration:.2f} FPS)"
                )
            )

        # Transform the network result to a RGB image.
        result_frame = to_rgb(convert_result_to_image(result))
        # Resize the image and the result to a target frame shape.
        result_frame = cv2.resize(result_frame, (target_frame_width, target_frame_height))
        image = cv2.resize(image, (target_frame_width, target_frame_height))
        # Put the image and the result side by side.
        stacked_frame = np.hstack((image, result_frame))
        # Save a frame to the video.
        out_video.write(stacked_frame)

        input_video_frame_nr = input_video_frame_nr + ADVANCE_FRAMES
        cap.set(1, input_video_frame_nr)

        progress_bar.progress = input_video_frame_nr
        progress_bar.update()

except KeyboardInterrupt:
    print("Processing interrupted.")
finally:
    clear_output()
    processed_frames = num_frames // ADVANCE_FRAMES
    out_video.release()
    cap.release()
    end_time = time.perf_counter()
    duration = end_time - start_time

    print(
        f"Processed {processed_frames} frames in {duration:.2f} seconds. "
        f"Total FPS (including video processing): {processed_frames/duration:.2f}."
        f"Inference FPS: {processed_frames/total_inference_duration:.2f} "
    )
    print(f"Monodepth Video saved to '{str(result_video_path)}'.")
Processed 60 frames in 97.70 seconds. Total FPS (including video processing): 0.61.Inference FPS: 82.48
Monodepth Video saved to 'output/Coco%20Walking%20in%20Berkeley_monodepth.mp4'.
Display Monodepth Video#
video = Video(result_video_path, width=800, embed=True)
if not result_video_path.exists():
    plt.imshow(stacked_frame)
    raise ValueError("OpenCV was unable to write the video file. Showing one video frame.")
else:
    print(f"Showing monodepth video saved at\n{result_video_path.resolve()}")
    print("If you cannot see the video in your browser, please click on the " "following link to download the video ")
    video_link = FileLink(result_video_path)
    video_link.html_link_str = "<a href='%s' download>%s</a>"
    display(HTML(video_link._repr_html_()))
    display(video)
Showing monodepth video saved at
/home/ea/work/openvino_notebooks/notebooks/vision-monodepth/output/Coco%20Walking%20in%20Berkeley_monodepth.mp4
If you cannot see the video in your browser, please click on the following link to download the video