Import Model
This document describes the first part of Get Started with DL Workbench workflow, following the model import steps from the Create Project video.
Get Started with the DL Workbench. Duration: 8:27 |
To start working with DL Workbench, you need to obtain a model. A model is a neural network that has been trained over a set of data using a certain frameworks, such as TensorFlow*, ONNX*, Caffe*, MXNet*, and others.

There are two ways to import a model in DL Workbench:
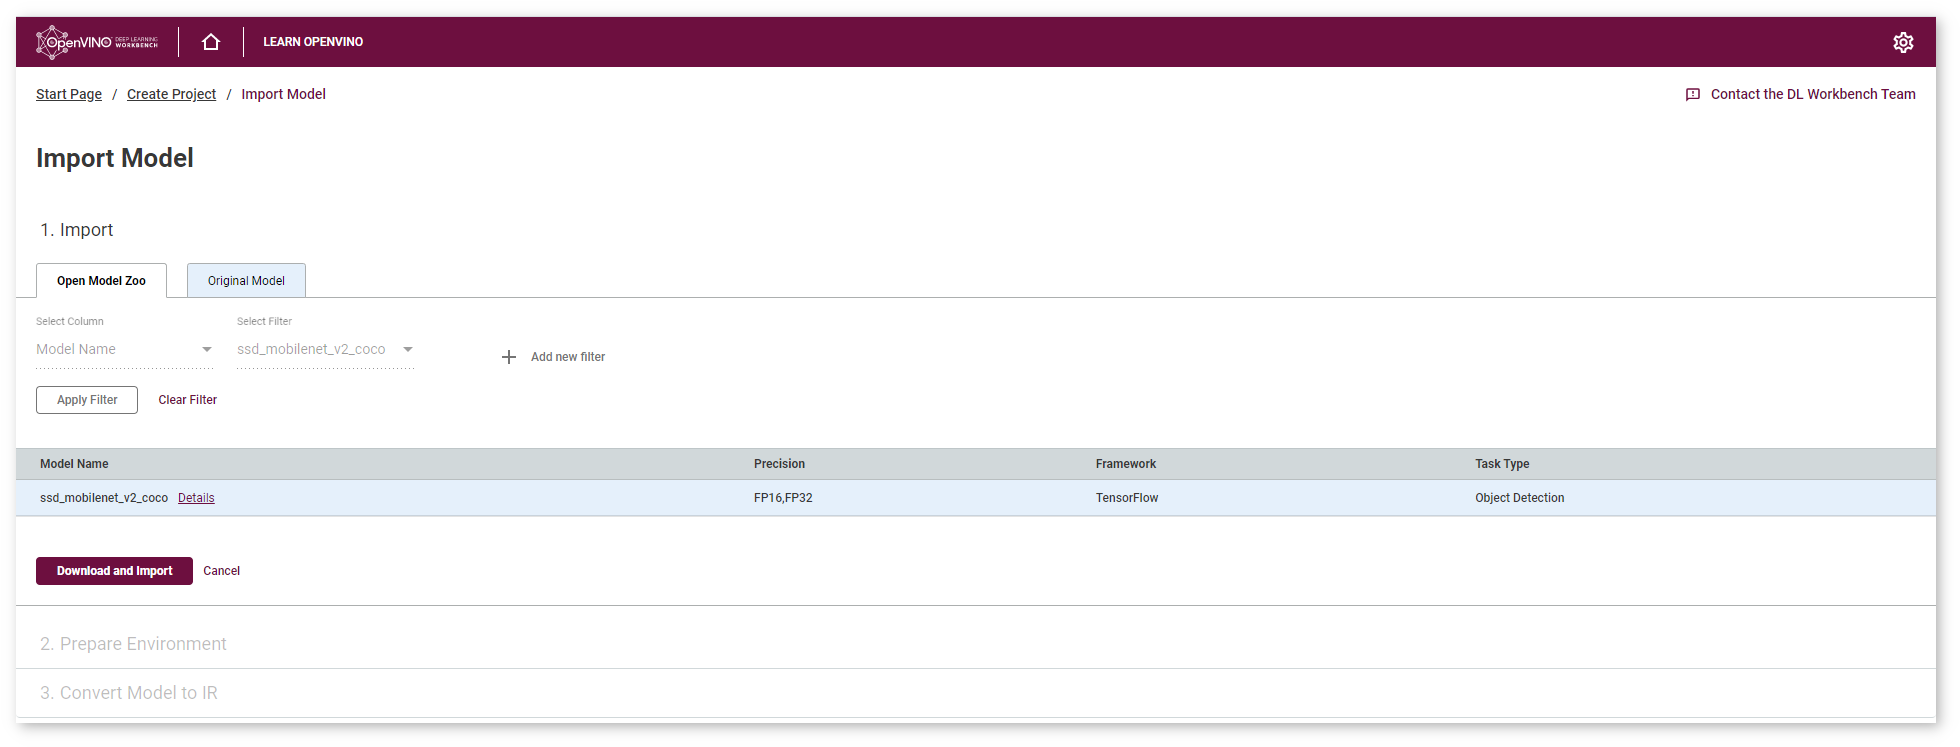
Select a model from the Open Model Zoo. Open Model Zoo includes a set of high-quality pretrained Deep Learning public and Intel-trained models for different use cases, such as classification, object detection, segmentation and many others.
Import your original model. Upload the files and start the import if you have a model pretrained in one of the supported frameworks or you already have an Intermediate Representation(IR) model.
This document focuses on importing a model from the Open Model Zoo. If you want to learn about importing original model, see the Obtain Models page.
Download Model
First, you need to select a model. This guide uses ssd_mobilenet_v2_coco SSD model for object detection use case, pretrained with TensorFlow* framework. Type the name in the search, select the model and click Download and Import. During this step, you can also inspect the model details.
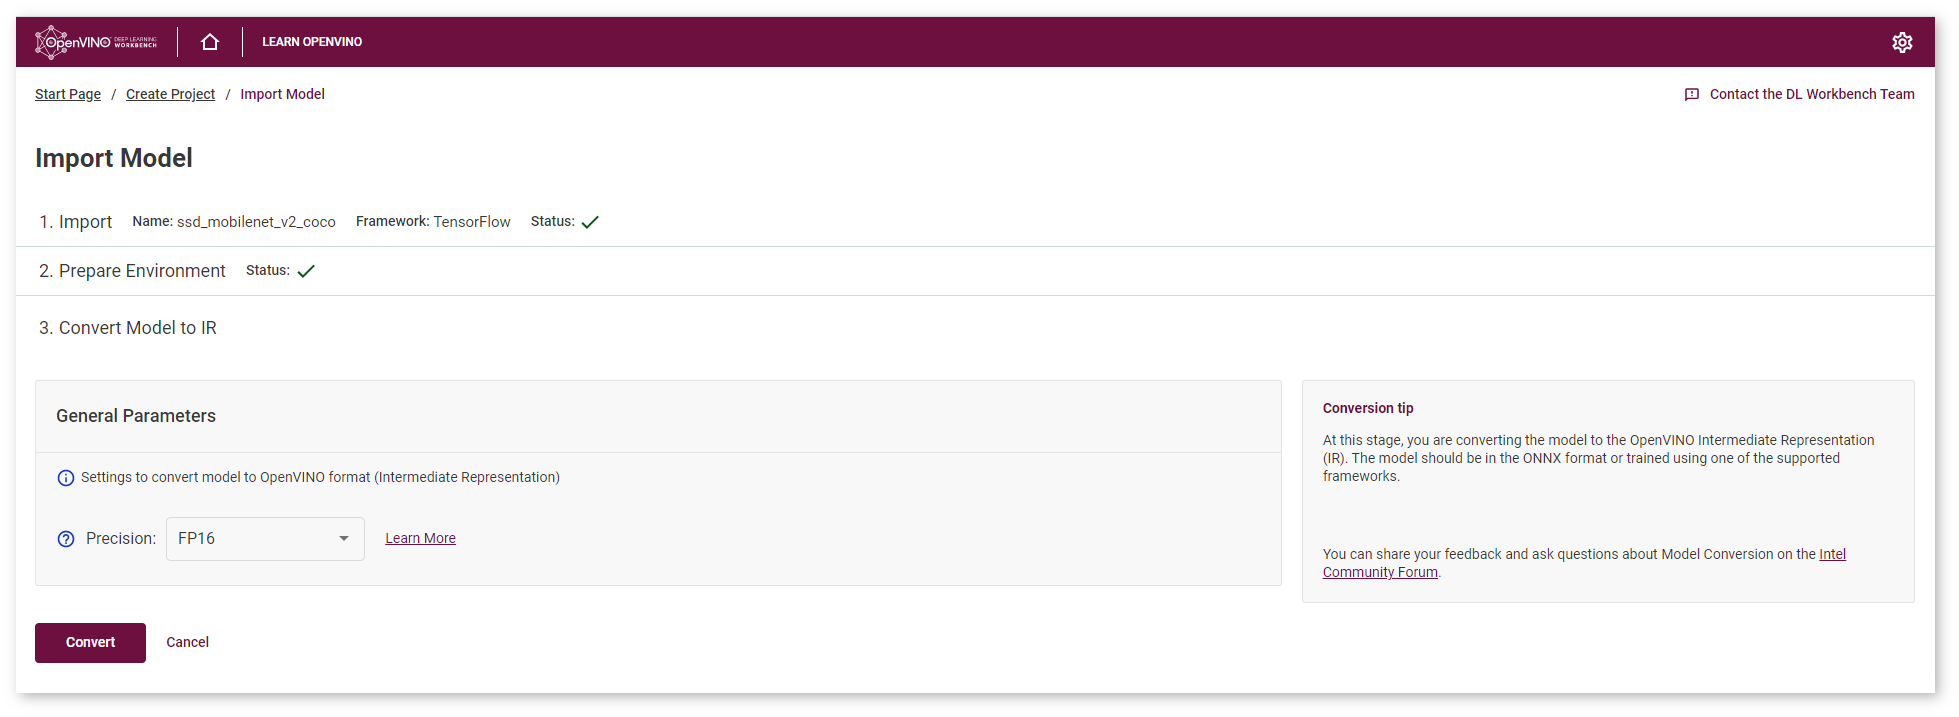
Convert Model
To work with DL Workbench, you need to obtain a model in the Intermediate Representation (IR) format. Specify the precision in which model weights should be stored to convert the selected TensorFlow* model to IR. You can select either 32-bit (FP32) or 16-bit (FP16) floating-point values. In this tutorial we choose FP16, as it keeps good accuracy and provides smaller footprint. Select the precision and click Convert.
You will be redirected to the Create Project page, where you can check the import status.
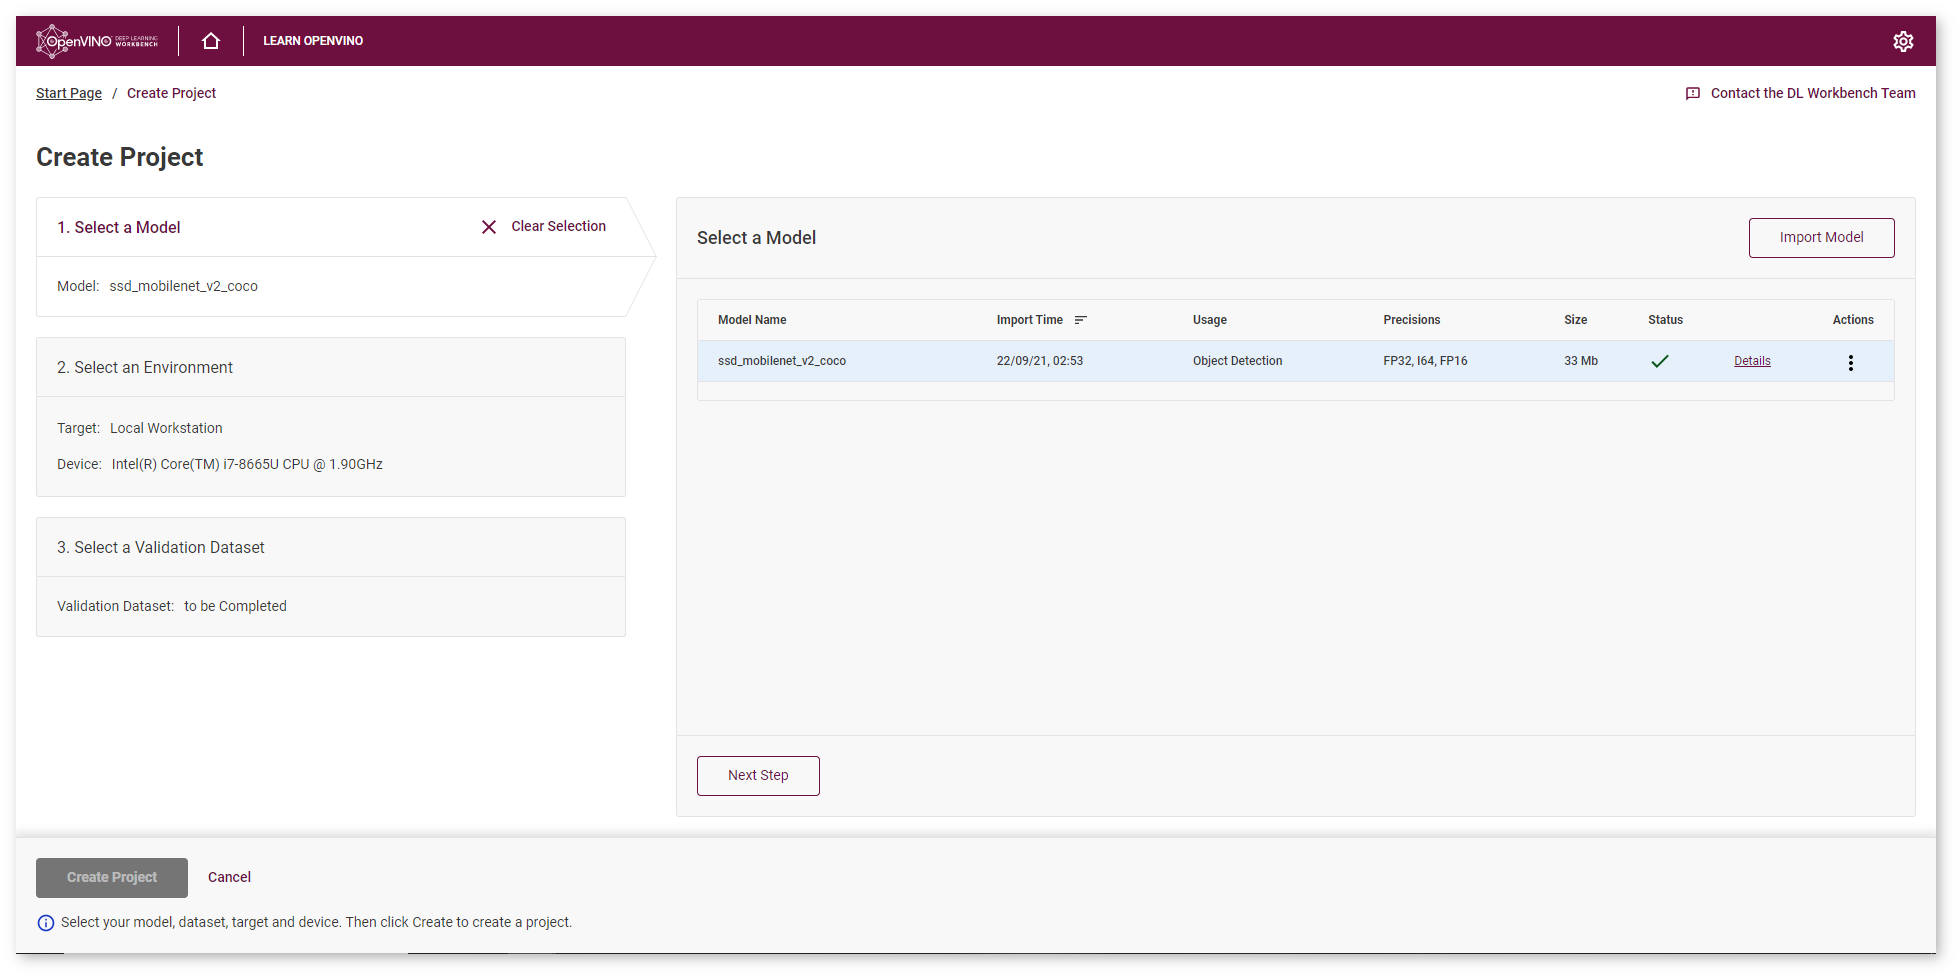
You have completed the first part of Get Started with DL Workbench guide. The next step is to create a project. Before creating a project, you can find out how your model works on test images.
Optional. Visualize Model
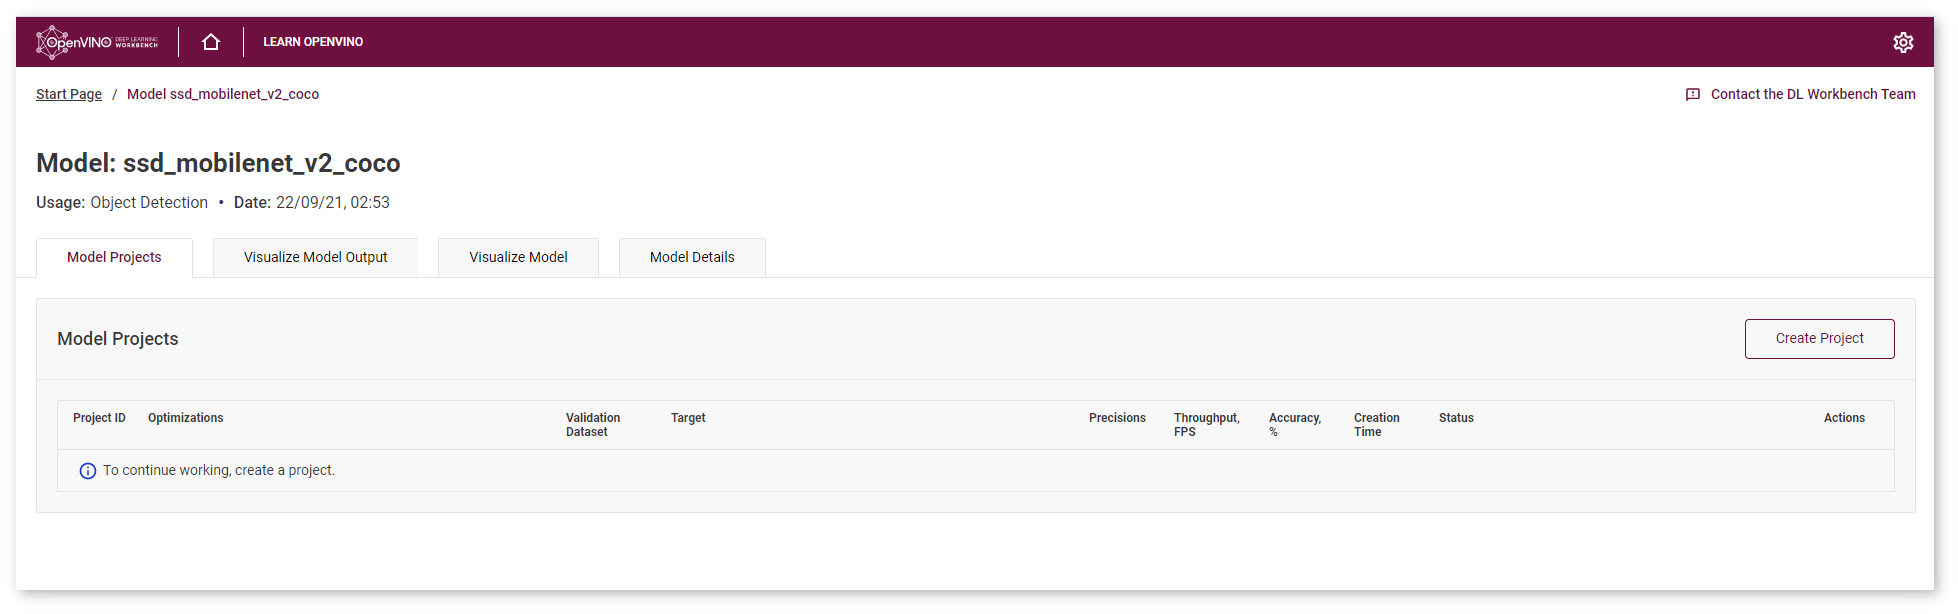
To check your model and explore its properties, click Open under the Actions column.
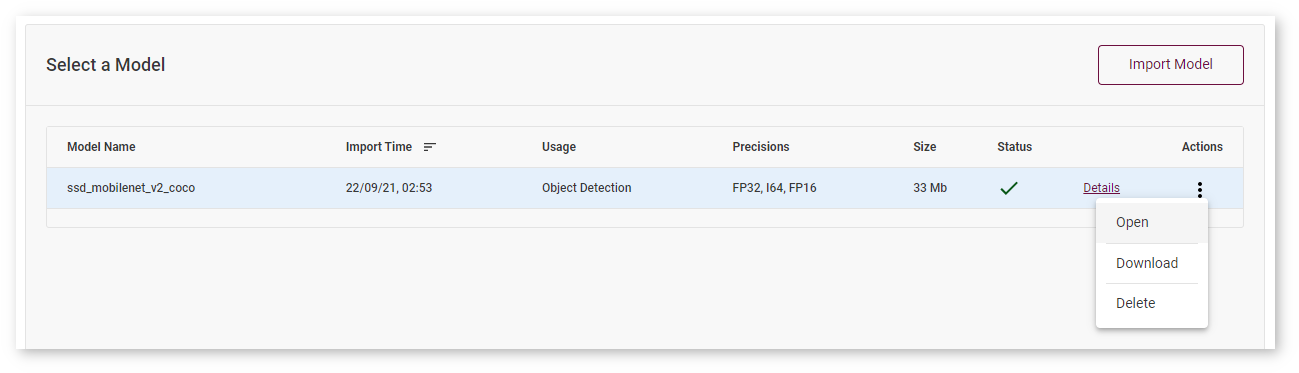
The Model Page will open. You can also access this page from the Start Page where all imported models are displayed:
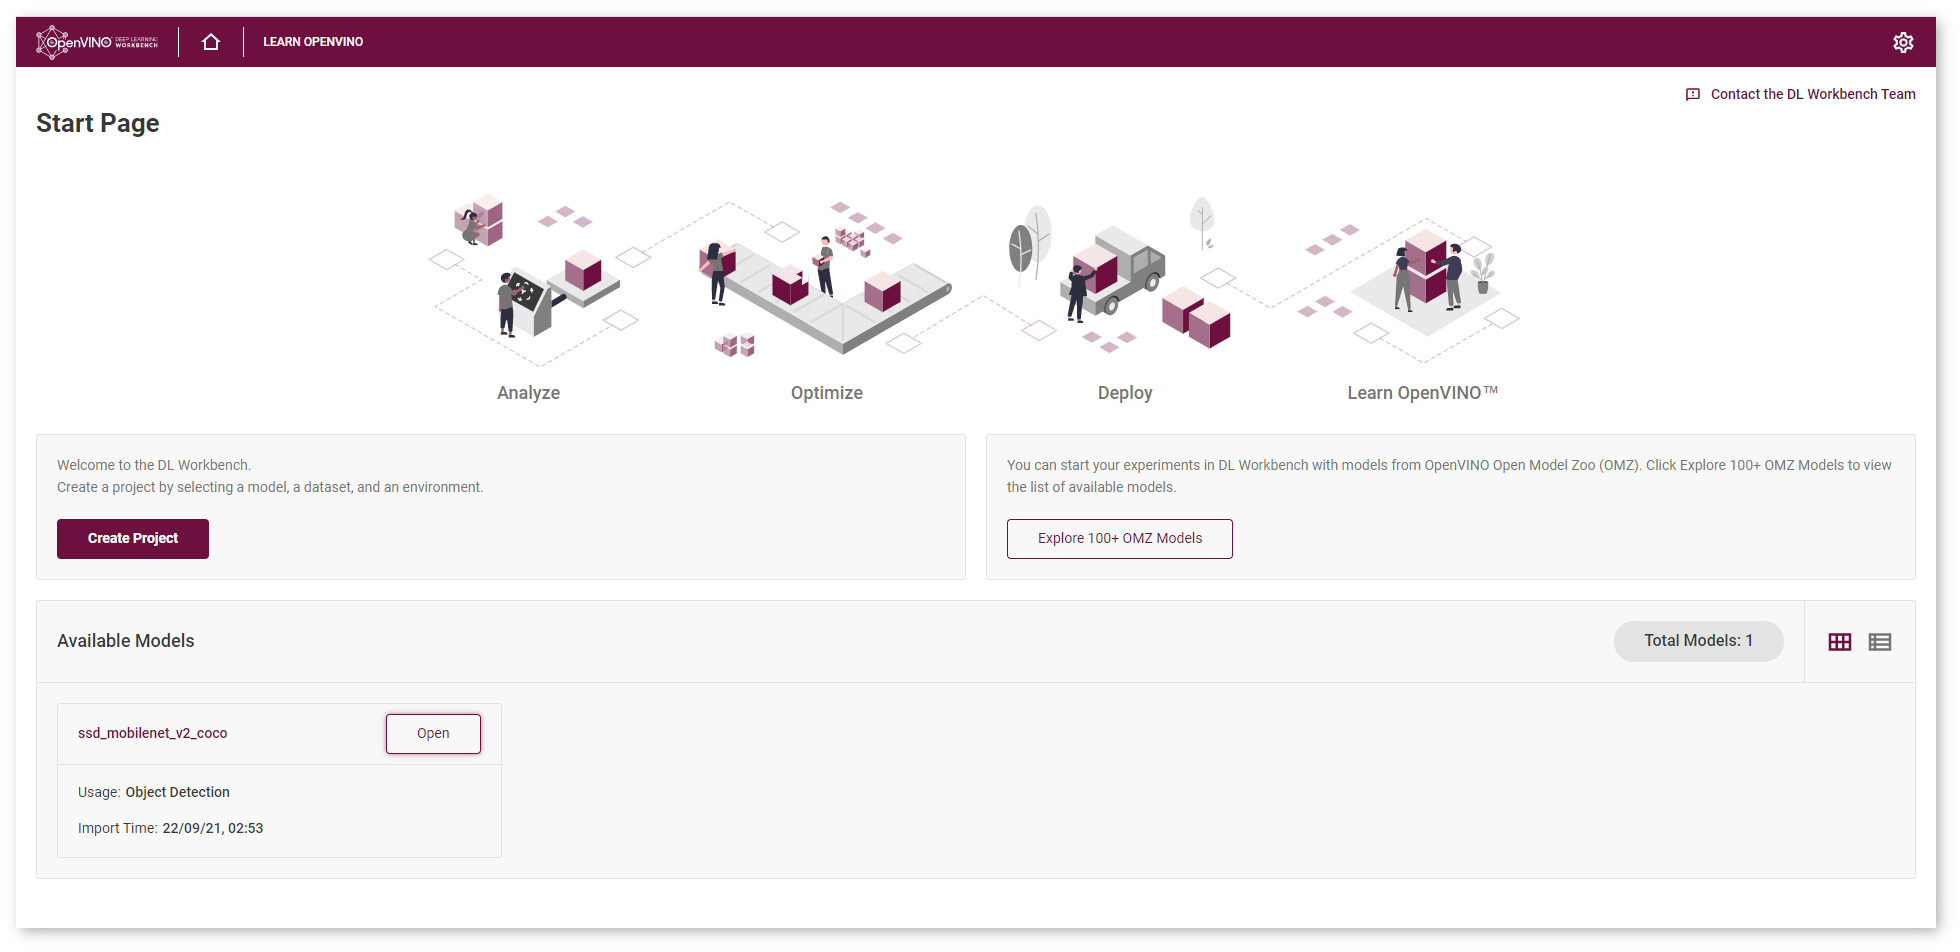
On this page you can see the list of available model projects, visualize the model structure and output, read information about theoretical analysis, conversion settings, and accuracy configurations.
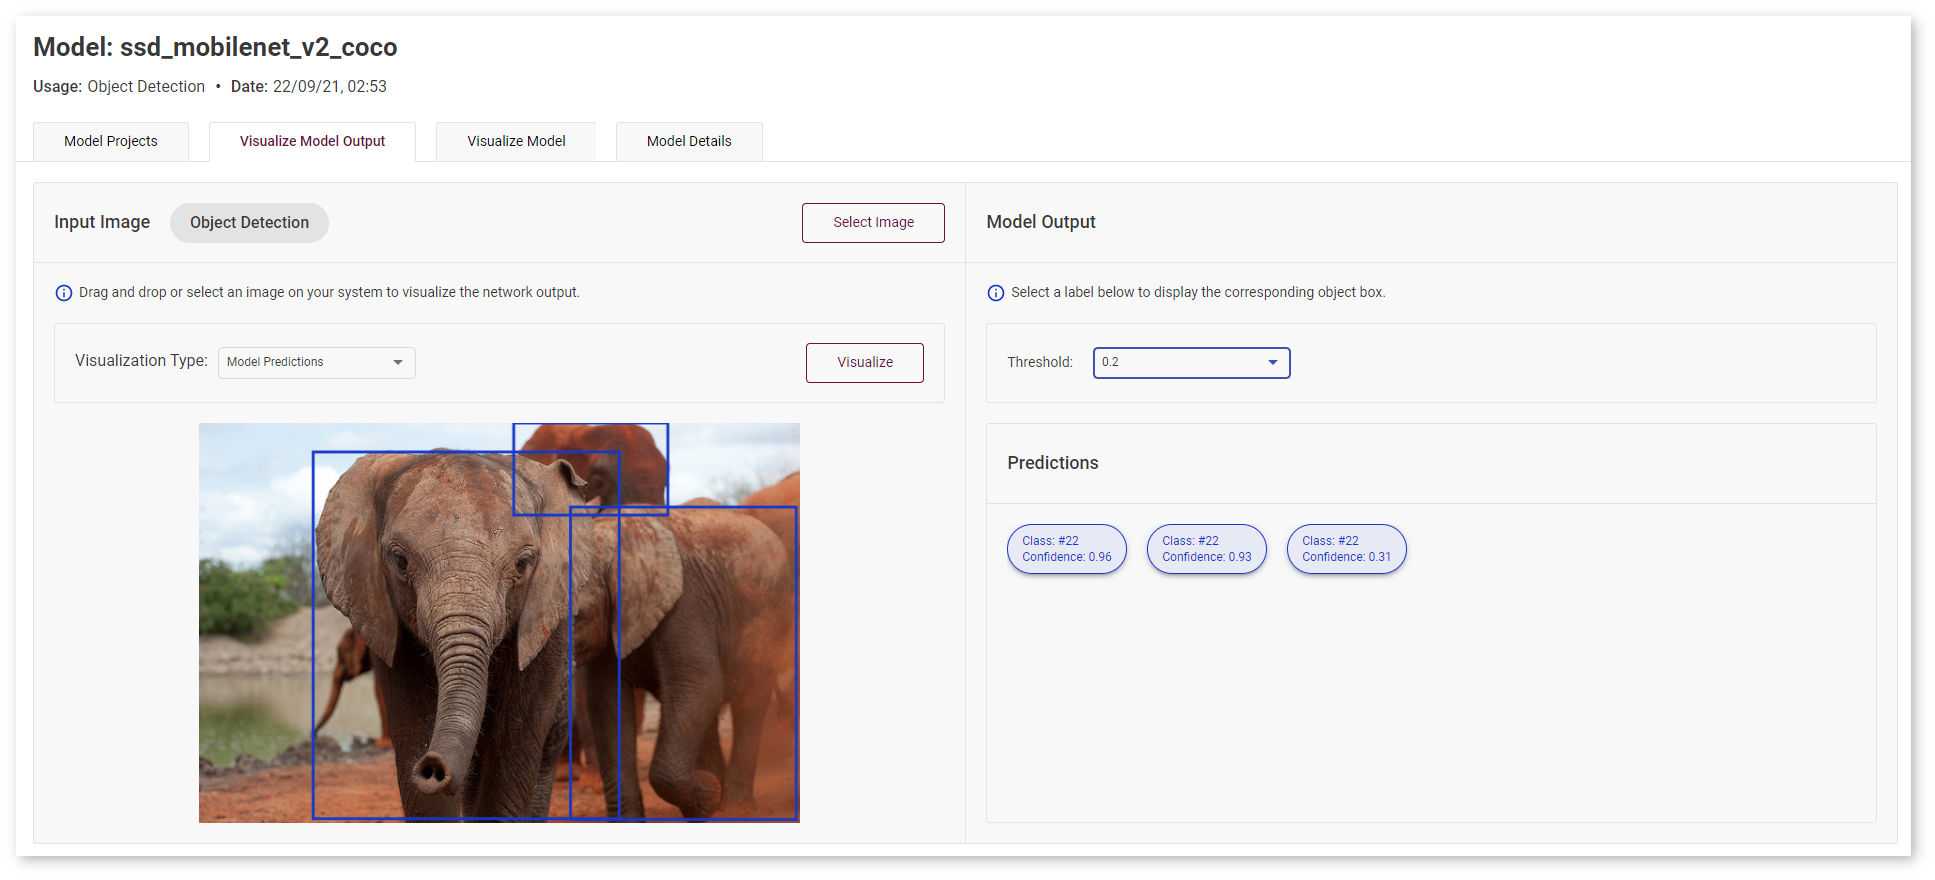
Drag and drop your image to evaluate the model performance:
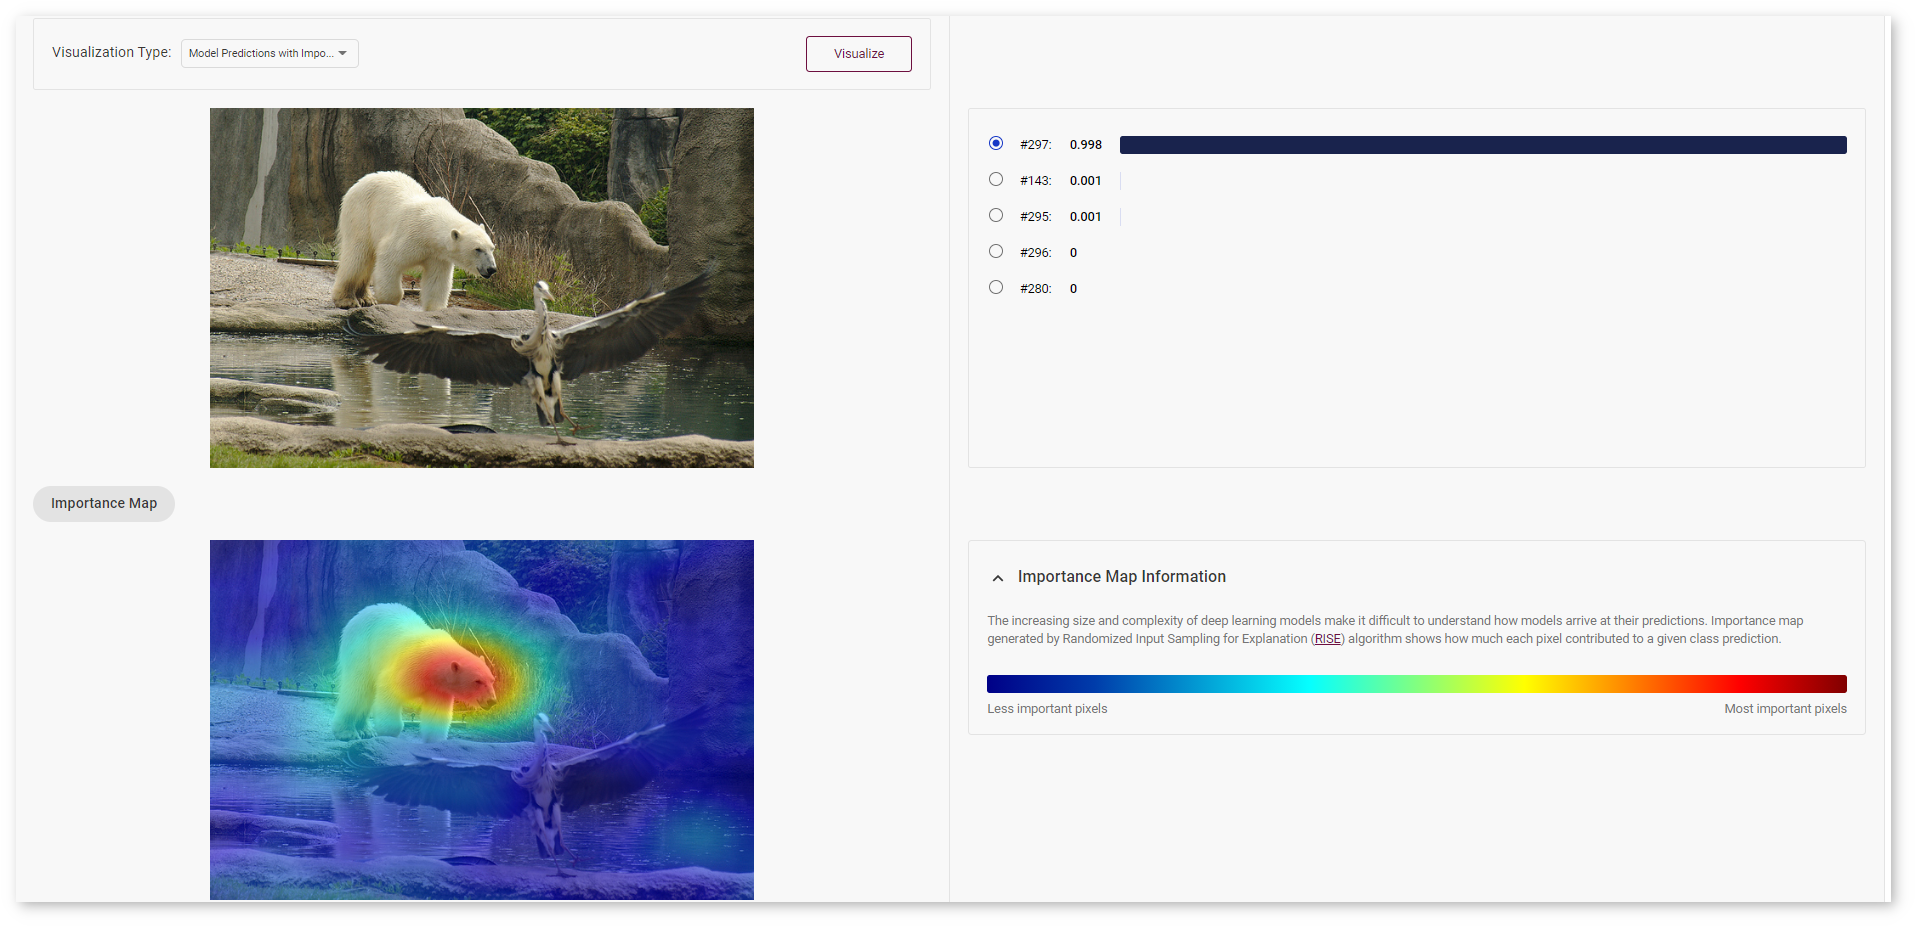
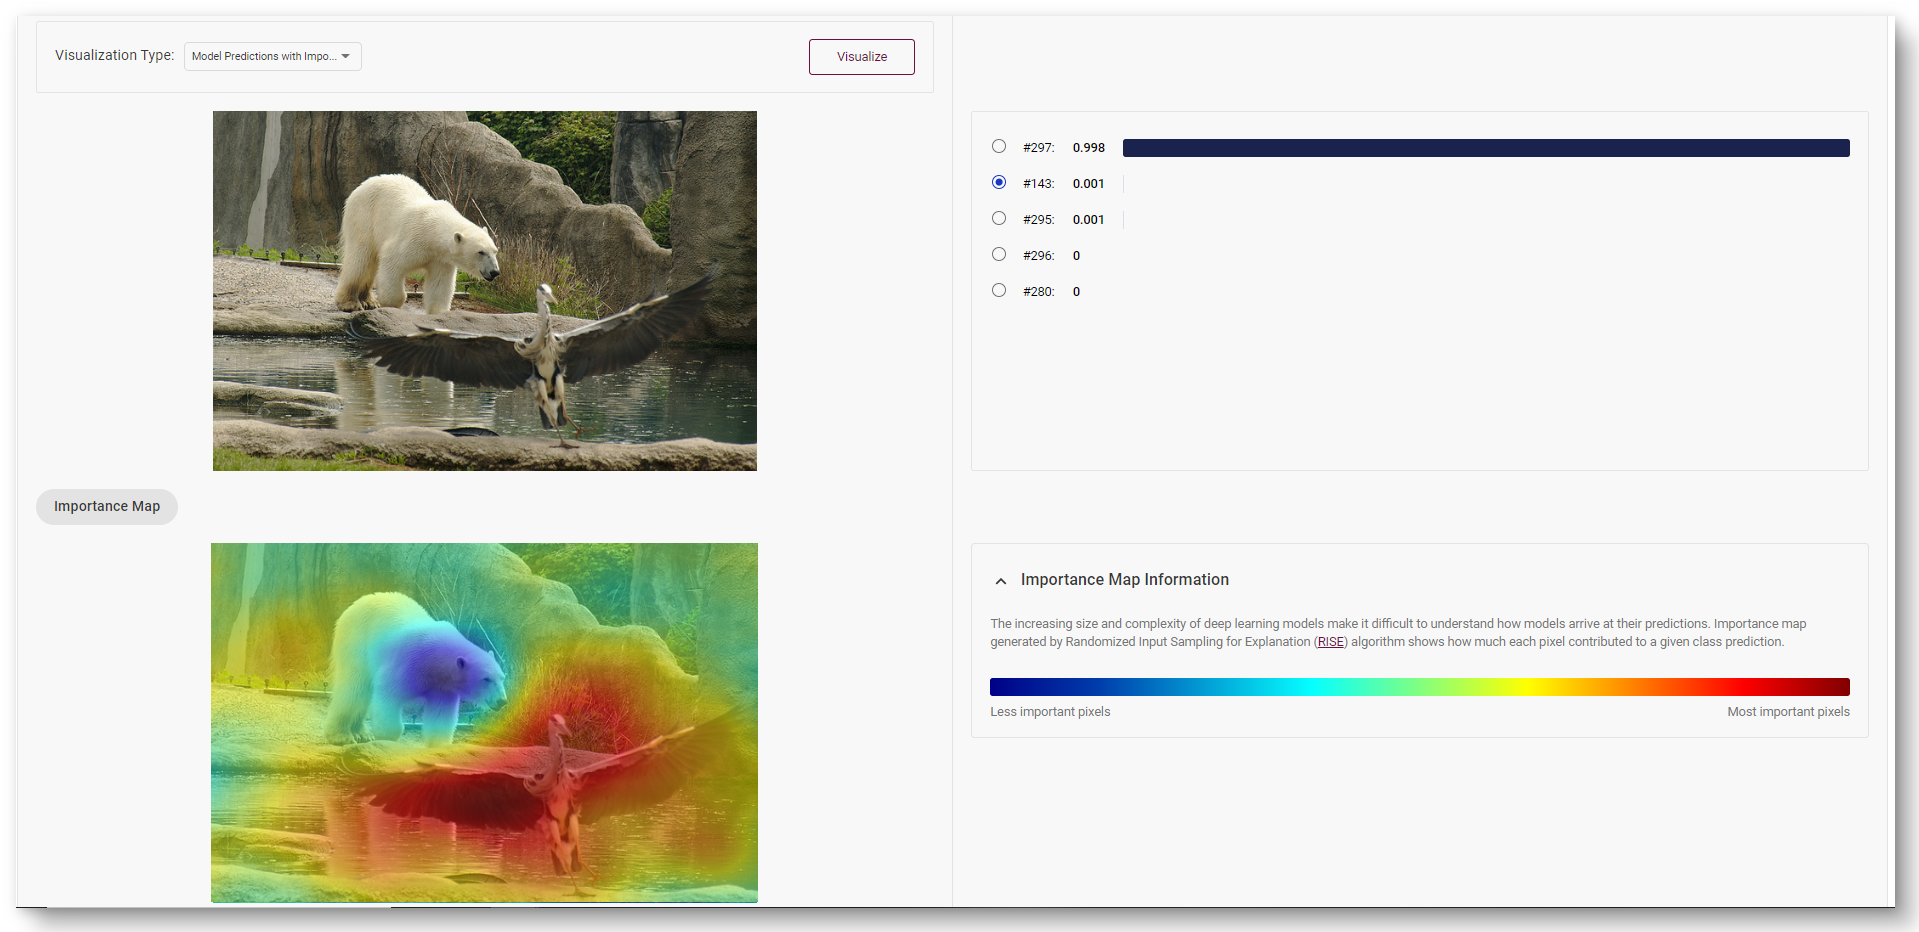
Visualize Model Predictions with Importance Map
Note
The feature is available for models of classification use case
Although deep neural models are widely used to automate data processing, their decision-making process is mostly unknown and difficult to explain. Explainable AI helps you understand and interpret model predictions.
Randomized Input Sampling for Explanation (RIZE) algorithm can explain why a black-box model makes classification decisions by generating a pixel importance map for each class. The algorithm tests the model with randomly masked versions of the input image and obtains the corresponding outputs to evaluate the importance.
Select Model Predictions with Importance Map visualization type, upload an image and click Visualize button. You will see the progress bar on the right.
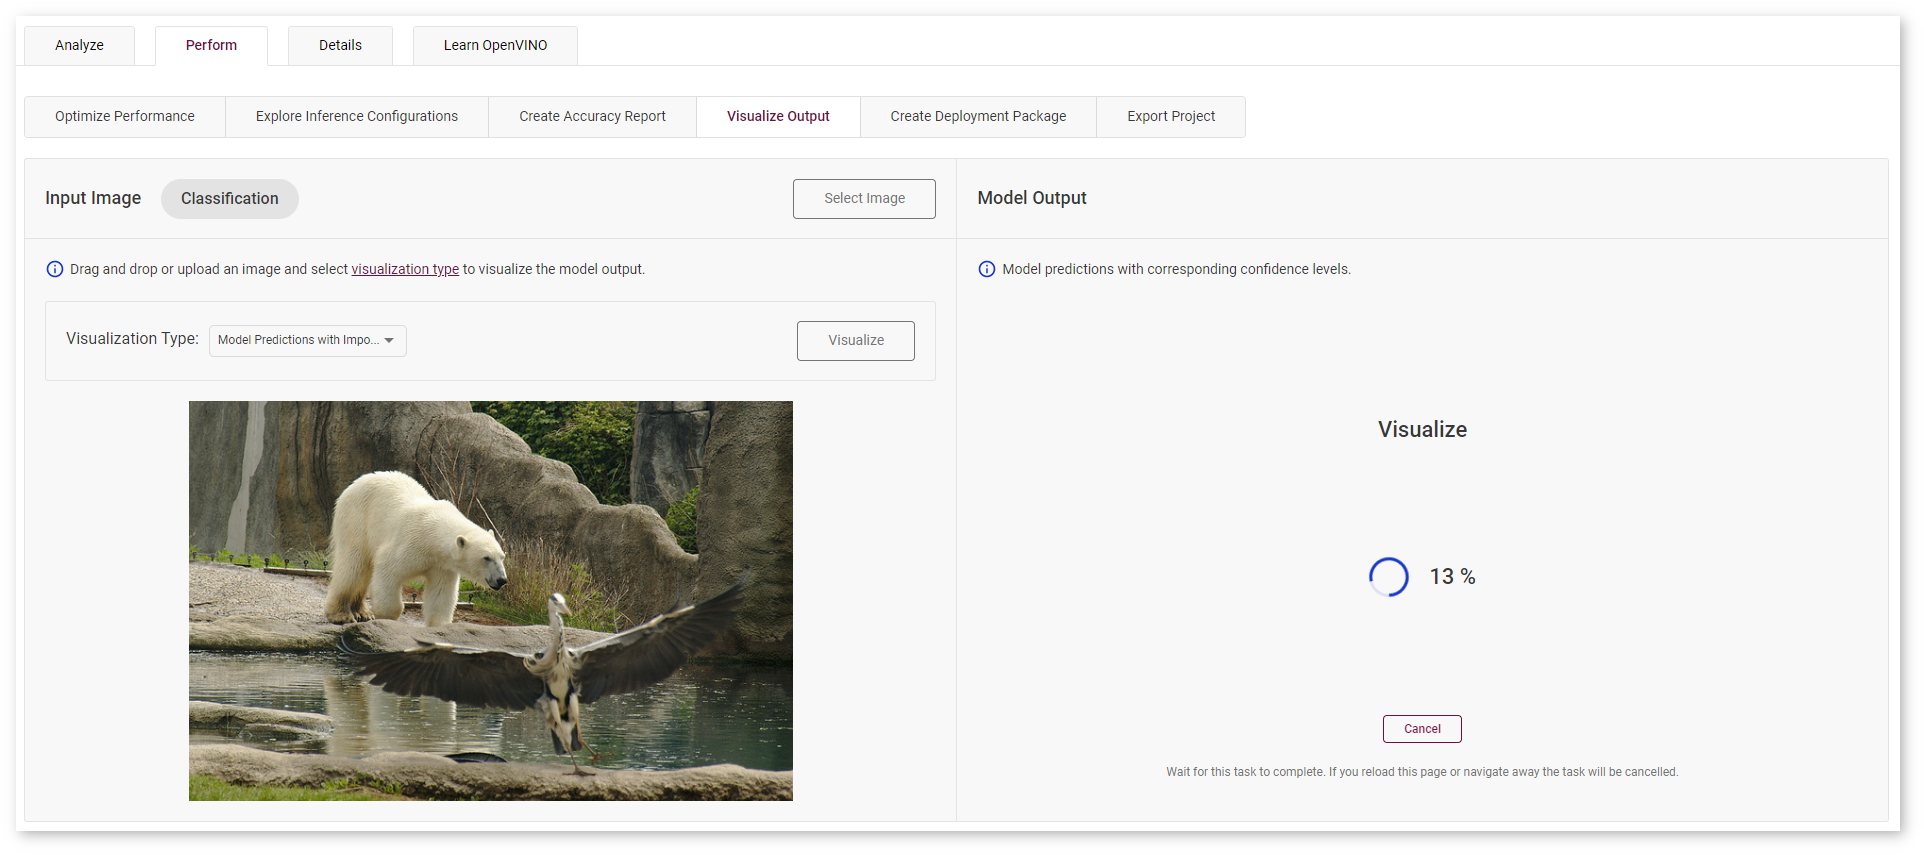
In the images below, red area indicates the most important pixels for class #269 (polar bear). Blue area contains less important pixels for the corresponding model prediction.
Select another prediction to show the heatmap for class #143 (crane).
Once you have checked how the model works, proceed to create a project to further explore the DL Workbench capabilities.
All images were taken from ImageNet, Pascal Visual Object Classes, and Common Objects in Context datasets for demonstration purposes only.