Image Generation with OpenAI API#
This demo shows how to deploy image generation models (Stable Diffusion/Stable Diffusion 3/Stable Diffusion XL/FLUX) to create and edit images with the OpenVINO Model Server.
Image generation pipelines are exposed via OpenAI API images/generations and images/edits endpoints.
Supported workloads:
Text-to-image — generate an image from a text prompt (
/v3/images/generations)Image-to-image — transform an existing image guided by a prompt (
/v3/images/edits)Inpainting — repaint a masked region of an image (
/v3/images/editswithmaskfield)Outpainting — extend an image beyond its original borders (
/v3/images/editswithmaskfield and larger canvas)
Check supported models.
Note: Please note that FLUX models are not supported on NPU.
Note: This demo was tested on Intel® Xeon®, Intel® Core®, Intel® Arc™ A770, Intel® Arc™ B580 on Ubuntu 22/24, RedHat 9 and Windows 11.
Prerequisites#
RAM/vRAM Select model size and precision according to your hardware capabilities (RAM/vRAM). Request resolution plays significant role in memory consumption, so the higher resolution you request, the more RAM/vRAM is required.
Model preparation (one of the below):
preconfigured models from HuggingFaces directly in OpenVINO IR format, list of Intel uploaded models available here)
or Python 3.9+ with pip and HuggingFace account to download, convert and quantize manually using Export Models Tool
Model Server deployment: Installed Docker Engine or OVMS binary package according to the baremetal deployment guide
Client: Python for using OpenAI client package and Pillow to save image or simply cURL
Option 1. Downloading the models directly via OVMS#
NOTE: Model downloading feature is described in depth in separate documentation page: Pulling HuggingFaces Models.
This command pulls the OpenVINO/stable-diffusion-v1-5-int8-ov quantized model directly from HuggingFaces and starts the serving. If the model already exists locally, it will skip the downloading and immediately start the serving.
NOTE: Optionally, to only download the model and omit the serving part, use
--pullparameter.
CPU#
Start docker container:
mkdir -p ${HOME}/models

docker run -d --rm --user $(id -u):$(id -g) -p 8000:8000 -v ${HOME}/models:/models:rw \
  -e http_proxy=$http_proxy -e https_proxy=$https_proxy -e no_proxy=$no_proxy \
  openvino/model_server:2026.2 \
    --rest_port 8000 \
    --model_repository_path /models \
    --task image_generation \
    --source_model OpenVINO/stable-diffusion-v1-5-int8-ov
Assuming you have unpacked model server package, make sure to:
On Windows: run
setupvarsscriptOn Linux: set
LD_LIBRARY_PATHandPATHenvironment variables
as mentioned in deployment guide, in every new shell that will start OpenVINO Model Server.
if not exist c:\models mkdir c:\models

ovms --rest_port 8000 ^
  --model_repository_path c:\models ^
  --task image_generation ^
  --source_model OpenVINO/stable-diffusion-v1-5-int8-ov
GPU#
In case you want to use Intel GPU device to run the generation, add extra docker parameters --device /dev/dri --group-add=$(stat -c "%g" /dev/dri/render* | head -n 1) to docker run command, use the docker image with GPU support. Export the models with precision matching the GPU capacity and adjust pipeline configuration.
It can be applied using the commands below:
mkdir -p ${HOME}/models

docker run -d --rm -p 8000:8000 -v ${HOME}/models:/models:rw \
  --user $(id -u):$(id -g) --device /dev/dri --group-add=$(stat -c "%g" /dev/dri/render* | head -n 1) \
  -e http_proxy=$http_proxy -e https_proxy=$https_proxy -e no_proxy=$no_proxy \
  openvino/model_server:2026.2-gpu \
    --rest_port 8000 \
    --model_repository_path /models \
    --task image_generation \
    --source_model OpenVINO/stable-diffusion-v1-5-int8-ov \
    --target_device GPU
If you run on GPU make sure to have appropriate drivers installed, so the device is accessible for the model server.
if not exist c:\models mkdir c:\models

ovms --rest_port 8000 ^
  --model_repository_path c:\models ^
  --task image_generation ^
  --source_model OpenVINO/stable-diffusion-v1-5-int8-ov ^
  --target_device GPU
NPU or mixed device#
Image generation endpoints consist of 3 models: vae encoder, denoising and vae decoder. It is possible to select device for each step separately. In this example, we will use NPU for text encoding and denoising, and GPU for vae decoder. This is useful when the model is too large to fit into NPU memory, but the NPU can still be used for the first two steps.
In case you want to use Intel NPU device to run the generation, add extra docker parameters --device /dev/accel --group-add=$(stat -c "%g" /dev/dri/render* | head -n 1) to docker run command, use the docker image with NPU support. Export the models with precision matching the NPU capacity and adjust pipeline configuration.
In this specific case, we also need to use --device /dev/dri, because we also use GPU.
NOTE: The NPU device requires the pipeline to be reshaped to static shape, this is why the
--resolutionparameter is used to define the input resolution.
NOTE: In case the model loading phase takes too long, consider caching the model with
--cache_dirparameter, as seen in example below.
It can be applied using the commands below:
mkdir -p ${HOME}/models
mkdir -p ${HOME}/models/cache

docker run -d --rm -p 8000:8000 \
  -v ${HOME}/models:/models:rw \
  --user $(id -u):$(id -g) --device /dev/accel --device /dev/dri --group-add=$(stat -c "%g" /dev/dri/render* | head -n 1) \
  -e http_proxy=$http_proxy -e https_proxy=$https_proxy -e no_proxy=$no_proxy \
  openvino/model_server:2026.2-gpu \
    --rest_port 8000 \
    --model_repository_path /models \
    --task image_generation \
    --source_model OpenVINO/stable-diffusion-v1-5-int8-ov \
    --target_device 'NPU NPU NPU' \
    --resolution 512x512 \
    --cache_dir /models/cache
if not exist c:\models mkdir c:\models
if not exist c:\models\cache mkdir c:\models\cache

ovms --rest_port 8000 ^
  --model_repository_path c:\models ^
  --task image_generation ^
  --source_model OpenVINO/stable-diffusion-v1-5-int8-ov ^
  --target_device "NPU NPU NPU" ^
  --resolution 512x512 ^
  --cache_dir C:/models/cache
SDXL model deployment#
To deploy an SDXL model (higher quality, 1024×1024 native resolution), use a different --source_model:
Start docker container:
mkdir -p ${HOME}/models

docker run -d --rm -p 8000:8000 -v ${HOME}/models:/models:rw \
  --user $(id -u):$(id -g) --device /dev/dri --group-add=$(stat -c "%g" /dev/dri/render* | head -n 1) \
  -e http_proxy=$http_proxy -e https_proxy=$https_proxy -e no_proxy=$no_proxy \
  openvino/model_server:2026.2-gpu \
    --rest_port 8000 \
    --model_repository_path /models \
    --task image_generation \
    --source_model OpenVINO/stable-diffusion-xl-base-1.0-int8-ov \
    --target_device GPU
if not exist c:\models mkdir c:\models

ovms --rest_port 8000 ^
  --model_repository_path c:\models ^
  --task image_generation ^
  --source_model OpenVINO/stable-diffusion-xl-base-1.0-int8-ov ^
  --target_device GPU
NOTE: SDXL models require more RAM/vRAM than SD 1.5. Use
--resolution 1024x1024when deploying on NPU.
Option 2. Serving a pre-downloaded model#
If you already have a model on disk (downloaded via Option 1 with --pull, or via huggingface-cli, or converted with Export Models Tool), you can start the server pointing directly to the model directory using --model_name and --model_path:
docker run -d --rm -p 8000:8000 -v ${HOME}/models:/models:rw \
  openvino/model_server:2026.2 \
    --rest_port 8000 \
    --model_name OpenVINO/stable-diffusion-v1-5-int8-ov \
    --model_path /models/OpenVINO/stable-diffusion-v1-5-int8-ov
ovms --rest_port 8000 ^
  --model_name OpenVINO/stable-diffusion-v1-5-int8-ov ^
  --model_path c:\models\OpenVINO\stable-diffusion-v1-5-int8-ov
NOTE: The
graph.pbtxtconfiguration file is auto-generated at runtime when using--task image_generation. You can also customize it manually — see Image Generation calculator reference for all available options.
Readiness Check#
Wait for the model to load. You can check the status with a simple command:
curl http://localhost:8000/v3/models
{
  "object": "list",
  "data": [
    {
      "id": "OpenVINO/stable-diffusion-v1-5-int8-ov",
      "object": "model",
      "created": 0,
      "owned_by": "OVMS"
    }
  ]
}
Request Generation#
A single servable exposes the following endpoints:
Text-to-image:
images/generations— JSON body withpromptImage-to-image:
images/edits— multipart form withimage+prompt(no mask)Inpainting:
images/edits— multipart form withimage+mask+promptOutpainting:
images/edits— multipart form withimage+mask+prompt(image placed on larger canvas, mask marks the area to fill)
Note: Inpainting/outpainting requests are processed sequentially — concurrent requests will be queued.
Note: Dedicated inpainting models (e.g.
stable-diffusion-v1-5/stable-diffusion-inpainting) only support theimages/editsendpoint — they cannot be used for text-to-image generation viaimages/generations. General-purpose models (e.g. SDXL) support both endpoints. Check supported models.
All requests are processed in unary format, with no streaming capabilities.
Requesting images/generations API using cURL#
Linux
curl http://localhost:8000/v3/images/generations \
-H "Content-Type: application/json" \
-d '{
"model": "OpenVINO/stable-diffusion-v1-5-int8-ov",
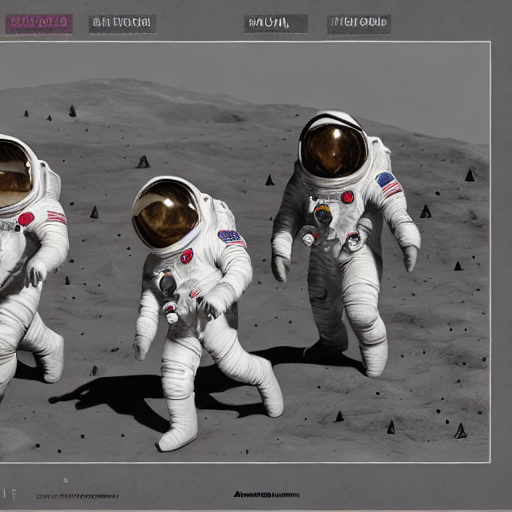
"prompt": "Three astronauts on the moon, cold color palette, muted colors, detailed, 8k",
"rng_seed": 409,
"num_inference_steps": 50,
"size": "512x512"
}'| jq -r '.data[0].b64_json' | base64 --decode > generate_output.png
Windows Powershell
$response = Invoke-WebRequest -Uri "http://localhost:8000/v3/images/generations" `
    -Method POST `
    -Headers @{ "Content-Type" = "application/json" } `
    -Body '{"model": "OpenVINO/stable-diffusion-v1-5-int8-ov", "prompt": "Three astronauts on the moon, cold color palette, muted colors, detailed, 8k", "rng_seed": 409, "num_inference_steps": 50, "size": "512x512"}'

$base64 = ($response.Content | ConvertFrom-Json).data[0].b64_json

[IO.File]::WriteAllBytes('generate_output.png', [Convert]::FromBase64String($base64))
Windows Command Prompt
curl http://localhost:8000/v3/images/generations ^
  -H "Content-Type: application/json" ^
  -d "{\"model\": \"OpenVINO/stable-diffusion-v1-5-int8-ov\", \"prompt\": \"Three astronauts on the moon, cold color palette, muted colors, detailed, 8k\", \"rng_seed\": 409, \"num_inference_steps\": 50, \"size\": \"512x512\"}"
Expected Response
{
  "data": [
    {
      "b64_json": "..."
    }
  ]
}
The commands will have the generated image saved in generate_output.png.
Requesting image generation with OpenAI Python package#
The image generation/edit endpoints are compatible with OpenAI client:
Install the client library:
pip3 install openai pillow
from openai import OpenAI
import base64
from io import BytesIO
from PIL import Image

client = OpenAI(
    base_url="http://localhost:8000/v3",
    api_key="unused"
)

response = client.images.generate(
            model="OpenVINO/stable-diffusion-v1-5-int8-ov",
            prompt="Three astronauts on the moon, cold color palette, muted colors, detailed, 8k",
            extra_body={
                "rng_seed": 409,
                "size": "512x512",
                "num_inference_steps": 50
            }
        )
base64_image = response.data[0].b64_json

image_data = base64.b64decode(base64_image)
image = Image.open(BytesIO(image_data))
image.save('generate_output.png')
Requesting image edit with OpenAI Python package#
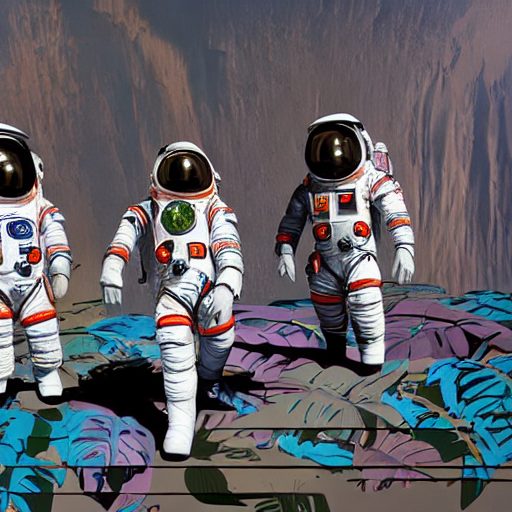
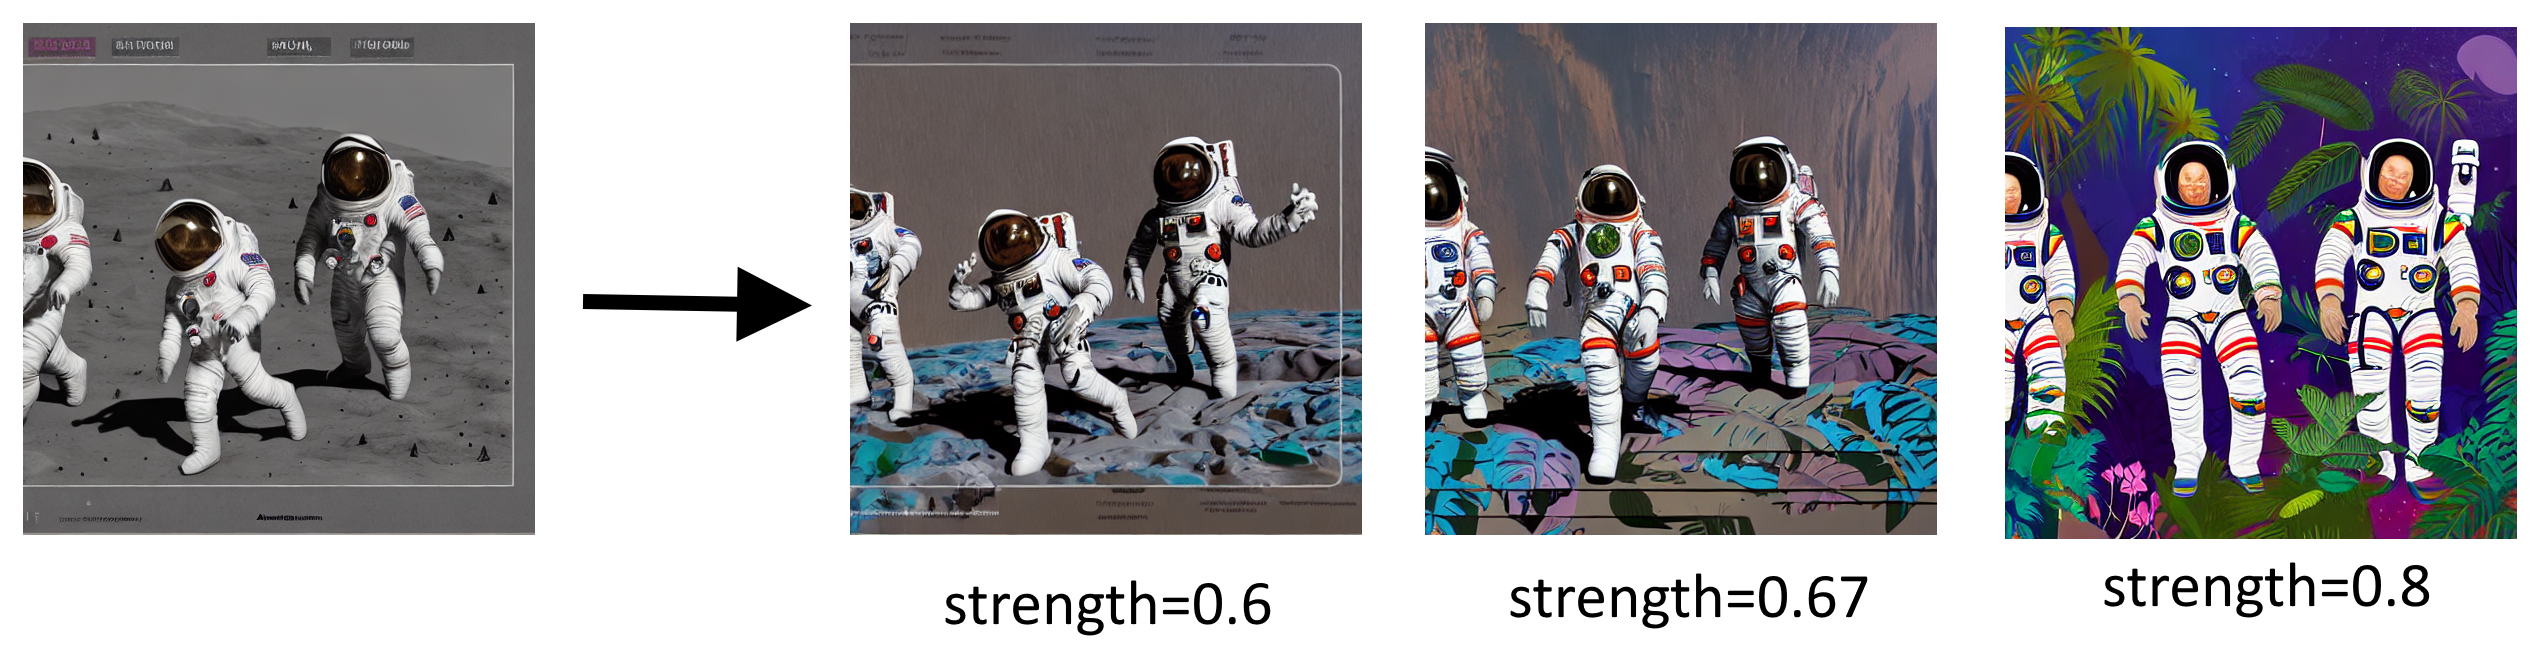
Example changing the previously generated image to: Three astronauts in the jungle, vibrant color palette, live colors, detailed, 8k:
from openai import OpenAI
import base64
from io import BytesIO
from PIL import Image

client = OpenAI(
    base_url="http://localhost:8000/v3",
    api_key="unused"
)

response = client.images.edit(
            model="OpenVINO/stable-diffusion-v1-5-int8-ov",
            image=open("generate_output.png", "rb"),
            prompt="Three astronauts in the jungle, vibrant color palette, live colors, detailed, 8k",
            extra_body={
                "rng_seed": 409,
                "size": "512x512",
                "num_inference_steps": 50,
                "strength": 0.67
            }
        )
base64_image = response.data[0].b64_json

image_data = base64.b64decode(base64_image)
image = Image.open(BytesIO(image_data))
image.save('edit_output.png')
Output file (edit_output.png):
Requesting inpainting with cURL#
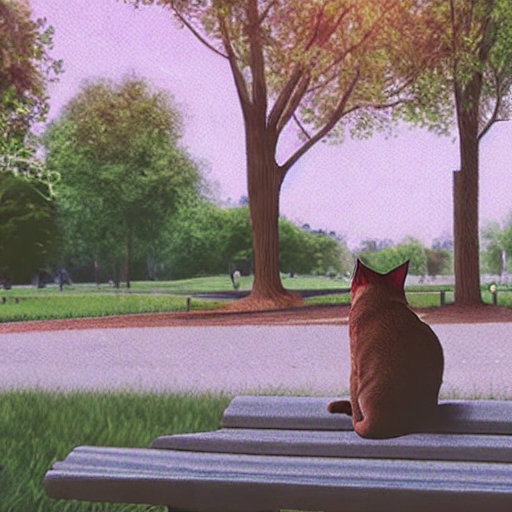
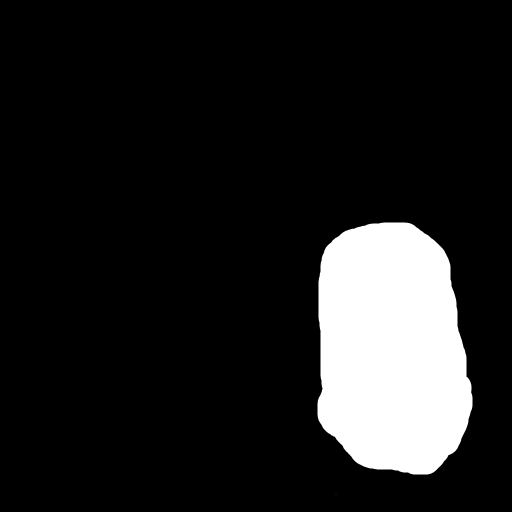
Inpainting replaces a masked region in an image based on the prompt. The mask is a black-and-white image where white pixels mark the area to repaint.
Download sample images:
curl -O https://raw.githubusercontent.com/openvinotoolkit/model_server/releases/2026/2/demos/image_generation/cat.png
curl -O https://raw.githubusercontent.com/openvinotoolkit/model_server/releases/2026/2/demos/image_generation/cat_mask.png
curl http://localhost:8000/v3/images/edits \
-F "model=OpenVINO/stable-diffusion-v1-5-int8-ov" \
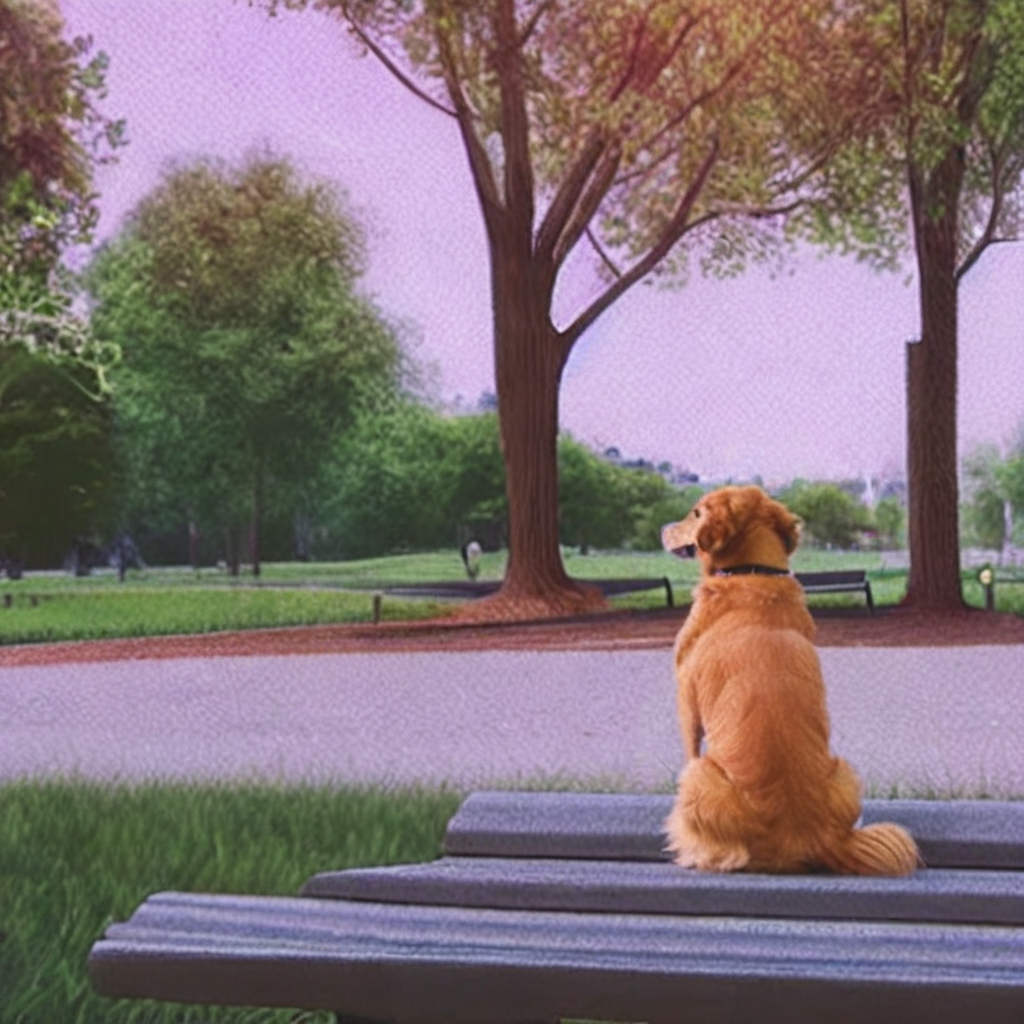
-F "prompt=a golden retriever dog sitting on a bench in a sunny park" \
-F "image=@cat.png" \
-F "mask=@cat_mask.png" \
-F "num_inference_steps=50" \
-F "size=512x512" | jq -r '.data[0].b64_json' | base64 --decode > inpaint_output.png
curl http://localhost:8000/v3/images/edits ^
  -F "model=OpenVINO/stable-diffusion-v1-5-int8-ov" ^
  -F "prompt=a golden retriever dog sitting on a bench in a sunny park" ^
  -F "image=@cat.png" ^
  -F "mask=@cat_mask.png" ^
  -F "num_inference_steps=50" ^
  -F "size=512x512"
Expected output (inpaint_output.png):
Requesting inpainting with OpenAI Python package#
from openai import OpenAI
import base64
from io import BytesIO
from PIL import Image

client = OpenAI(
    base_url="http://localhost:8000/v3",
    api_key="unused"
)

response = client.images.edit(
            model="OpenVINO/stable-diffusion-v1-5-int8-ov",
            image=open("cat.png", "rb"),
            mask=open("cat_mask.png", "rb"),
            prompt="a golden retriever dog sitting on a bench in a sunny park",
            extra_body={
                "num_inference_steps": 50,
                "size": "512x512"
            }
        )
base64_image = response.data[0].b64_json

image_data = base64.b64decode(base64_image)
image = Image.open(BytesIO(image_data))
image.save('inpaint_output.png')
Requesting outpainting with cURL#
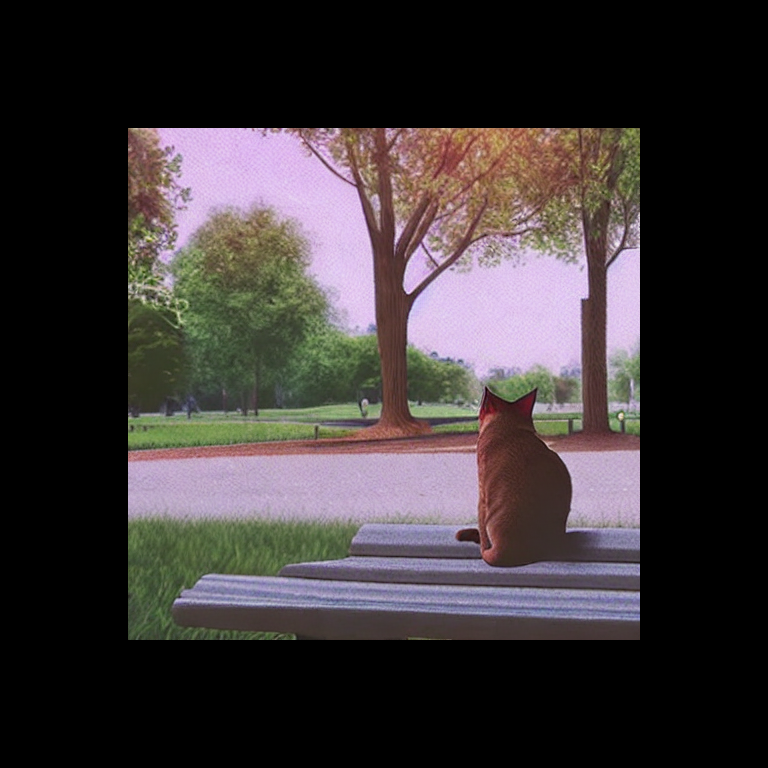
Outpainting extends an image beyond its original borders. Prepare two images:
outpaint_input.png — the original image centered on a larger canvas (e.g. 768×768) with black borders
outpaint_mask.png — white where the new content should be generated (the borders), black where the original image is
Download sample images:
curl -O https://raw.githubusercontent.com/openvinotoolkit/model_server/releases/2026/2/demos/image_generation/outpaint_input.png
curl -O https://raw.githubusercontent.com/openvinotoolkit/model_server/releases/2026/2/demos/image_generation/outpaint_mask.png

curl http://localhost:8000/v3/images/edits \
-F "model=OpenVINO/stable-diffusion-v1-5-int8-ov" \
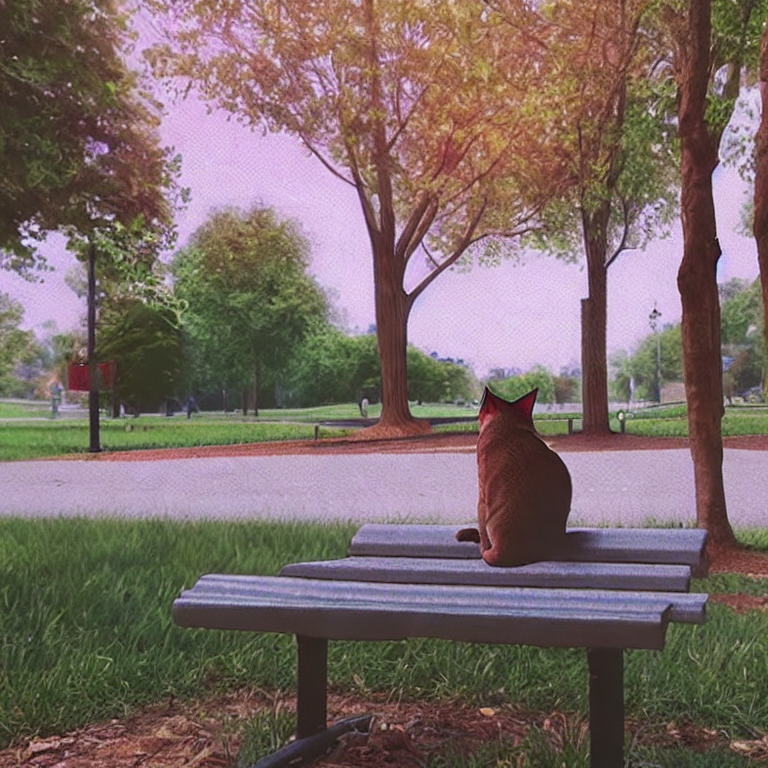
-F "prompt=a cat sitting on a bench in a park" \
-F "image=@outpaint_input.png" \
-F "mask=@outpaint_mask.png" \
-F "num_inference_steps=50" \
-F "size=768x768" | jq -r '.data[0].b64_json' | base64 --decode > outpaint_output.png
curl http://localhost:8000/v3/images/edits ^
  -F "model=OpenVINO/stable-diffusion-v1-5-int8-ov" ^
  -F "prompt=a cat sitting on a bench in a park" ^
  -F "image=@outpaint_input.png" ^
  -F "mask=@outpaint_mask.png" ^
  -F "num_inference_steps=50" ^
  -F "size=768x768"
Expected output (outpaint_output.png):
Requesting outpainting with OpenAI Python package#
from openai import OpenAI
import base64
from io import BytesIO
from PIL import Image

client = OpenAI(
    base_url="http://localhost:8000/v3",
    api_key="unused"
)

response = client.images.edit(
            model="OpenVINO/stable-diffusion-v1-5-int8-ov",
            image=open("outpaint_input.png", "rb"),
            mask=open("outpaint_mask.png", "rb"),
            prompt="a cat sitting on a bench in a park",
            extra_body={
                "num_inference_steps": 50,
                "size": "768x768"
            }
        )
base64_image = response.data[0].b64_json

image_data = base64.b64decode(base64_image)
image = Image.open(BytesIO(image_data))
image.save('outpaint_output.png')
Using dedicated inpainting models#
For best inpainting/outpainting quality, use a dedicated inpainting model. These models have a 9-channel UNet specifically trained for masked generation.
Example models for inpainting:
OpenVINO/dreamshaper-8-inpainting-int8-ov— SD 1.5 based, 512×512 native resolutionOpenVINO/stable-diffusion-xl-base-1.0-int8-ov— SDXL based, 1024×1024 native resolution (supports all endpoints including inpainting)
For the full list see supported image generation models.
Note: Dedicated inpainting models only expose the
images/editsendpoint (with mask). Text-to-image and image-to-image requests will return an error indicating the pipeline is not available for this model. Base models (e.g.stable-diffusion-v1-5/stable-diffusion-v1-5) support all endpoints including inpainting.
mkdir -p ${HOME}/models

docker run -d --rm -p 8000:8000 -v ${HOME}/models:/models:rw \
  --user $(id -u):$(id -g) --device /dev/dri --group-add=$(stat -c "%g" /dev/dri/render* | head -n 1) \
  -e http_proxy=$http_proxy -e https_proxy=$https_proxy -e no_proxy=$no_proxy \
  openvino/model_server:2026.2-gpu \
    --rest_port 8000 \
    --model_repository_path /models \
    --task image_generation \
    --source_model OpenVINO/dreamshaper-8-inpainting-int8-ov \
    --target_device GPU
if not exist c:\models mkdir c:\models

ovms --rest_port 8000 ^
  --model_repository_path c:\models ^
  --task image_generation ^
  --source_model OpenVINO/dreamshaper-8-inpainting-int8-ov ^
  --target_device GPU
Strength influence on final image#
Please follow OpenVINO notebook to understand how other parameters affect editing.
Multi-LoRA Image Generation#
This section demonstrates how to serve multiple LoRA adapters with a single SDXL base model, enabling per-request style selection. This replicates the Multi LoRA Image Generation notebook but using OVMS for serving.
Start Server with Multiple LoRA Adapters#
The following command starts OVMS with Stable Diffusion XL and 5 LoRA adapters for different artistic styles:
mkdir -p models

docker run -d --rm --user $(id -u):$(id -g) -p 8000:8000 -v $(pwd)/models:/models/:rw \
  --device /dev/dri --group-add=$(stat -c "%g" /dev/dri/render* | head -n 1) \
  -e http_proxy=$http_proxy -e https_proxy=$https_proxy -e no_proxy=$no_proxy \
  openvino/model_server:2026.2-gpu \
    --rest_port 8000 \
    --model_repository_path /models/ \
    --task image_generation \
    --source_model OpenVINO/stable-diffusion-xl-base-1.0-int8-ov \
    --target_device GPU \
    --source_loras "xray=DoctorDiffusion/doctor-diffusion-s-xray-xl-lora@DD-xray-v1.safetensors,thepoint=alvdansen/the-point@araminta_k_the_point.safetensors,ukiyo=KappaNeuro/ukiyo-e-art@Ukiyo-e%20Art.safetensors,vector=DoctorDiffusion/doctor-diffusion-s-controllable-vector-art-xl-lora@DD-vector-v2.safetensors,chalk=Norod78/sdxl-chalkboarddrawing-lora@SDXL_ChalkBoardDrawing_LoRA_r8.safetensors"
if not exist c:\models mkdir c:\models

ovms --rest_port 8000 ^
  --model_repository_path c:\models ^
  --task image_generation ^
  --source_model OpenVINO/stable-diffusion-xl-base-1.0-int8-ov ^
  --target_device GPU ^
  --source_loras "xray=DoctorDiffusion/doctor-diffusion-s-xray-xl-lora@DD-xray-v1.safetensors,thepoint=alvdansen/the-point@araminta_k_the_point.safetensors,ukiyo=KappaNeuro/ukiyo-e-art@Ukiyo-e%20Art.safetensors,vector=DoctorDiffusion/doctor-diffusion-s-controllable-vector-art-xl-lora@DD-vector-v2.safetensors,chalk=Norod78/sdxl-chalkboarddrawing-lora@SDXL_ChalkBoardDrawing_LoRA_r8.safetensors"
The registered adapters and their recommended use:
Alias |
Repository |
Style |
Recommended Alpha |
Prompt Template |
|---|---|---|---|---|
|
DoctorDiffusion/doctor-diffusion-s-xray-xl-lora |
X-Ray style |
1.0 |
|
|
alvdansen/the-point |
Artistic illustration |
1.0 |
|
|
KappaNeuro/ukiyo-e-art |
Ukiyo-e Japanese art |
1.0 |
|
|
DoctorDiffusion/doctor-diffusion-s-controllable-vector-art-xl-lora |
Vector art |
1.0 |
|
|
Norod78/sdxl-chalkboarddrawing-lora |
Chalkboard drawing |
1.0 |
|
Generate Images with Different Styles#
Use the adapter alias as the model field to select which adapter to apply per request. The adapter is activated via model name routing — when the model field matches a registered LoRA alias, that adapter is automatically applied.
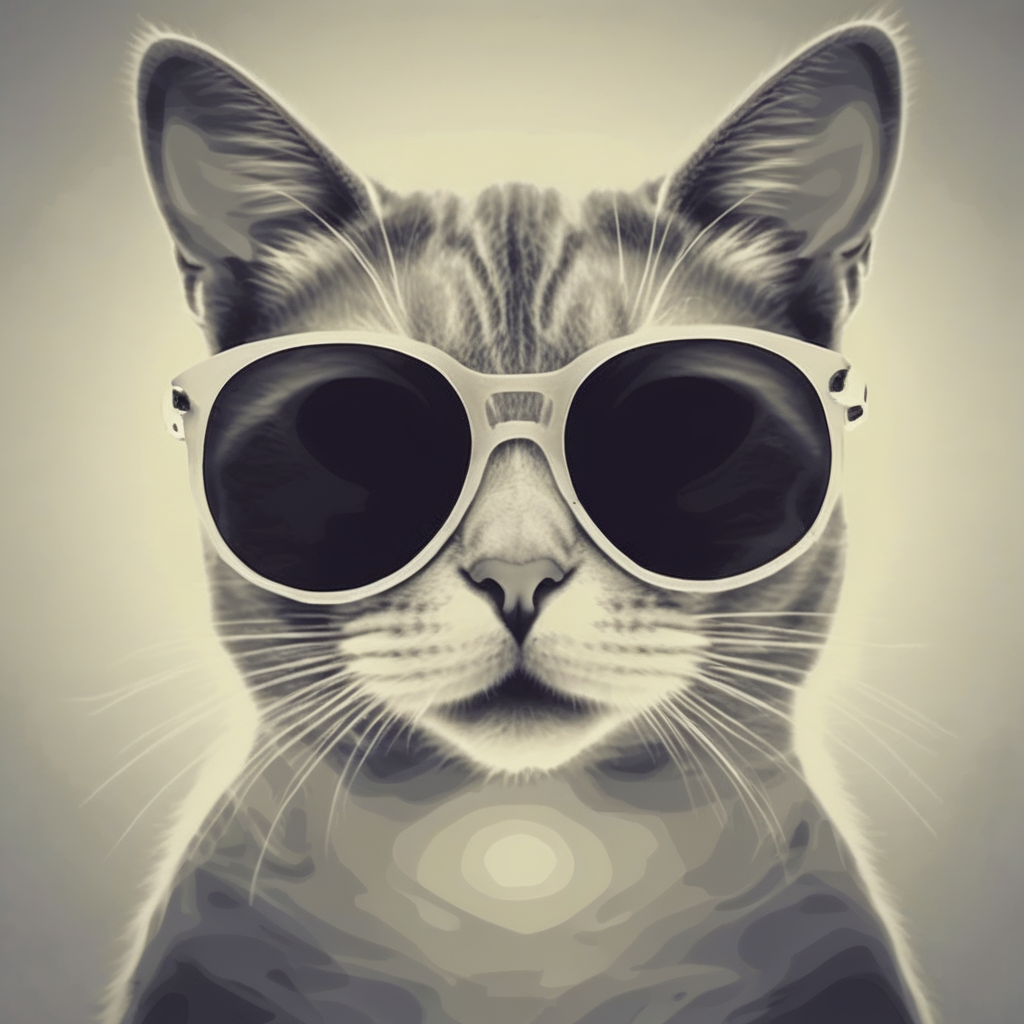
X-Ray style:
curl http://localhost:8000/v3/images/generations \
  -H "Content-Type: application/json" \
  -d '{
    "model": "xray",
    "prompt": "xray a cute cat in sunglasses",
    "num_inference_steps": 40,
    "guidance_scale": 7.5,
    "size": "1024x1024"
  }' | jq -r '.data[0].b64_json' | base64 --decode > xray_cat.png
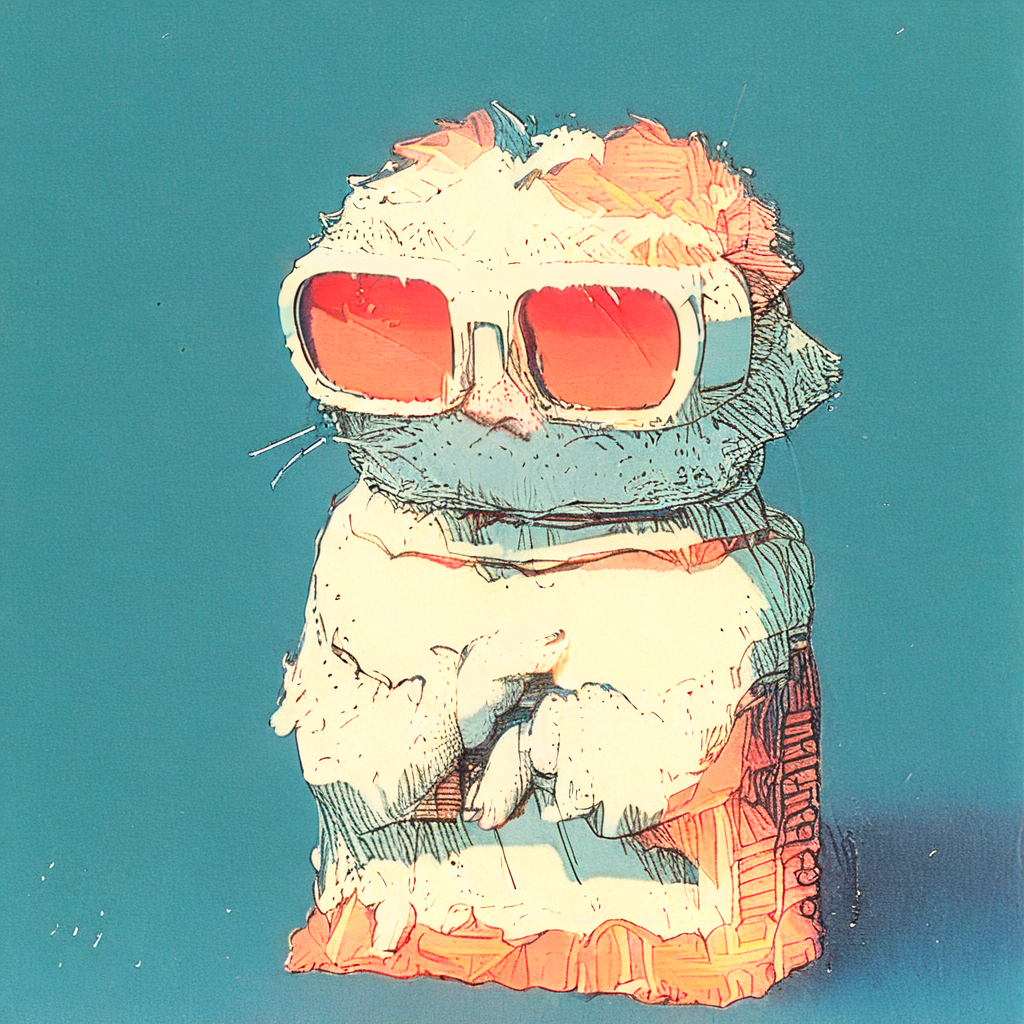
Artistic illustration (The Point):
curl http://localhost:8000/v3/images/generations \
  -H "Content-Type: application/json" \
  -d '{
    "model": "thepoint",
    "prompt": "a cute cat in sunglasses",
    "num_inference_steps": 40,
    "guidance_scale": 7.5,
    "size": "1024x1024"
  }' | jq -r '.data[0].b64_json' | base64 --decode > thepoint_cat.png
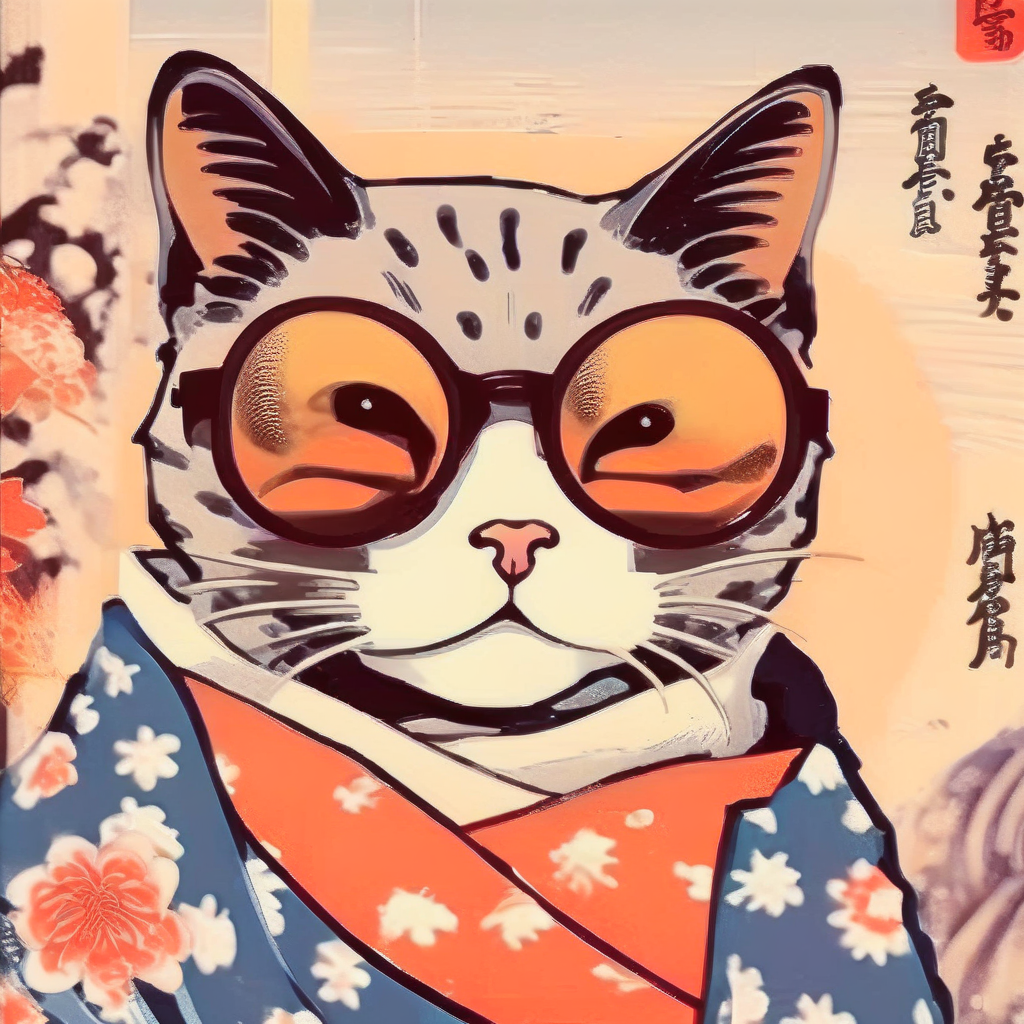
Ukiyo-e Japanese art:
curl http://localhost:8000/v3/images/generations \
  -H "Content-Type: application/json" \
  -d '{
    "model": "ukiyo",
    "prompt": "an illustration of a cute cat in sunglasses in Ukiyo-e Art style",
    "num_inference_steps": 40,
    "guidance_scale": 7.5,
    "size": "1024x1024"
  }' | jq -r '.data[0].b64_json' | base64 --decode > ukiyo_cat.png
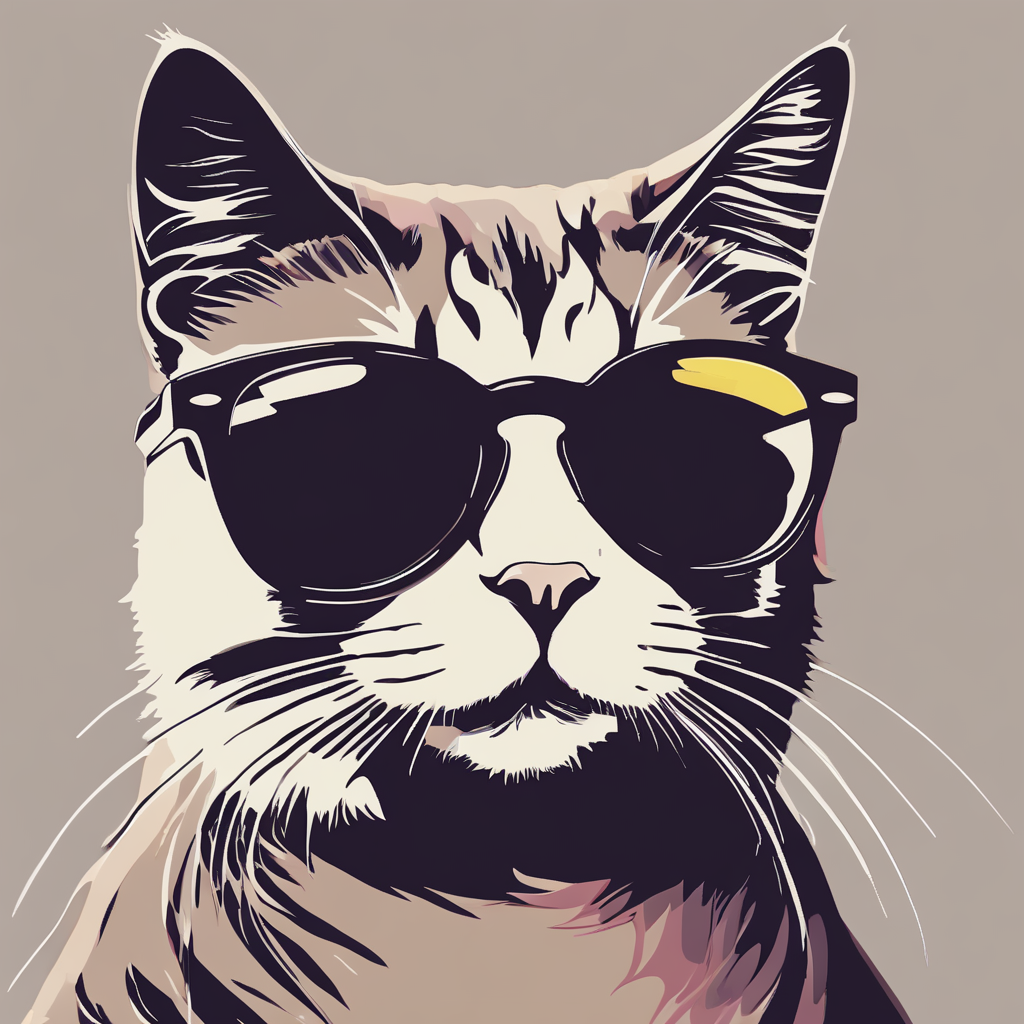
Vector art:
curl http://localhost:8000/v3/images/generations \
  -H "Content-Type: application/json" \
  -d '{
    "model": "vector",
    "prompt": "vector a cute cat in sunglasses",
    "num_inference_steps": 40,
    "guidance_scale": 7.5,
    "size": "1024x1024"
  }' | jq -r '.data[0].b64_json' | base64 --decode > vector_cat.png
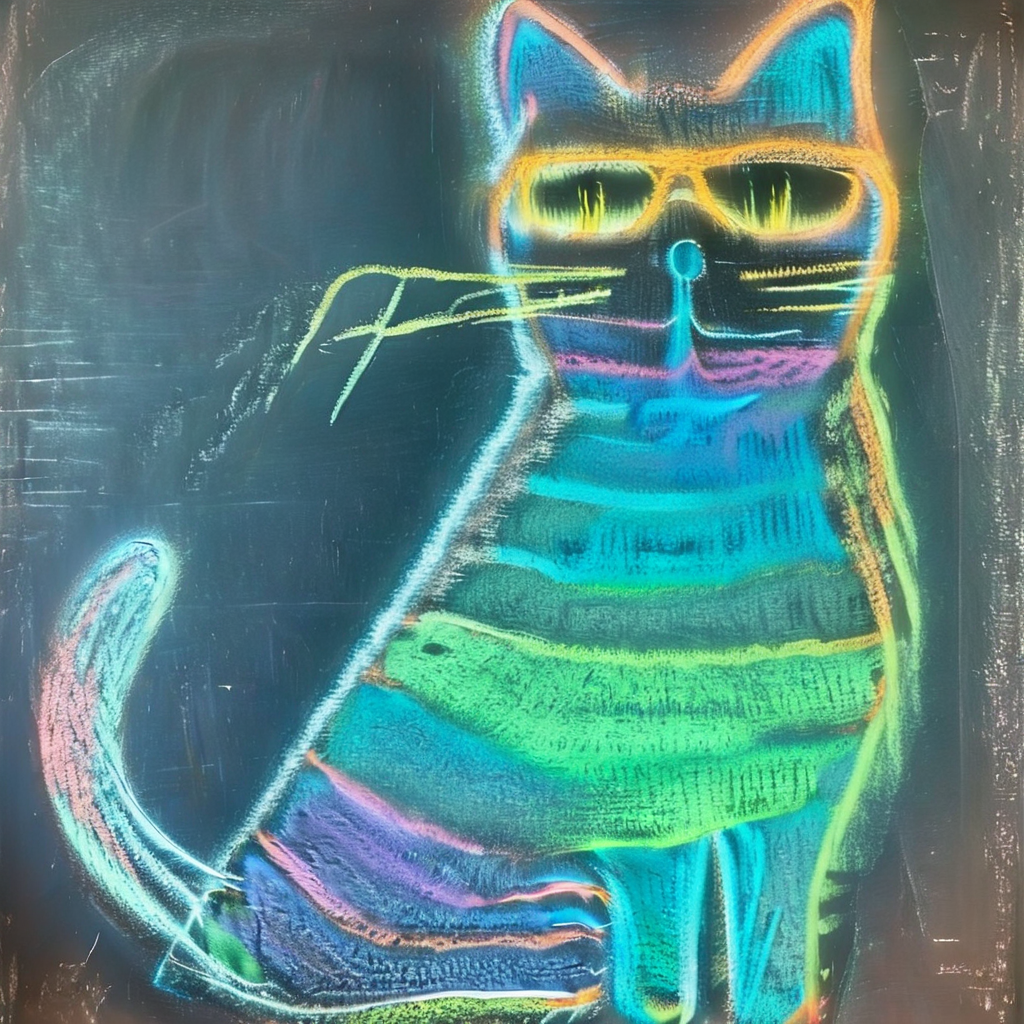
Chalkboard drawing:
curl http://localhost:8000/v3/images/generations \
  -H "Content-Type: application/json" \
  -d '{
    "model": "chalk",
    "prompt": "A colorful chalkboard drawing of a cute cat in sunglasses",
    "num_inference_steps": 40,
    "guidance_scale": 7.5,
    "size": "1024x1024"
  }' | jq -r '.data[0].b64_json' | base64 --decode > chalk_cat.png
Optionally override the adapter alpha using lora_alphas:
curl http://localhost:8000/v3/images/generations \
  -H "Content-Type: application/json" \
  -d '{
    "model": "xray",
    "prompt": "xray a cute cat in sunglasses",
    "lora_alphas": {"xray": 0.5},
    "num_inference_steps": 40,
    "guidance_scale": 7.5,
    "size": "1024x1024"
  }' | jq -r '.data[0].b64_json' | base64 --decode > xray_cat_half_alpha.png
Using OpenAI Python Client with LoRA#
from openai import OpenAI
import base64
from io import BytesIO
from PIL import Image

client = OpenAI(
    base_url="http://localhost:8000/v3",
    api_key="unused"
)

# Define LoRA styles — the adapter alias is used as the model name
styles = {
    "xray": {"prompt": "xray {subject}"},
    "thepoint": {"prompt": "{subject}"},
    "ukiyo": {"prompt": "an illustration of {subject} in Ukiyo-e Art style"},
    "vector": {"prompt": "vector {subject}"},
    "chalk": {"prompt": "A colorful chalkboard drawing of {subject}"},
}

subject = "a cute cat in sunglasses"

for style_name, style_config in styles.items():
    prompt = style_config["prompt"].format(subject=subject)
    response = client.images.generate(
        model=style_name,  # adapter alias activates the LoRA
        prompt=prompt,
        extra_body={
            "num_inference_steps": 40,
            "guidance_scale": 7.5,
            "size": "1024x1024",
        }
    )
    image_data = base64.b64decode(response.data[0].b64_json)
    image = Image.open(BytesIO(image_data))
    image.save(f'{style_name}_cat.png')
    print(f"Saved {style_name}_cat.png")
Blending Multiple Adapters#
To blend multiple adapters, define a composite adapter at startup using the @alias:alpha syntax:
--source_loras="xray=...,ukiyo=...,blend=@xray:0.5+@ukiyo:0.4"
Then use the composite alias as the model name:
response = client.images.generate(
    model="blend",  # activates both xray and ukiyo
    prompt="a cute cat in sunglasses",
    extra_body={
        "num_inference_steps": 40,
        "guidance_scale": 7.5,
        "size": "1024x1024",
    }
)
You can override individual component alphas at request time:
response = client.images.generate(
    model="blend",
    prompt="a cute cat in sunglasses",
    extra_body={
        "lora_alphas": {"xray": 0.8, "ukiyo": 0.2},
        "num_inference_steps": 40,
        "guidance_scale": 7.5,
        "size": "1024x1024",
    }
)
Note: For more details on LoRA adapter configuration, see the Image Generation reference documentation.