DL Workbench can lower the precision of a model from FP32 to INT8 with a process called calibration. Calibration accelerates the performance of certain models on hardware that supports INT8. An INT8 model takes up less memory footprint and speeds up inference time at the cost of a small reduction in accuracy.
When INT8 is selected from the Optimize tab, the DL Workbench automatically quantizes the selected model to INT8 by running a calibration procedure and then generating a quantized version of the model.
To read more about INT8 inference, see Using Low-Precision INT8 Integer Inference and Post-Training Optimization Toolkit.
NOTE: INT8 calibration is not available in the following cases:
- your project uses a generated dataset
- your project uses a model with Intermediate Representation (IR) versions lower than 10
- your model is already calibrated
- you run the project on a GPU or VPU plugin
INT8 Calibration Methods
DL Workbench supports two calibration methods: maximum performance calibration (optimization method: Default) and maximum accuracy calibration (optimization method: AccuracyAware).
TIP: As a rule, the smaller the calibration subset, the less time the algorithms take. It is recommended to use at least a 3-5% subset of the validation dataset (300-1000 images).
NOTE: A model optimized by the Default method translates all layers that support INT8 execution into INT8 precision, while the AccuracyAware method translates only those layers that both can be executed in INT8 precision and almost do not affect increase accuracy drop.
Maximum Performance Optimization
Maximum performance calibration optimizes your model to achieve best performance. The algorithm usually produces the fastest model and usually but not always results in accuracy drop within 1%. Also, this algorithm takes less time than the AccuracyAware optimization method.
Maximum Accuracy Optimization
Maximum accuracy calibration optimizes your model to achieve best performance possible with the specified maximum acceptable accuracy drop. Maximum accuracy calibration might result in lower performance compared to the Maximum performance calibration, while the accuracy drop is predictable. Accuracy drop is the difference between the original model accuracy and the optimized model accuracy. Accuracy of the optimized model is guaranteed to be not smaller than the difference between the original model accuracy and the accuracy drop.
Workflow
The overall flow for converting a model from FP32 to INT8 is:
- Select an FP32 model
- Select an appropriate dataset
- Run a baseline inference
- Configure INT8 calibration settings
- Configure inference settings for a calibrated model
- View INT8 calibration
- View inference results
- Compare the calibrated model with the original FP32 model
Only some convolution models in the FP32 format can be calibrated to INT8. If your model is incompatible, you receive an error message. Find more details on error conditions and solution paths in Troubleshooting.
Use the links above to walk through the steps and workflow for creating a calibrated model. Topics specific only to the INT8 calibration process (steps 4 and 6, above) are described below.
Configure INT8 Calibration Settings
Once a model has been profiled by the DL Workbench, you can convert it from FP32 to to INT8. For non-FP32 models, the INT8 option is grayed out.
NOTE: Using INT8 calibration, you can tune only an original (top-level) model.
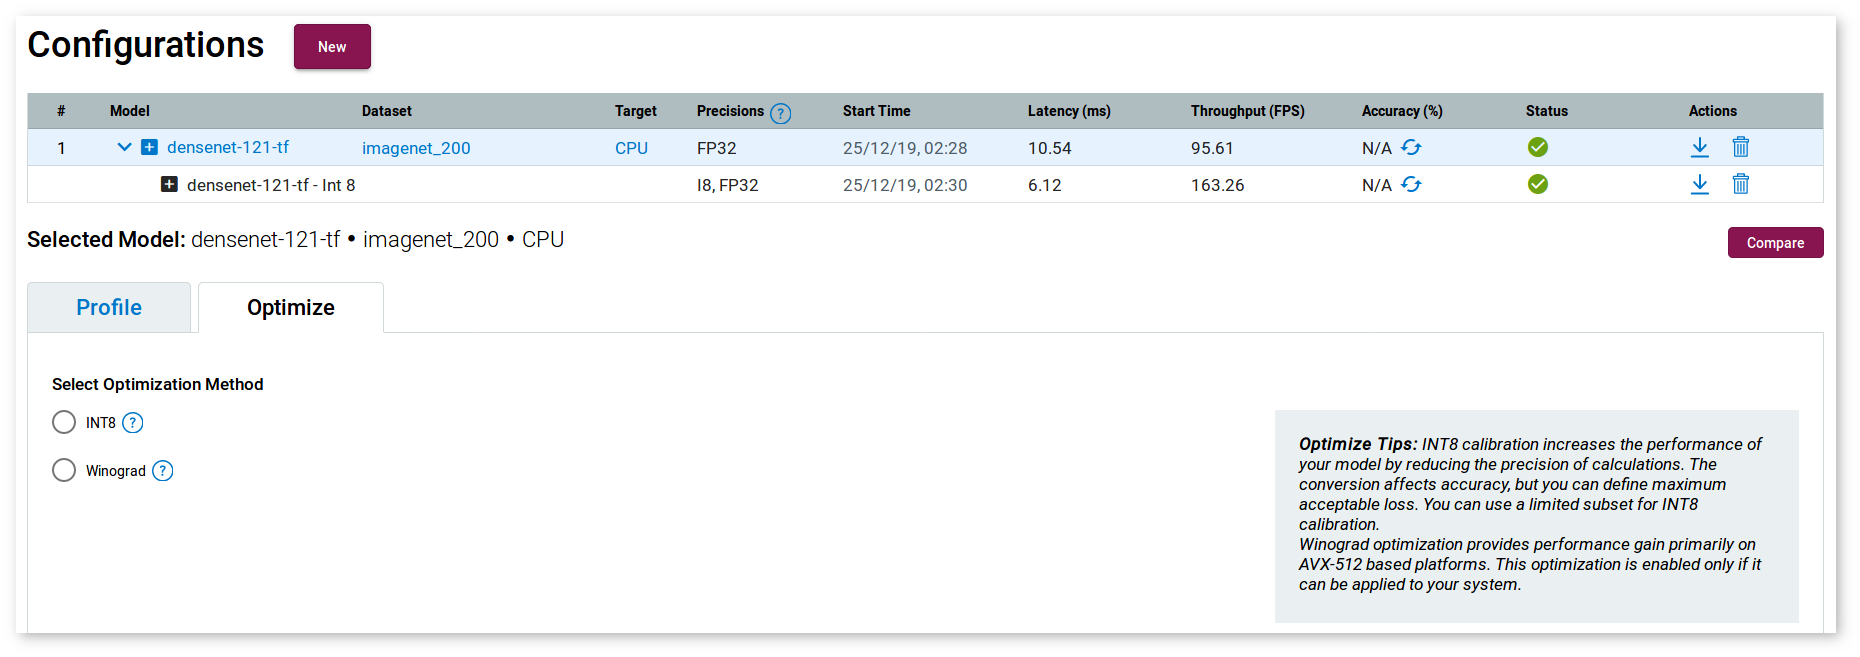
Select the Optimize tab, check INT8 and click Optimize. It takes you to the Calibrator Options page where you must select the optimization method:
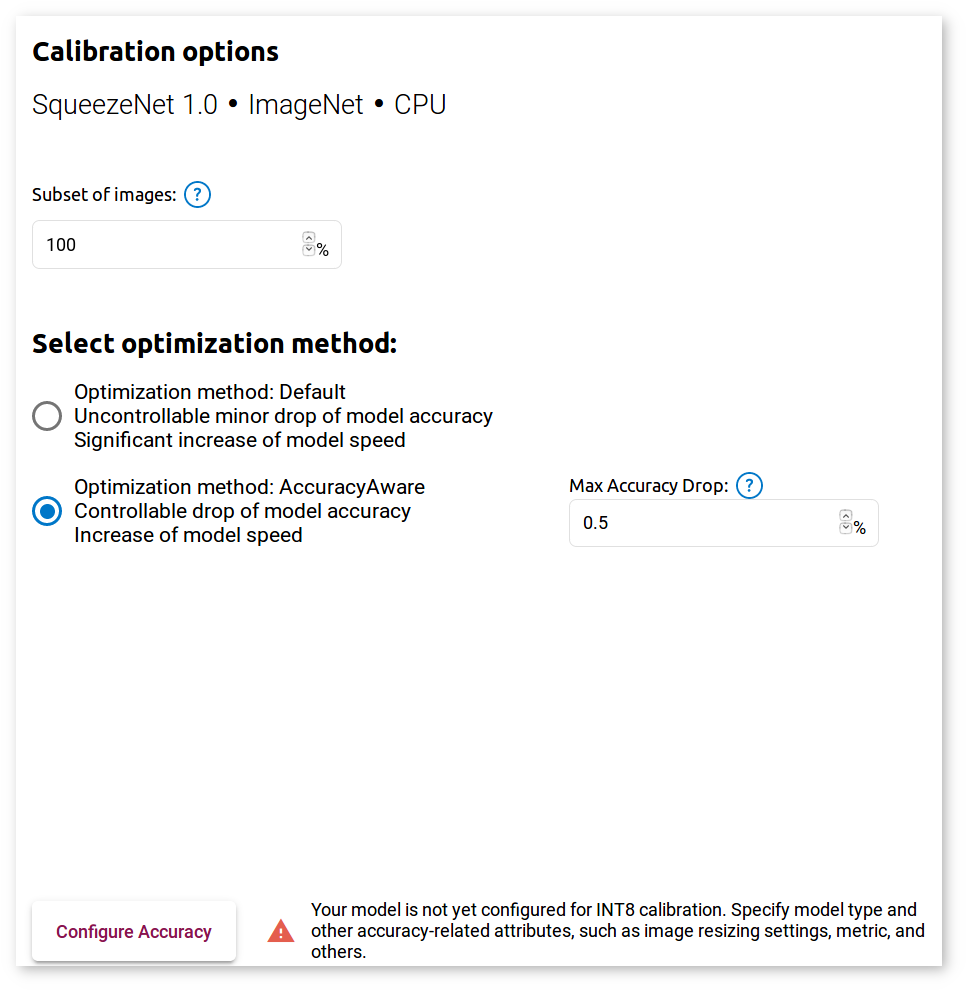
For any method, specify the percentage of images you will use during the calibration procedure in the Subset of Images box. The default value is 100%.
For the AccuracyAware option, specify the Maximum Accuracy Drop to instruct the application to only convert layers that do not exceed the maximum accuracy drop you are willing to sacrifice. If a layer is estimated to exceed this value, it is not calibrated and remains at the original precision.
Click Configure Accuracy and select the model usage in the new window. After you click Save, you are directed back to the previous window. Click Calibrate.
View INT8 Calibration
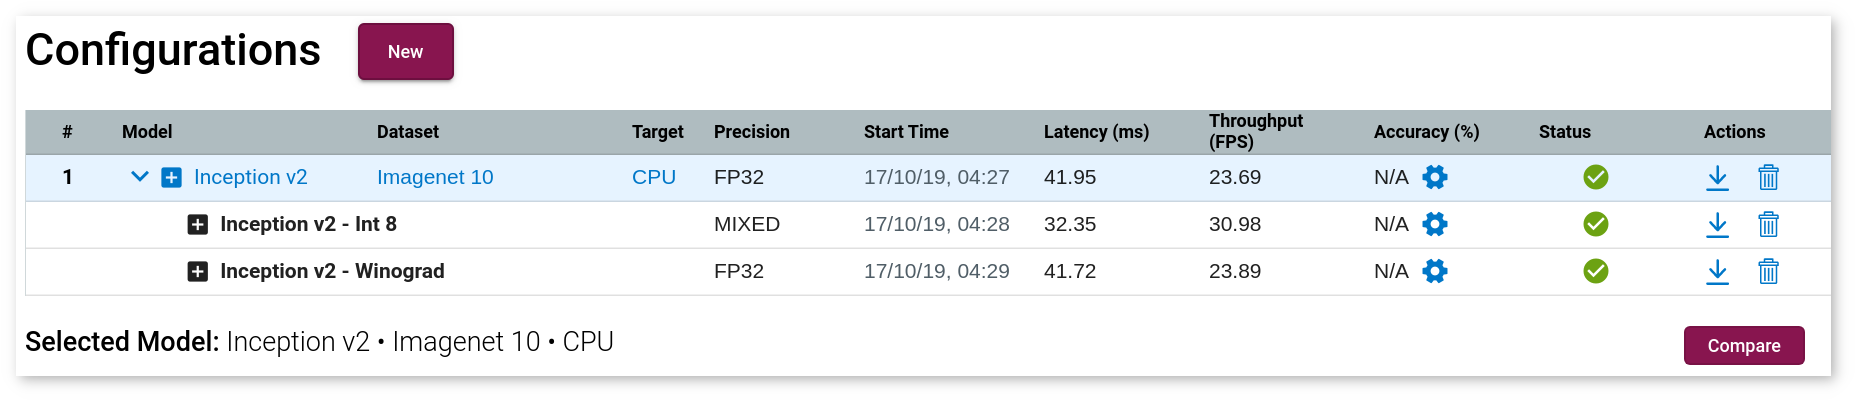
Click Calibrate, and a new row appears for your model.

View INT8 Calibration Results
Once the job is done, you can compare an optimized model with the original model. For more details, go to Compare Performance between Two Versions of Models.
The value of the outputPrecisions parameter in the Layer Name table for layers of INT8 optimized models is U8 (INT8 unsigned integer value):