3D Human Pose Estimation Python* Demo


This demo demonstrates how to run 3D Human Pose Estimation models using OpenVINO™.
NOTE: Only batch size of 1 is supported.
How It Works
The demo application expects a 3D human pose estimation model in the Intermediate Representation (IR) format.
As input, the demo application can take:
a path to a video file or a device node of a webcam.
a list of image paths.
The demo workflow is the following:
The demo application reads video frames one by one and estimates 3D human poses in a given frame.
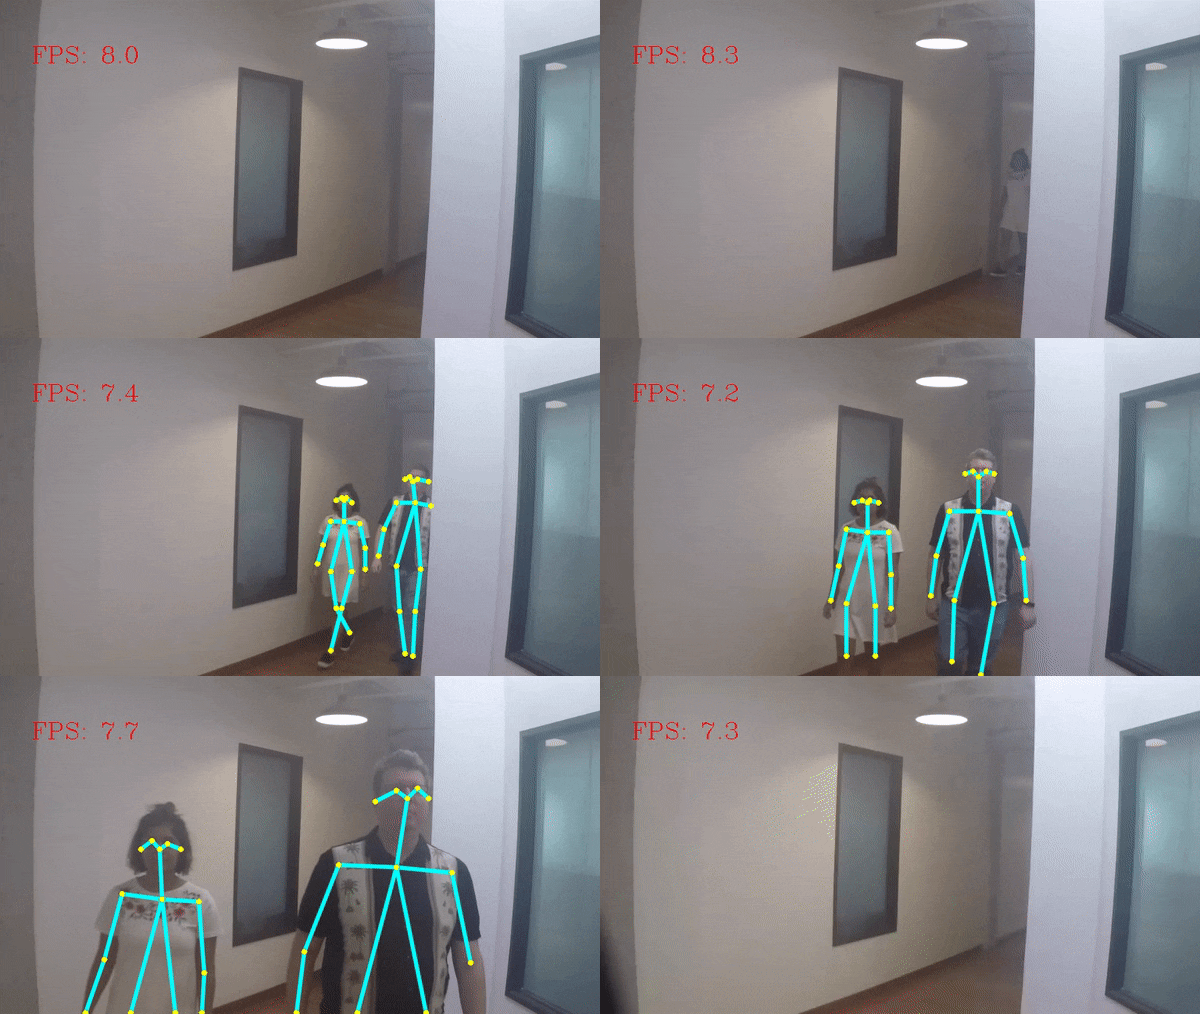
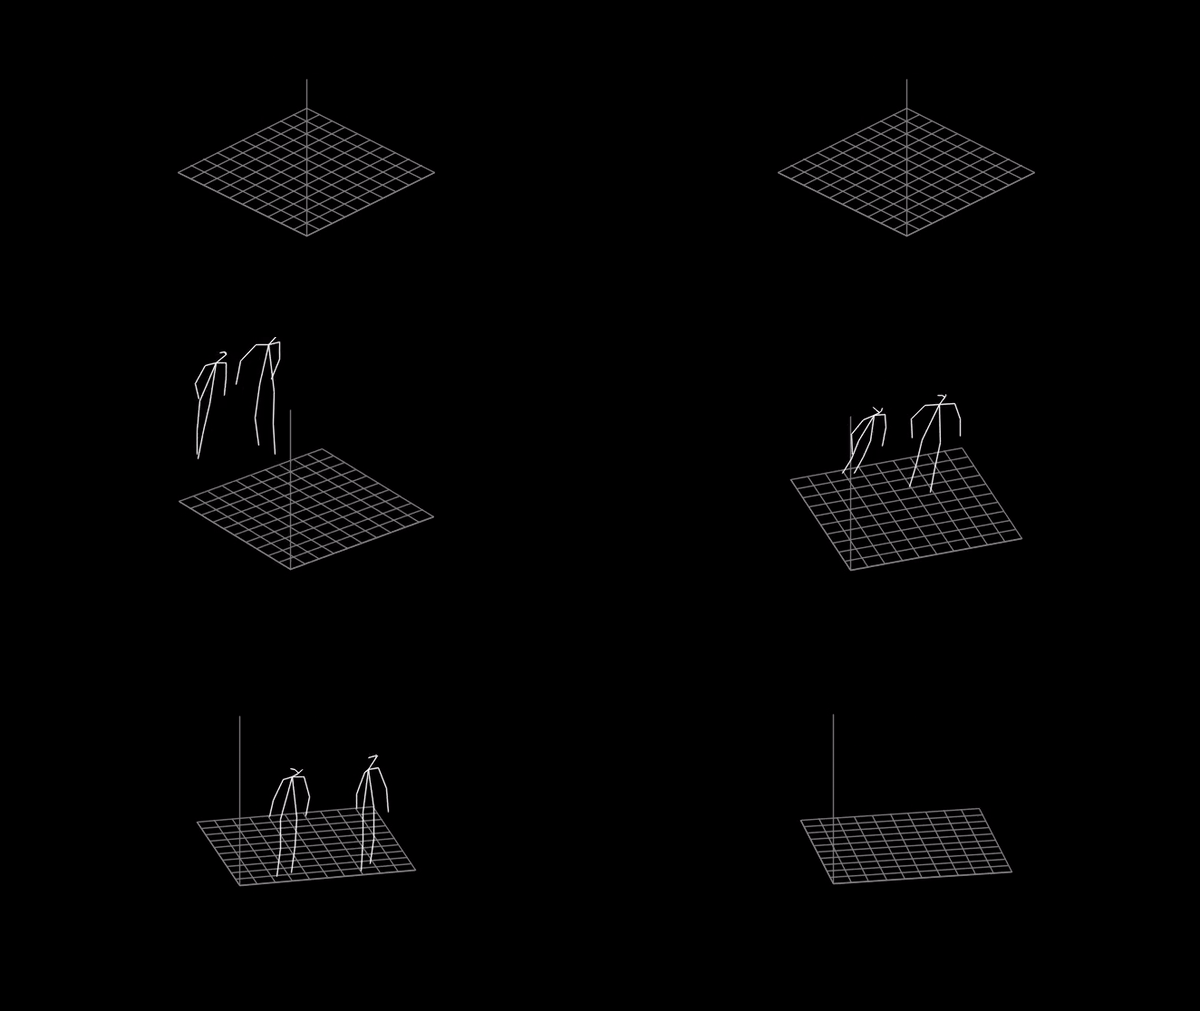
The app visualizes results of its work as graphical window with 2D poses, which are overlaid on input image, and canvas with corresponding 3D poses.
NOTE: By default, Open Model Zoo demos expect input with BGR channels order. If you trained your model to work with RGB order, you need to manually rearrange the default channels order in the demo application or reconvert your model using the Model Optimizer tool with the
--reverse_input_channelsargument specified. For more information about the argument, refer to When to Reverse Input Channels section of [Embedding Preprocessing Computation](@ref openvino_docs_MO_DG_Additional_Optimization_Use_Cases).
Preparing to Run
For demo input image or video files, refer to the section Media Files Available for Demos in the Open Model Zoo Demos Overview.
The list of models supported by the demo is in <omz_dir>/demos/human_pose_estimation_3d_demo/python/models.lst file.
This file can be used as a parameter for Model Downloader and Converter to download and, if necessary, convert models to OpenVINO IR format (*.xml + *.bin).
An example of using the Model Downloader:
omz_downloader --list models.lst
An example of using the Model Converter:
omz_converter --list models.lst
Supported Models
human-pose-estimation-3d-0001
NOTE: Refer to the tables Intel’s Pre-Trained Models Device Support and Public Pre-Trained Models Device Support for the details on models inference support at different devices.
Prerequisites
This demo application requires a native Python extension module to be built before you can run it.
Refer to Open Model Zoo Demos for instructions on how to build it and prepare the environment for running the demo. Once the demo is built with Python extension modules, add the path of the demo build folder to the PYTHONPATH environment variable.
Running
Run the application with the -h option to see the following usage message:
usage: human_pose_estimation_3d_demo.py [-h] -m MODEL -i INPUT [--loop]
                                        [-o OUTPUT] [-limit OUTPUT_LIMIT]
                                        [-d DEVICE] [--height_size HEIGHT_SIZE]
                                        [--extrinsics_path EXTRINSICS_PATH]
                                        [--fx FX] [--no_show]
                                        [-u UTILIZATION_MONITORS]

Lightweight 3D human pose estimation demo. Press esc to exit, "p" to (un)pause
video or process next image.

Options:
  -h, --help            Show this help message and exit.
  -m MODEL, --model MODEL
                        Required. Path to an .xml file with a trained model.
  -i INPUT, --input INPUT
                        Required. An input to process. The input must be a single image,
                        a folder of images, video file or camera id.
  --loop                Optional. Enable reading the input in a loop.
  -o OUTPUT, --output OUTPUT
                        Optional. Name of the output file(s) to save. Frames of odd width or height can be truncated. See https://github.com/opencv/opencv/pull/24086
  -limit OUTPUT_LIMIT, --output_limit OUTPUT_LIMIT
                        Optional. Number of frames to store in output.
                        If 0 is set, all frames are stored.
  -d DEVICE, --device DEVICE
                        Optional. Specify the target device to infer on: CPU or
                        GPU. The demo will look for a
                        suitable plugin for device specified (by default, it
                        is CPU).
  --height_size HEIGHT_SIZE
                        Optional. Network input layer height size.
  --extrinsics_path EXTRINSICS_PATH
                        Optional. Path to file with camera extrinsics.
  --fx FX               Optional. Camera focal length.
  --no_show             Optional. Do not display output.
  -u UTILIZATION_MONITORS, --utilization_monitors UTILIZATION_MONITORS
                        Optional. List of monitors to show initially.
Running the application with an empty list of options yields the short version of the usage message and an error message.
To run the demo, please provide paths to the model in the IR format, and to an input video or image(s):
python human_pose_estimation_3d_demo.py \
  -m <path_to_model>/human-pose-estimation-3d-0001.xml \
  -i <path_to_video>/video_name.mp4
NOTE: If you provide a single image as an input, the demo processes and renders it quickly, then exits. To continuously visualize inference results on the screen, apply the
loopoption, which enforces processing a single image in a loop.
You can save processed results to a Motion JPEG AVI file or separate JPEG or PNG files using the -o option:
To save processed results in an AVI file, specify the name of the output file with
aviextension, for example:-o output.avi.To save processed results as images, specify the template name of the output image file with
jpgorpngextension, for example:-o output_%03d.jpg. The actual file names are constructed from the template at runtime by replacing regular expression%03dwith the frame number, resulting in the following:output_000.jpg,output_001.jpg, and so on. To avoid disk space overrun in case of continuous input stream, like camera, you can limit the amount of data stored in the output file(s) with thelimitoption. The default value is 1000. To change it, you can apply the-limit Noption, whereNis the number of frames to store.
NOTE: Windows* systems may not have the Motion JPEG codec installed by default. If this is the case, you can download OpenCV FFMPEG back end using the PowerShell script provided with the OpenVINO ™ install package and located at
<INSTALL_DIR>/opencv/ffmpeg-download.ps1. The script should be run with administrative privileges if OpenVINO ™ is installed in a system protected folder (this is a typical case). Alternatively, you can save results as images.
Demo Output
The application uses OpenCV to display estimated poses. The demo reports
FPS: average rate of video frame processing (frames per second).
Latency: average time required to process one frame (from reading the frame to displaying the results). You can use both of these metrics to measure application-level performance.