Jupyter* Playground delivered by the DL Workbench helps you learn how to use OpenVINO™, its Python* API, and its components essential to analyze and optimize models. The playground enables you to quick start with OpenVINO™ by providing a preconfigured OpenVINO™ environment.
The JupyterLab* playground is built in the same Docker* image as the DL Workbench.
If the DL Workbench is not already running on your machine, open a terminal and use the command below to run the application.
NOTE: The command runs the DL Workbench with default settings. See Install DL Workbench for other options and details.
Choose one of the ways to access the playground:
NOTE: The playground opens in a new tab. Make sure your browser does not block pop-ups.
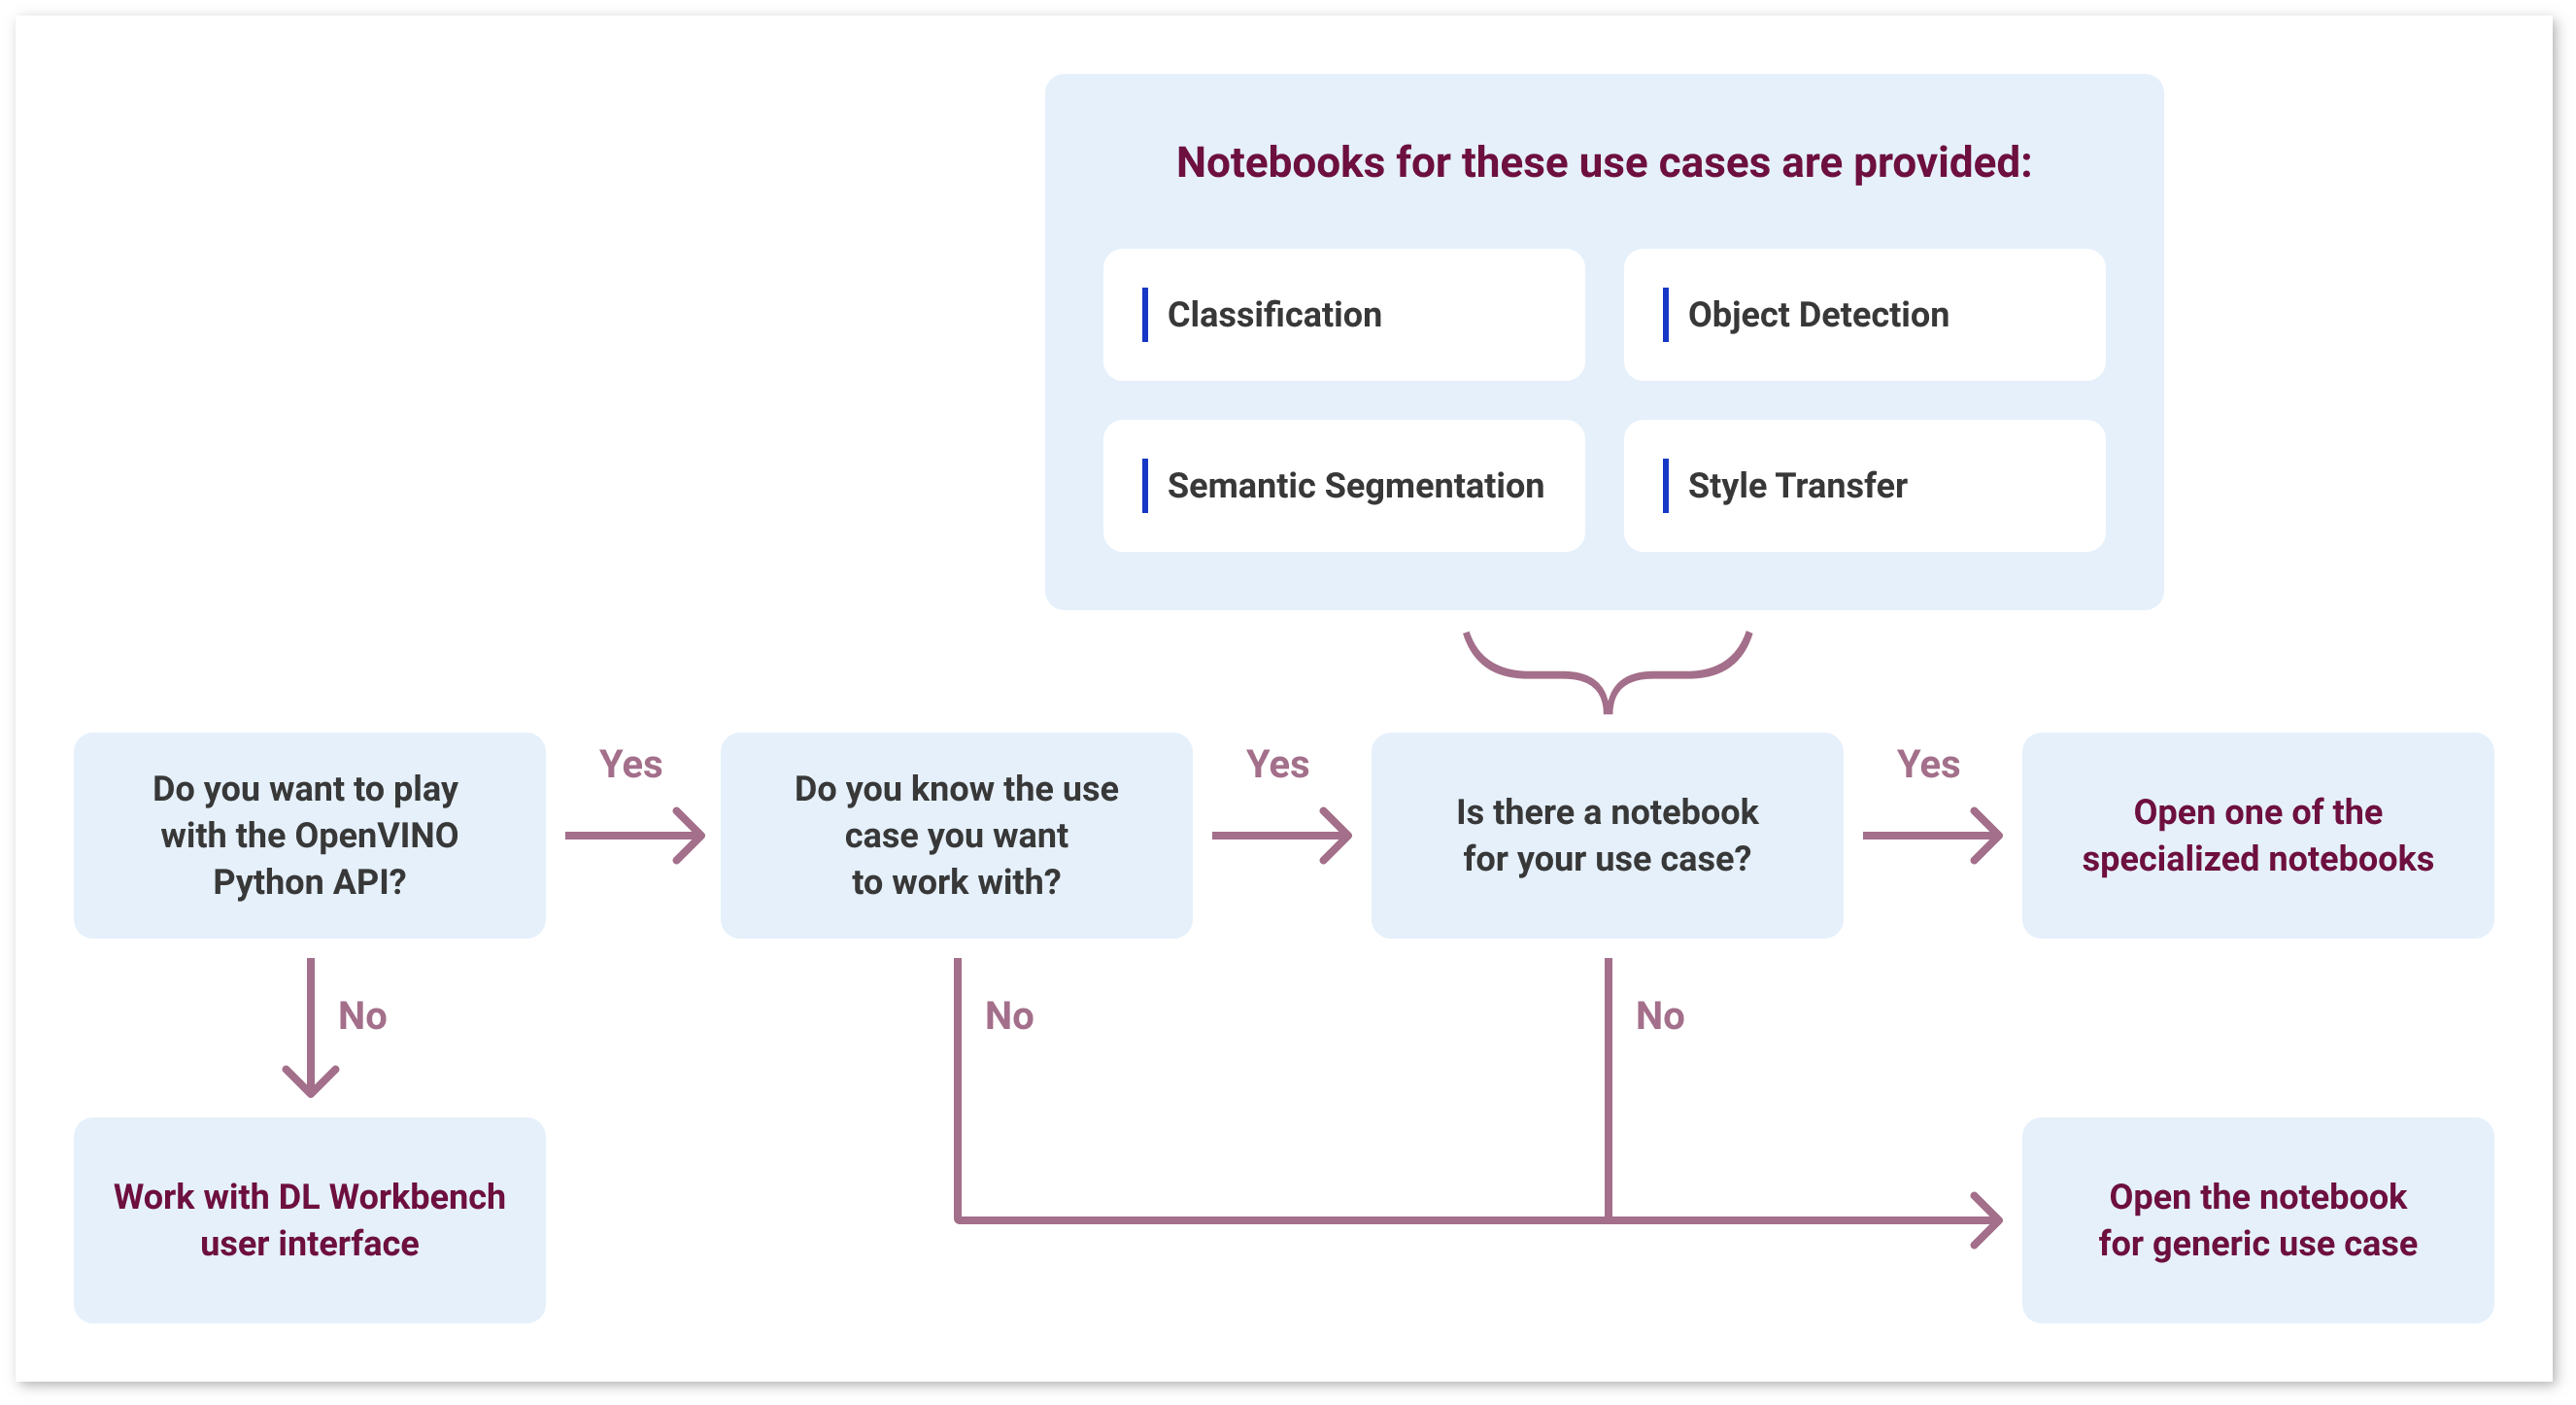
The playground provides you with tutorials that show how to infer a model using OpenVINO™ Python interface. The tutorials are listed below. Decide on what use case you want to work with and open the notebook with the relevant tutorial:
tutorials/classification/tutorial_classification.ipynbtutorials/object_detection_ssd/tutorial_object_detection_ssd.ipynbtutorials/semantic_segmentation/tutorial_semantic_segmentation.ipynbtutorials/style_transfer/tutorial_style_transfer.ipynbIf you could not find your use case in the list above, open the Generic tutorial: tutorials/generic/tutorial_generic.ipynb.
NOTE: If you opened the playground from the Open in Playground tab and the DL Workbench recognized the task of your model, you go directly to the associated tutorial. See You Have a Model Imported into the DL Workbench for next steps.
Decide on the model you want to work with:
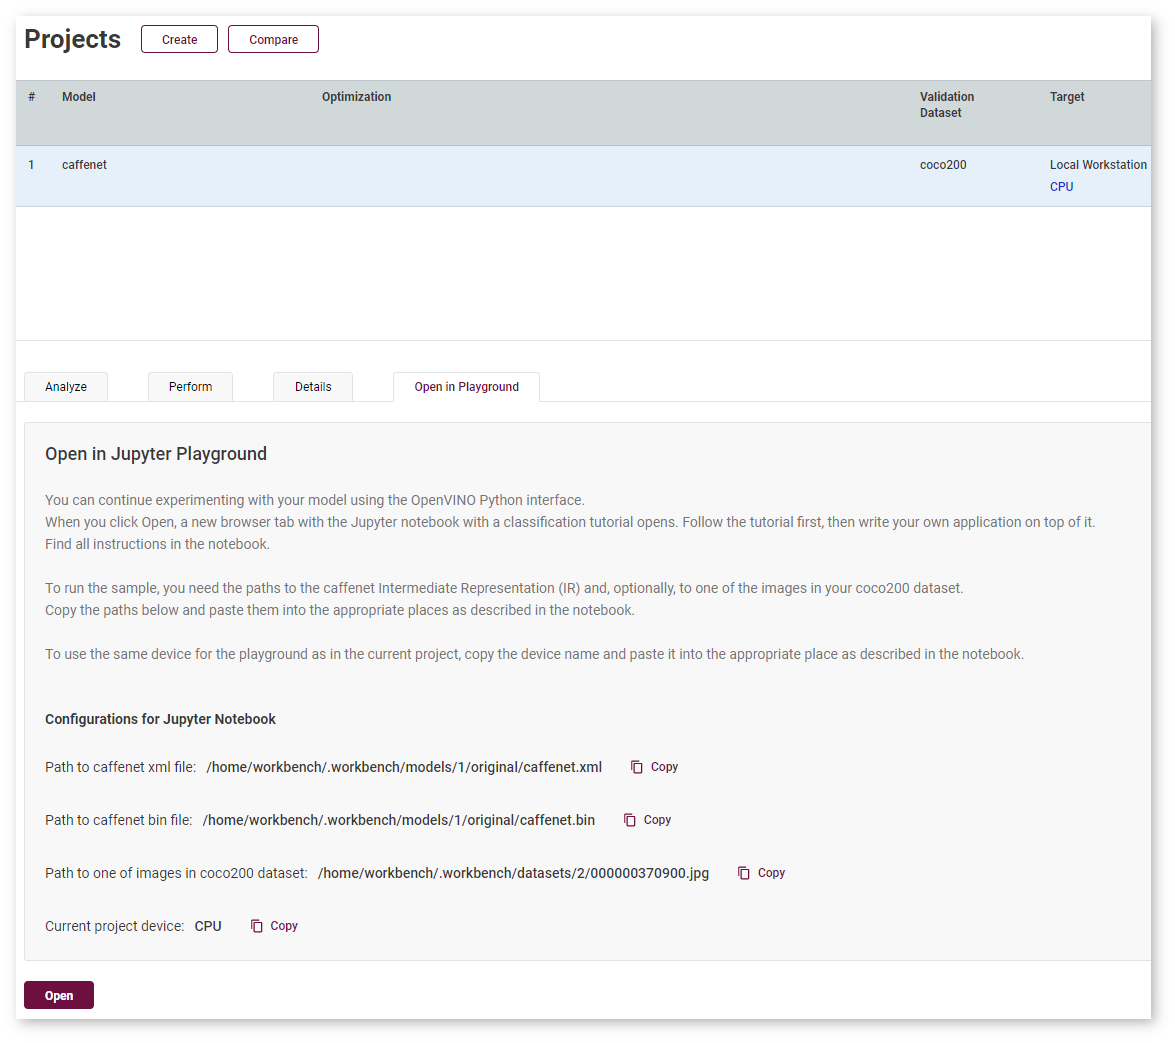
To use the same model, sample image, and/or the device that you imported into or used in the DL Workbench, follow the steps below.
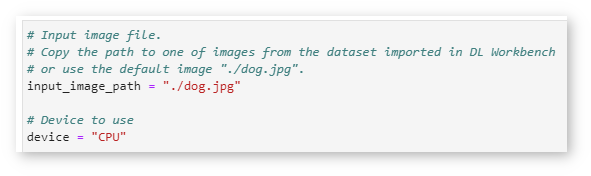
Copy the paths and device name from the Open in Playground tab in the DL Workbench and paste them into correct places:
To use a model, sample image, and/or device other than those specified in a tutorial, follow the steps below.
NOTE: OpenVINO™ works with Intermediate Representation (IR) and ONNX* formats. IR is a preferred format. If you upload an original model, convert it into the IR format. To do that, create a new cell in the notebook, and call the OpenVINO™ Model Optimizer. Your command should start with
!python3 /opt/intel/openvino/deployment_tools/model_optimizer/mo.py ....
1. Upload the files to the playground using the upload icon under the top menu: 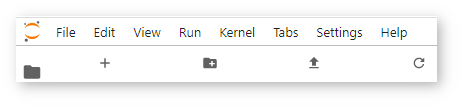
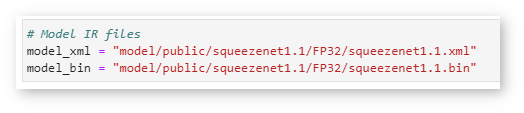
Replace the paths and device name in the notebook:
If you do not have a model, you still can use the tutorials. Intel® Open Model Zoo provides pretrained models for various use cases. Also, each notebook already has a selected model in it, so simply run all the cells to see how the model works in the OpenVINO™ environment. Feel free to change the model and experiment with another one.
Jupyter notebooks running in the same Docker container as the DL Workbench can impact inference results of experiments inside the DL Workbench. To make sure more accurate performance information, you might want to disable Jupyter Playground. Use the DISABLE_JUPYTER argument when starting the DL Workbench:
docker run command: start_workbench.sh command: WARNING: Be cautious when working with files and folders available in JupyterLab. It is recommended to work with a limited set of folders to ensure that the DL Workbench and JupyterLab continue working:
datasets. Contains all datasets imported in the DL Workbench. Feel free to open and use images from the folder, however, do not change the content.models. Contains all models imported in the DL Workbench. Feel free to use models from the folder, however, do not change the content.tutorials. Contains Jupyter notebooks with a full inference workflow for different use cases. Feel free to change the content of the folder.
