NOTE: If you have imported a model before, do not import it again. You can select it from the list of available models.
You can import original and the Open Model Zoo models. To import a model, click Import under the list of available models.
Importing a model includes the following steps:
- Upload a model
- Convert the model to Intermediate Representation (IR) — only for non-OpenVINO™ models from the Open Model Zoo
- Configure accuracy settings
Supported Frameworks
| Framework | Original Models | Open Model Zoo |
|---|---|---|
| OpenVINO™ | ✔ | ✔ |
| Caffe* | ✔ | |
| MXNet* | ✔ | |
| ONNX* | ✔ | |
| TensorFlow* | ✔ | |
| PyTorch* | ✔ |
Use Model from Open Model Zoo
NOTE: Internet connection is required for this option. If you are behind a corporate proxy, set environment variables during the Install from Docker Hub* step.
To use a model from the Open Model Zoo, go to the Open Model Zoo tab. Select a model and click Import:
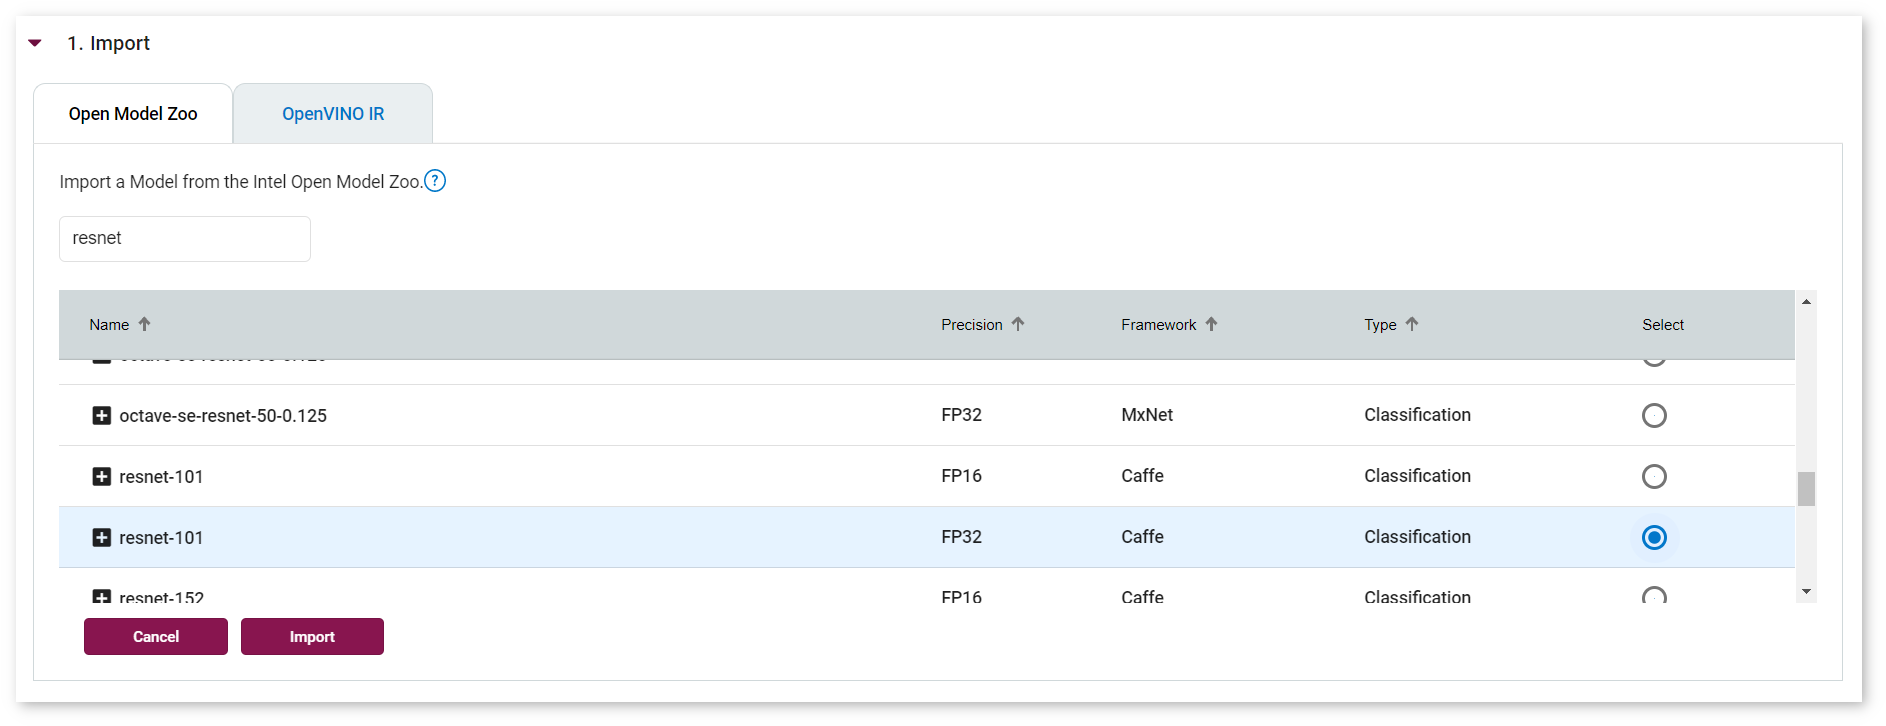
NOTE: Precision of models from the Open Model Zoo can be changed in the conversion step.
Once you click Import, the Convert Model to IR section opens. To convert a model from the Open Model Zoo, select precision (FP16 or FP32) in the General Parameters section:
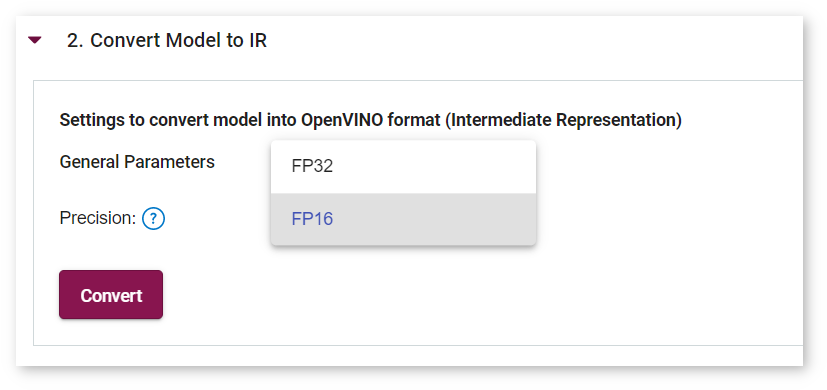
Once you click Convert, the Configure Accuracy Settings section opens.
Upload Original OpenVINO™ (IR) Model
You can upload original models stored in files on your operating system. The uploading process depends on the framework of your model.
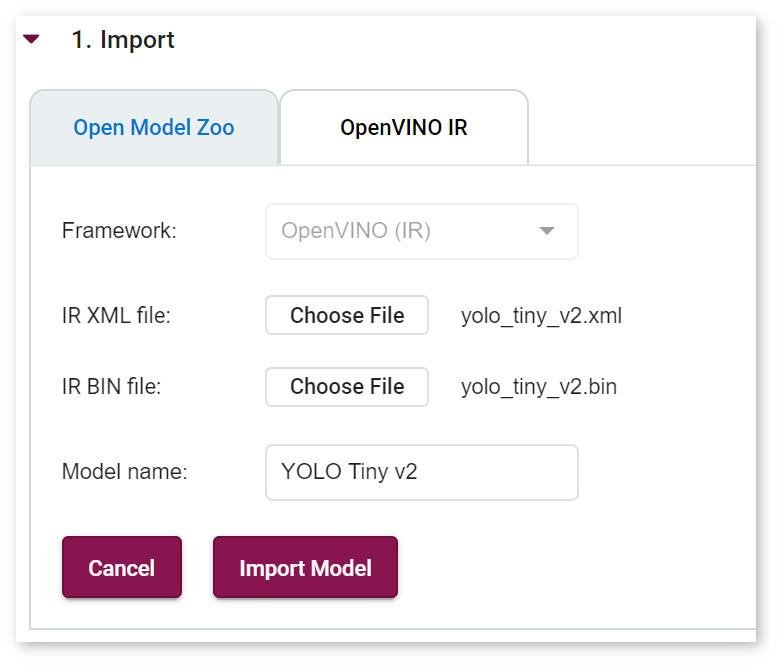
To import an OpenVINO™ model, upload an .xml file and a .bin file, provide the name, and click Import Model. You are instantly directed to the Configure Accuracy Settings section.
Accuracy Settings
Accuracy settings depend on the model usage. Specify Classification, Object-Detection or Generic usage in the drop-down list. If you choose Object Detection, specify SSD or YOLO model type. The latter requires additional type specification between V2 and Tiny V2:

You are required to specify several parameters for Classification and Object-Detection models.
NOTE: Do not change optional settings unless you are well aware of the impact they can have.
For details, refer to instructions on Configure Accuracy Settings.
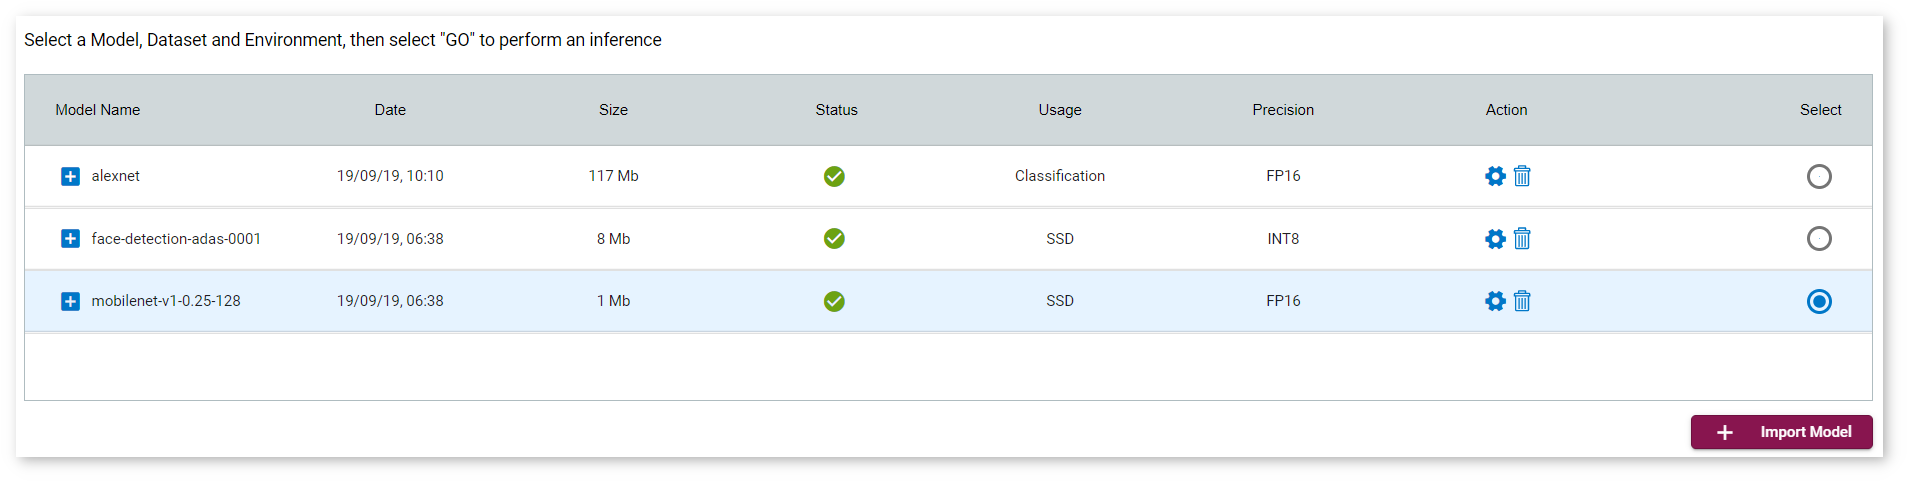
Once you import a model, you are directed back to One-Page Wizard, where you can select the imported model and proceed to select a dataset.