DL Workbench can lower the precision of a model from FP32 to INT8 with process called quantization. Quantization accelerates the performance of certain models on hardware that supports INT8. An INT8 model takes up less memory footprint and speeds up inference time at the cost of a small reduction in accuracy.
When INT8 is selected from the Optimize tab, the DL Workbench automatically quantizes the selected model to INT8 by running a calibration procedure and then generating a quantized version of the model.
To read more about INT8 inference, refer to Using Low-Precision INT8 Integer Inference and Inference Engine Calibration Tool (the tool calibrates a model prior to quantization to INT8).
NOTE: INT8 quantization is not available for projects that use a generated dataset, or either a generic or OpenVINO™ model.
The overall flow for converting a model from FP32 to INT8 is:
- Select an FP32 model
- Select an appropriate dataset
- Run a baseline inference
- Configure INT8 calibration settings
- Configure inference settings for a calibrated model
- View INT8 calibration
- View inference results
- Compare the calibrated model with the original FP32 model
Only some convolution models in the FP32 format can be quantized to INT8. If your model is incompatible, you receive an error message. Find more details on error conditions and solution paths in Troubleshooting.
Use the links above to walk through the steps and workflow for creating a calibrated model. Topics specific only to the INT8 calibration process (steps 4 and 6, above) are described below.
NOTE: There are command-line alternatives to calibrating and quantizing models. For more information, refer to the Calibration tool documentation.
Configure INT8 Calibration Settings
Once a model has been profiled by the DL Workbench, you can convert it from FP32 to to INT8. For non-FP32 models, the INT8 option is grayed out.
NOTE: Using INT8 quantization, you can tune only an original (top-level) model.
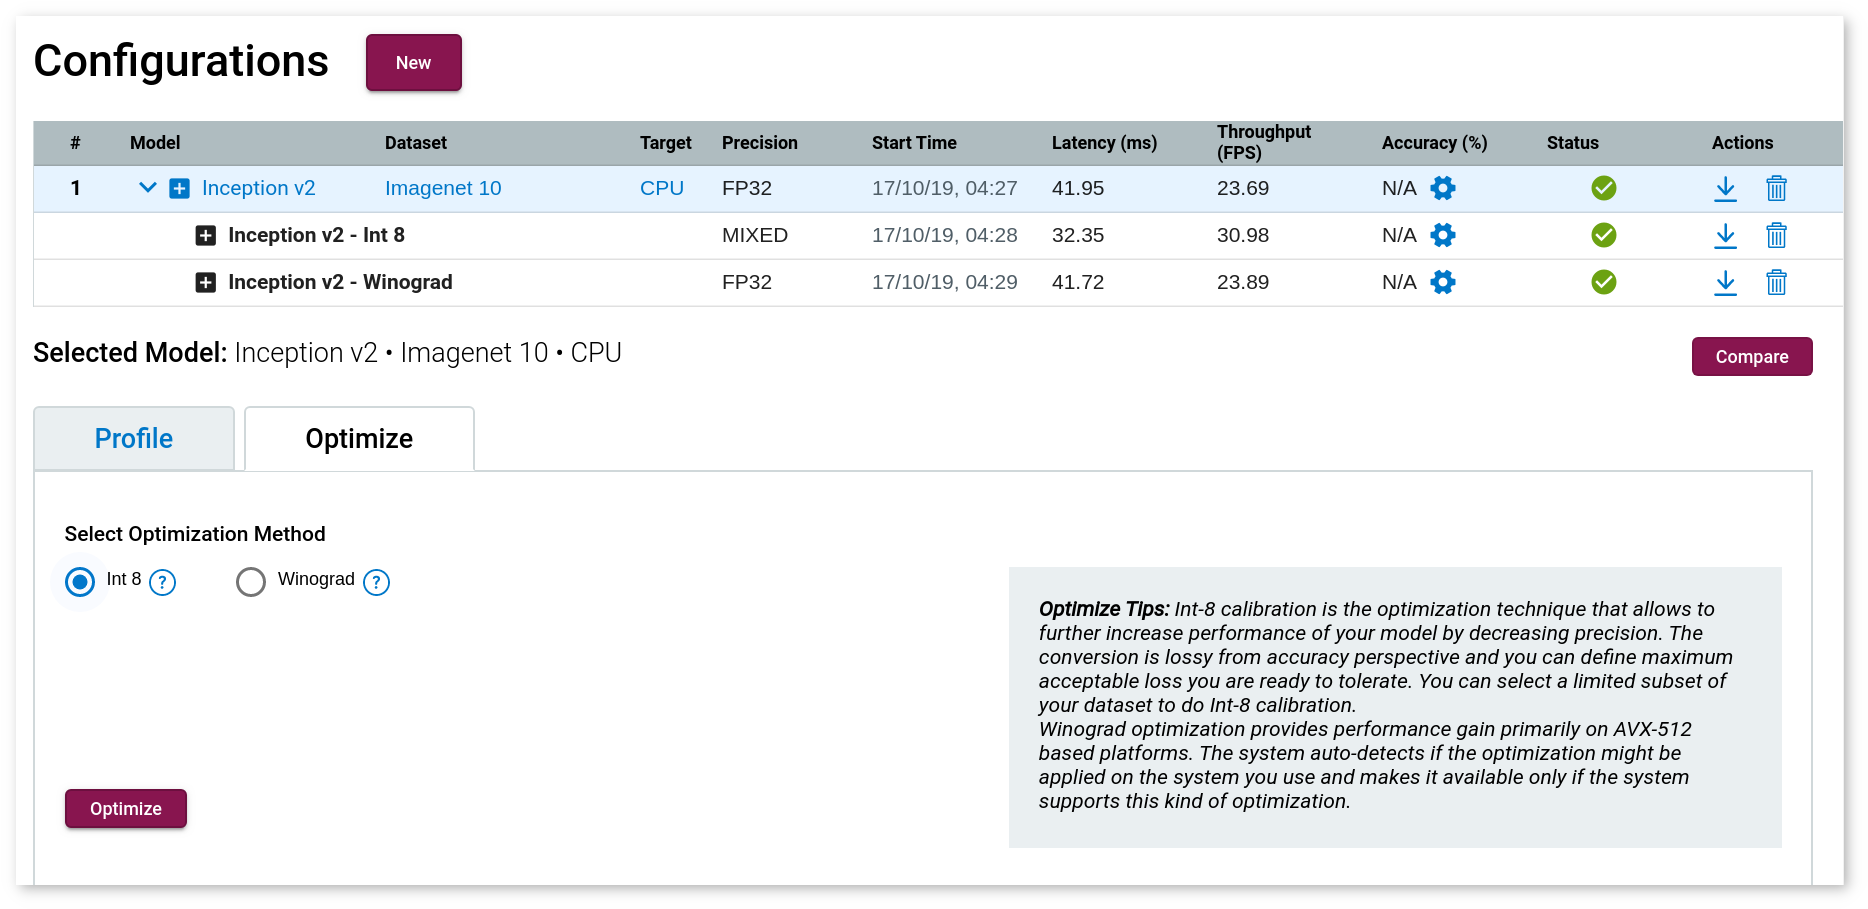
Select the Optimize tab, and check Int 8. It takes you to the Configure Calibrator page where you have to specify the following parameters:
- Maximum Accuracy Drop: Instruct the application to only convert layers that do not exceed the maximum accuracy drop you are willing to sacrifice. If a layer is estimated to exceed this value, it is not quantized and remains at the original precision.
- Subset of Images: Specify the percentage of images you will use during the calibration procedure. The default value is 100%.
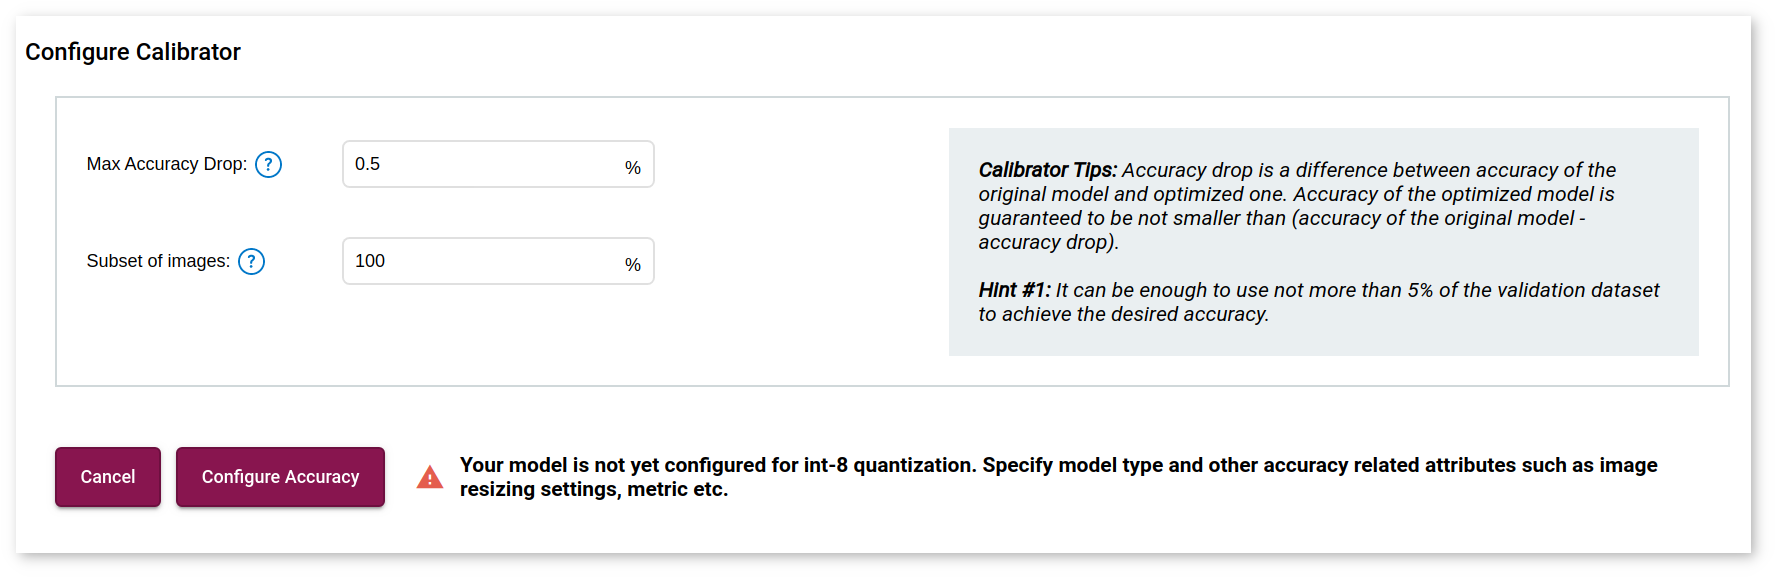
Click Configure Accuracy and select the model usage in the new window. After you click Save, you are directed back to the previous window. Click Calibrate.
View INT8 Calibration
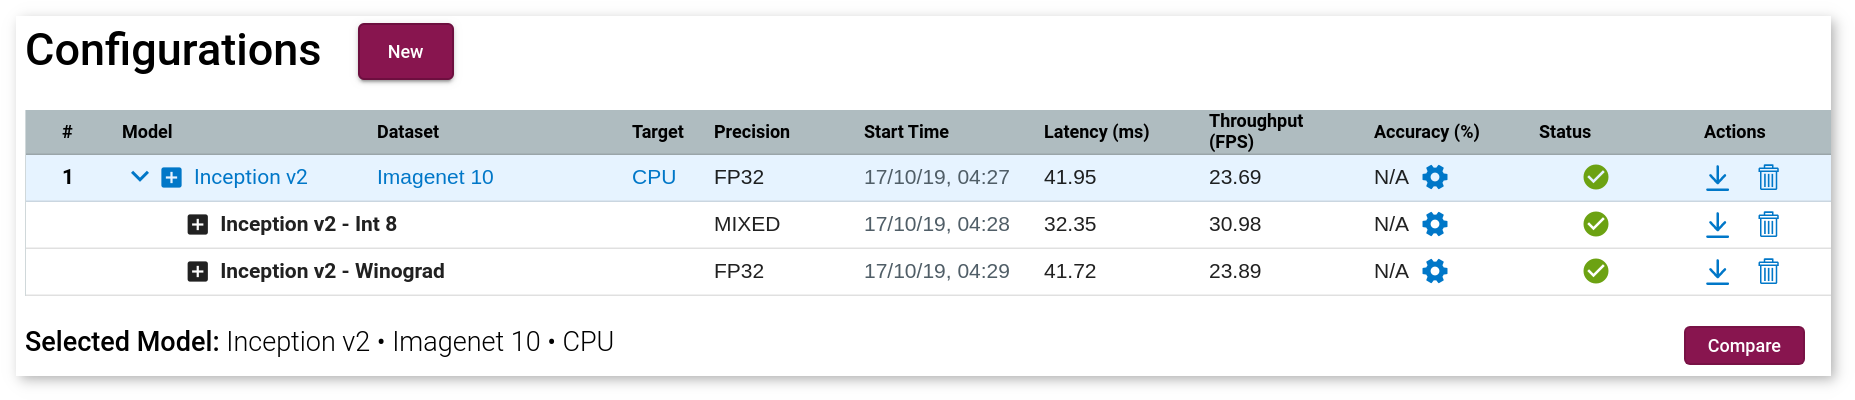
Click Calibrate, and a new row appears for your model.

View INT8 Calibration Results
Once the job is done, you can compare an optimized model with the original model. For more details, go to Compare Performance between Two Versions of Models.
The value of the outputPrecisions parameter in the Layer Name table for layers of INT8 optimized models is U8 (INT8 unsigned integer value):